
Attach a Cloud Network to an Existing Fortigate-VM
Use the following steps to attach a Cloud Network to an existing Fortigate®-VM:
Add the Cloud Network in the Cloud Control Panel
-
Log in to the Cloud Control Panel.
-
In the top navigation bar, click Select a Product > Rackspace Cloud.
-
Select Servers > Cloud Servers.
-
Navigate to the Server Details page for your Fortigate-VM as shown in the
following image:
-
In Networks and Security Groups, click Add Network and choose the
Cloud Network that you want to attach as shown in the following image:
-
Click Add Network in the dialog box.
-
Record the Cloud Networks IP address that displays after a few seconds.
Verify the Classless Inter-Domain Routing (CIDR) (subnet mask)
-
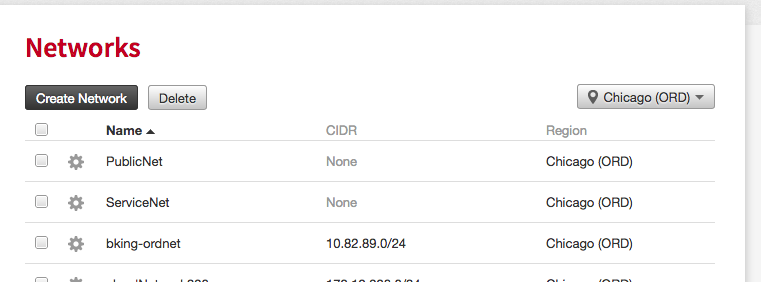
From the Cloud Control Panel, navigate to Networking > Networks.
-
Find the Cloud Network that you attached previously and record its CIDR,
which is usuallyip-address/24) as shown in the following image.
Set the IP address in the Fortigate-VM GUI
-
Browse to your Fortigate-VM by using the virtual machine (VM) PublicNet IP
address, for examplehttp:\\104.239.141.198. -
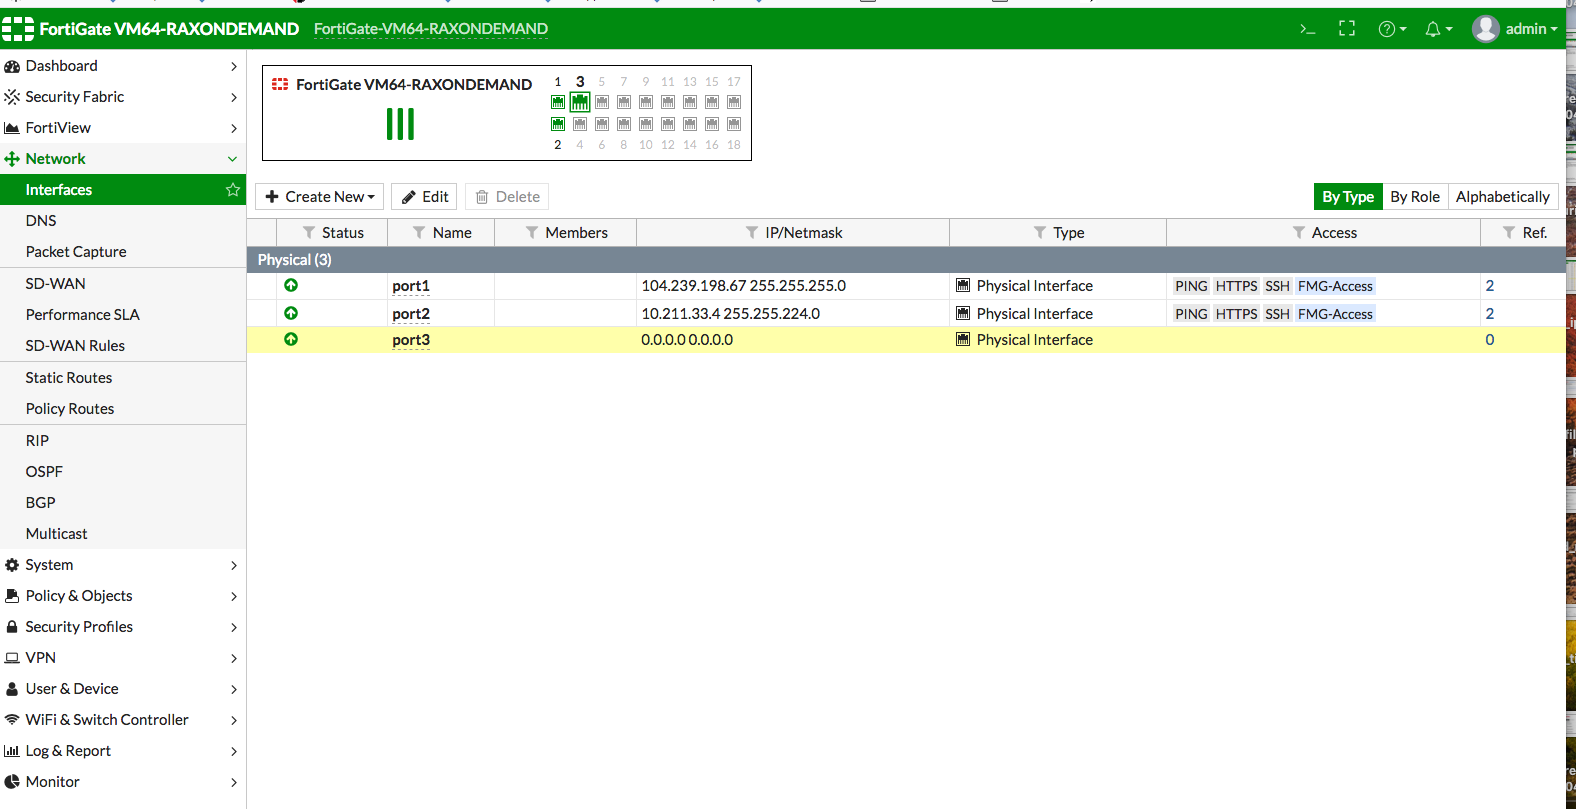
Click on Network > Interfaces to see a list of interfaces.
-
Click the highest-numbered interface, which is
port3in this example, and
click Edit. -
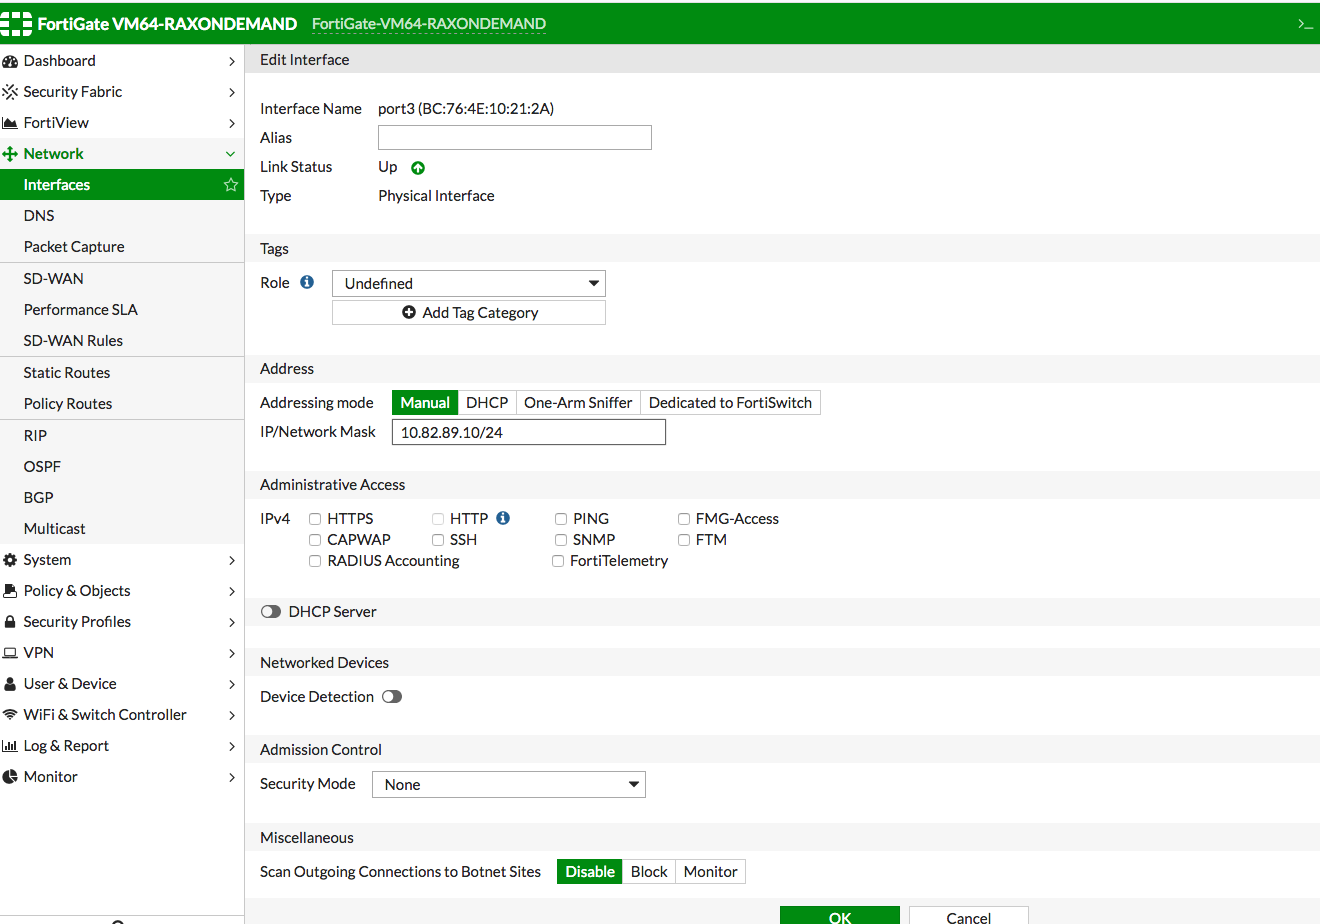
In the Address section, fill in the Cloud Network IP address and CIDR
that you recorded earlier and click OK as shown in the following images.
(Optional) Backup the new configuration
Because you just changed its configuration, we recommend that you
back up the Fortigate-VM.
Updated 2 months ago