
Configuring SSL Termination on a Load Balancer
Adding SSL Certs and Cert Mappings to your Rackspace Cloud Load Balancer
Overview
SSL Termination allows a load balancer to handle SSL/TLS encryption and decryption, offloading the processing from backend instances. This guide provides steps to enable SSL Termination on Rackspace Cloud using the Skyline UI.
Prerequisites
- Access to the Rackspace Rackspace Cloud Skyline UI
- Networking configured for your Rackspace Cloud account
- A provisioned Load Balancer
- Valid SSL/TLS certificate(s) and private key(s)
Uploading Certificates
Before you can add the certificates to your Load Balancer, they need to exist within the Certificates section of Skyline. Here's how to add those:
- Log in to the Skyline UI.
- Go to Network →Certificates
- Click Create Certificate
- In the fields provided, supply the following:
- Certificate Name
- Certificate Content
- Private Key
- Domain Name
- Expiration Date
- Click OK to complete the creation.
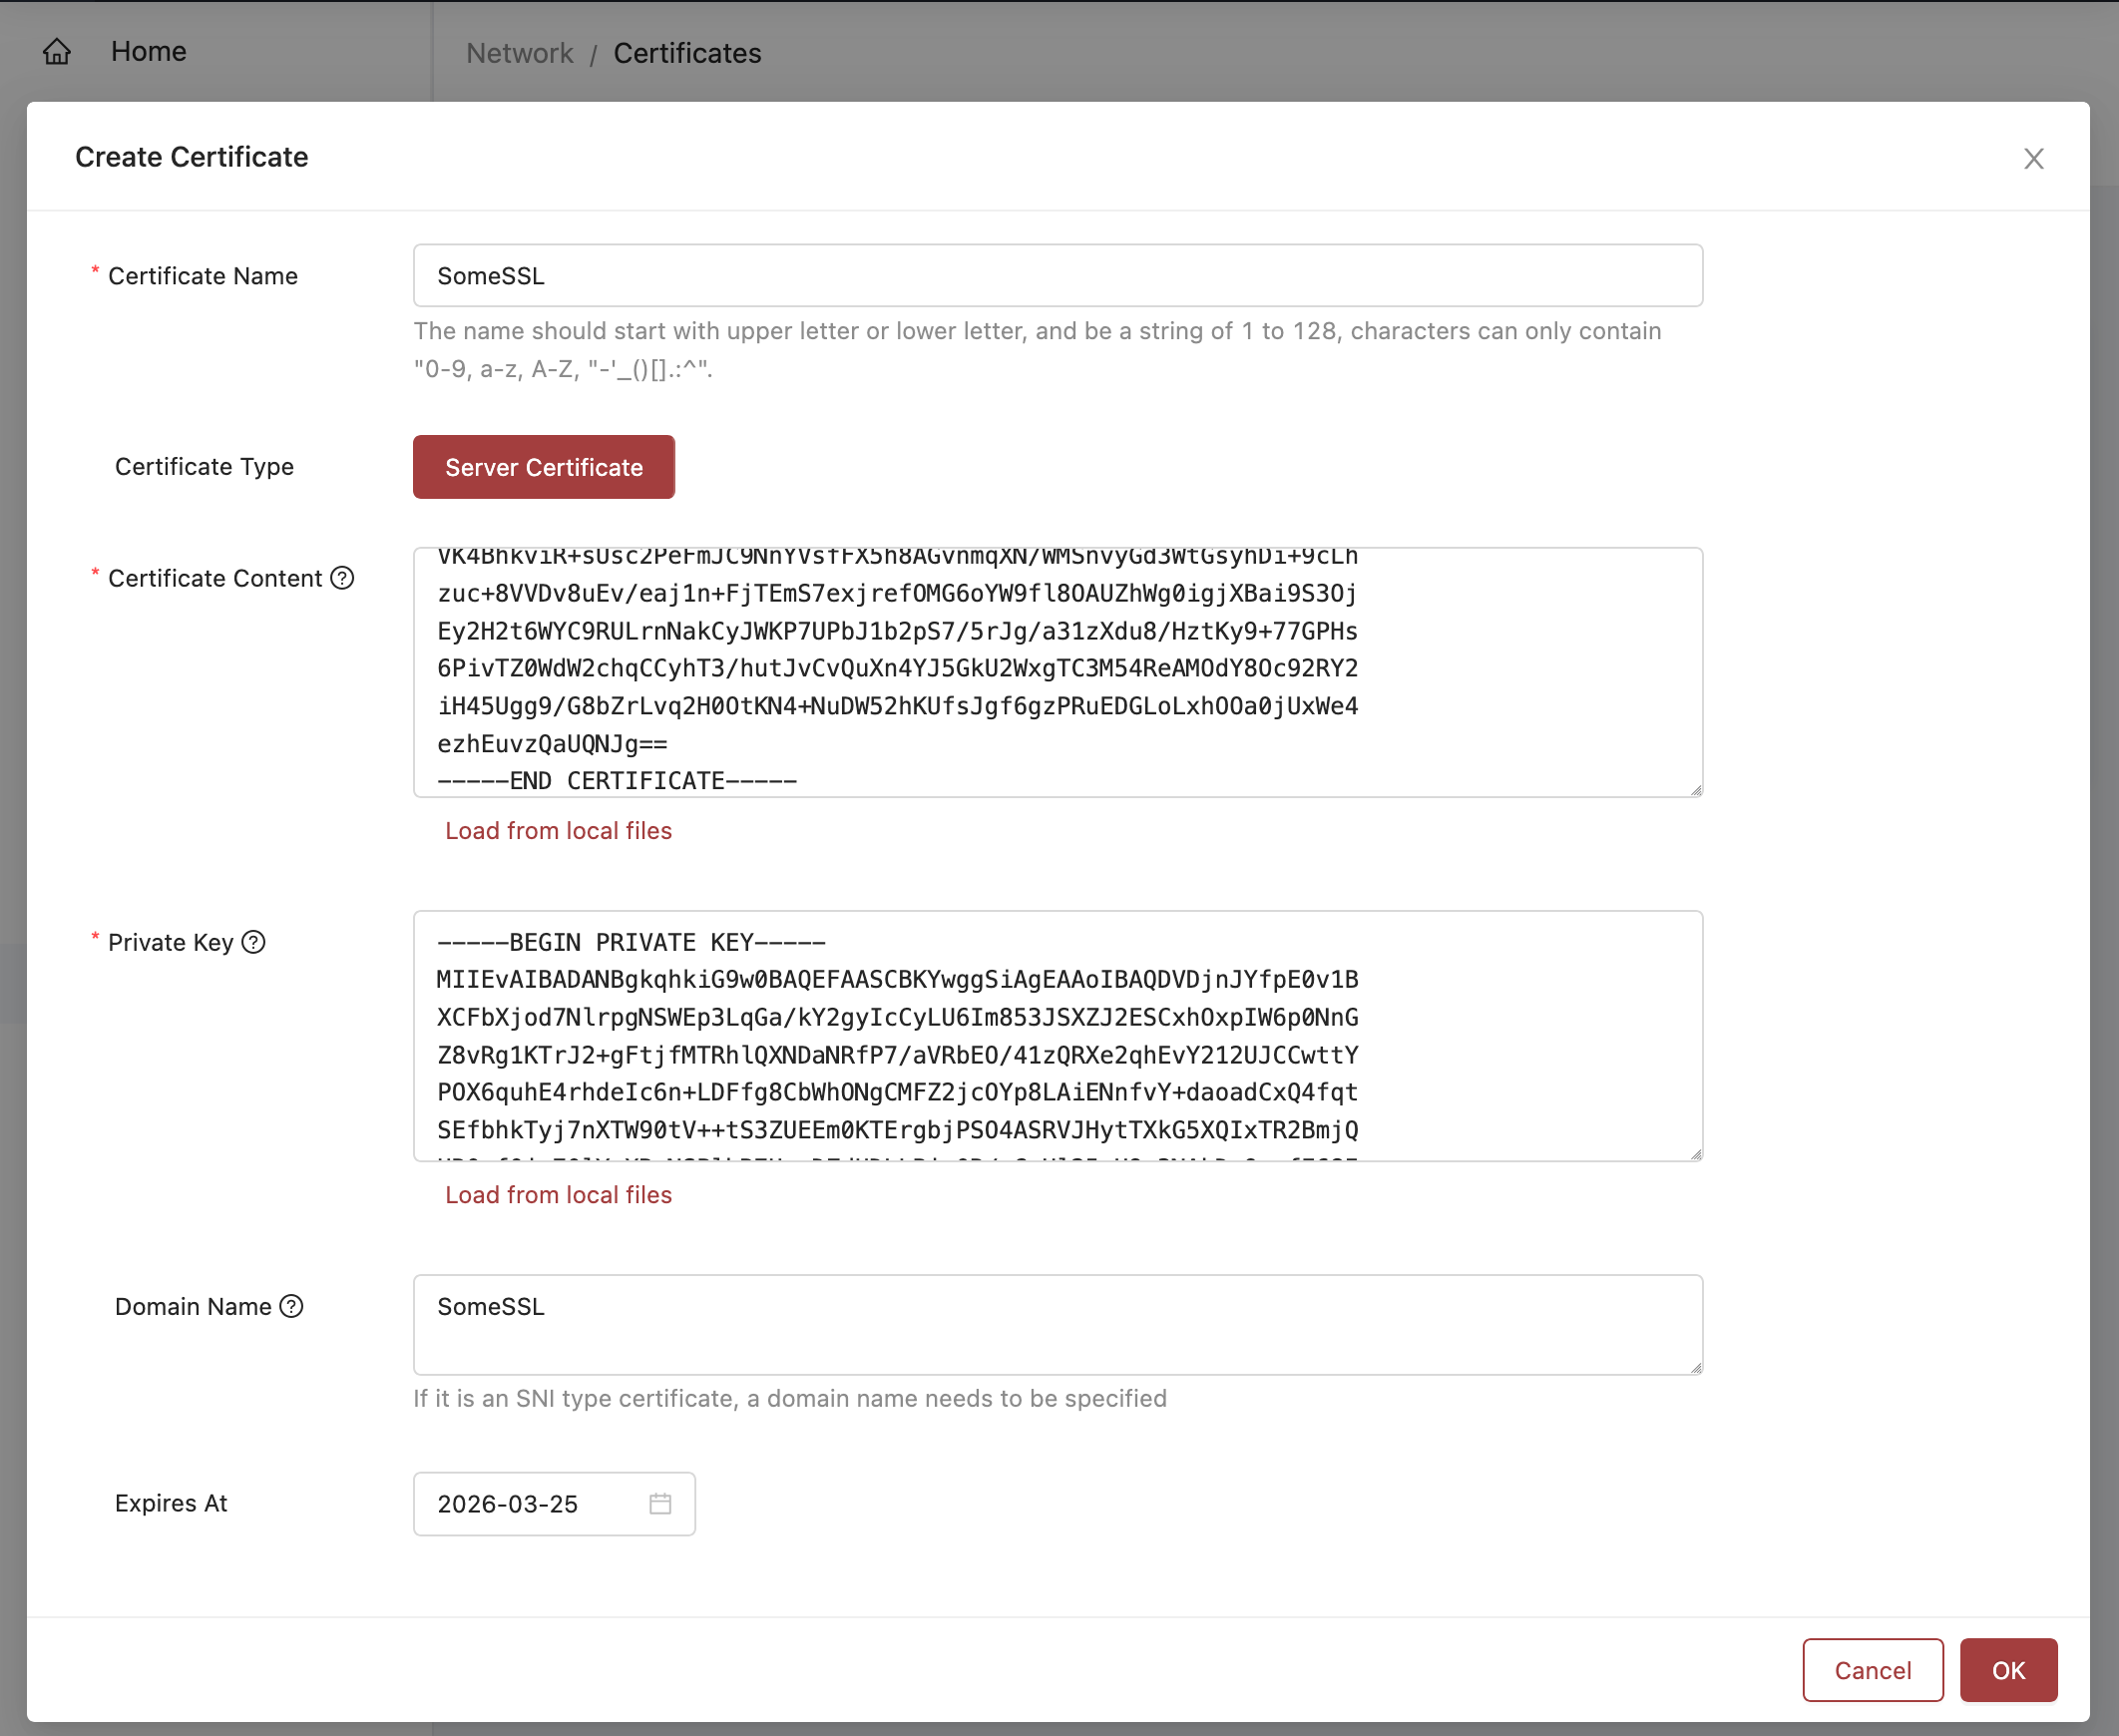
Example of Certificate Creation
Enabling SSL Termination
Navigate to Load Balancers
- Log in to Skyline UI.
- Go to Network → Load Balancers.
- Select the load balancer you want to configure.
Configure a Listener with a Primary SSL Certificate
- Under the Listeners tab, click Create Listener.
- Set the following values:
- Protocol:
HTTPS - Port:
443(or another HTTPS port if applicable) - SSL Parsing Method is up to you.
- Protocol:
- Select your certificate from the list of available certificates.
- Optional: Enable any of the following headers for additional information on the traffic arriving through your Load Balancer:
- X-Forwarded-For
- X-Forwarded-Port
- X-Forwarded-Proto
- Click Create
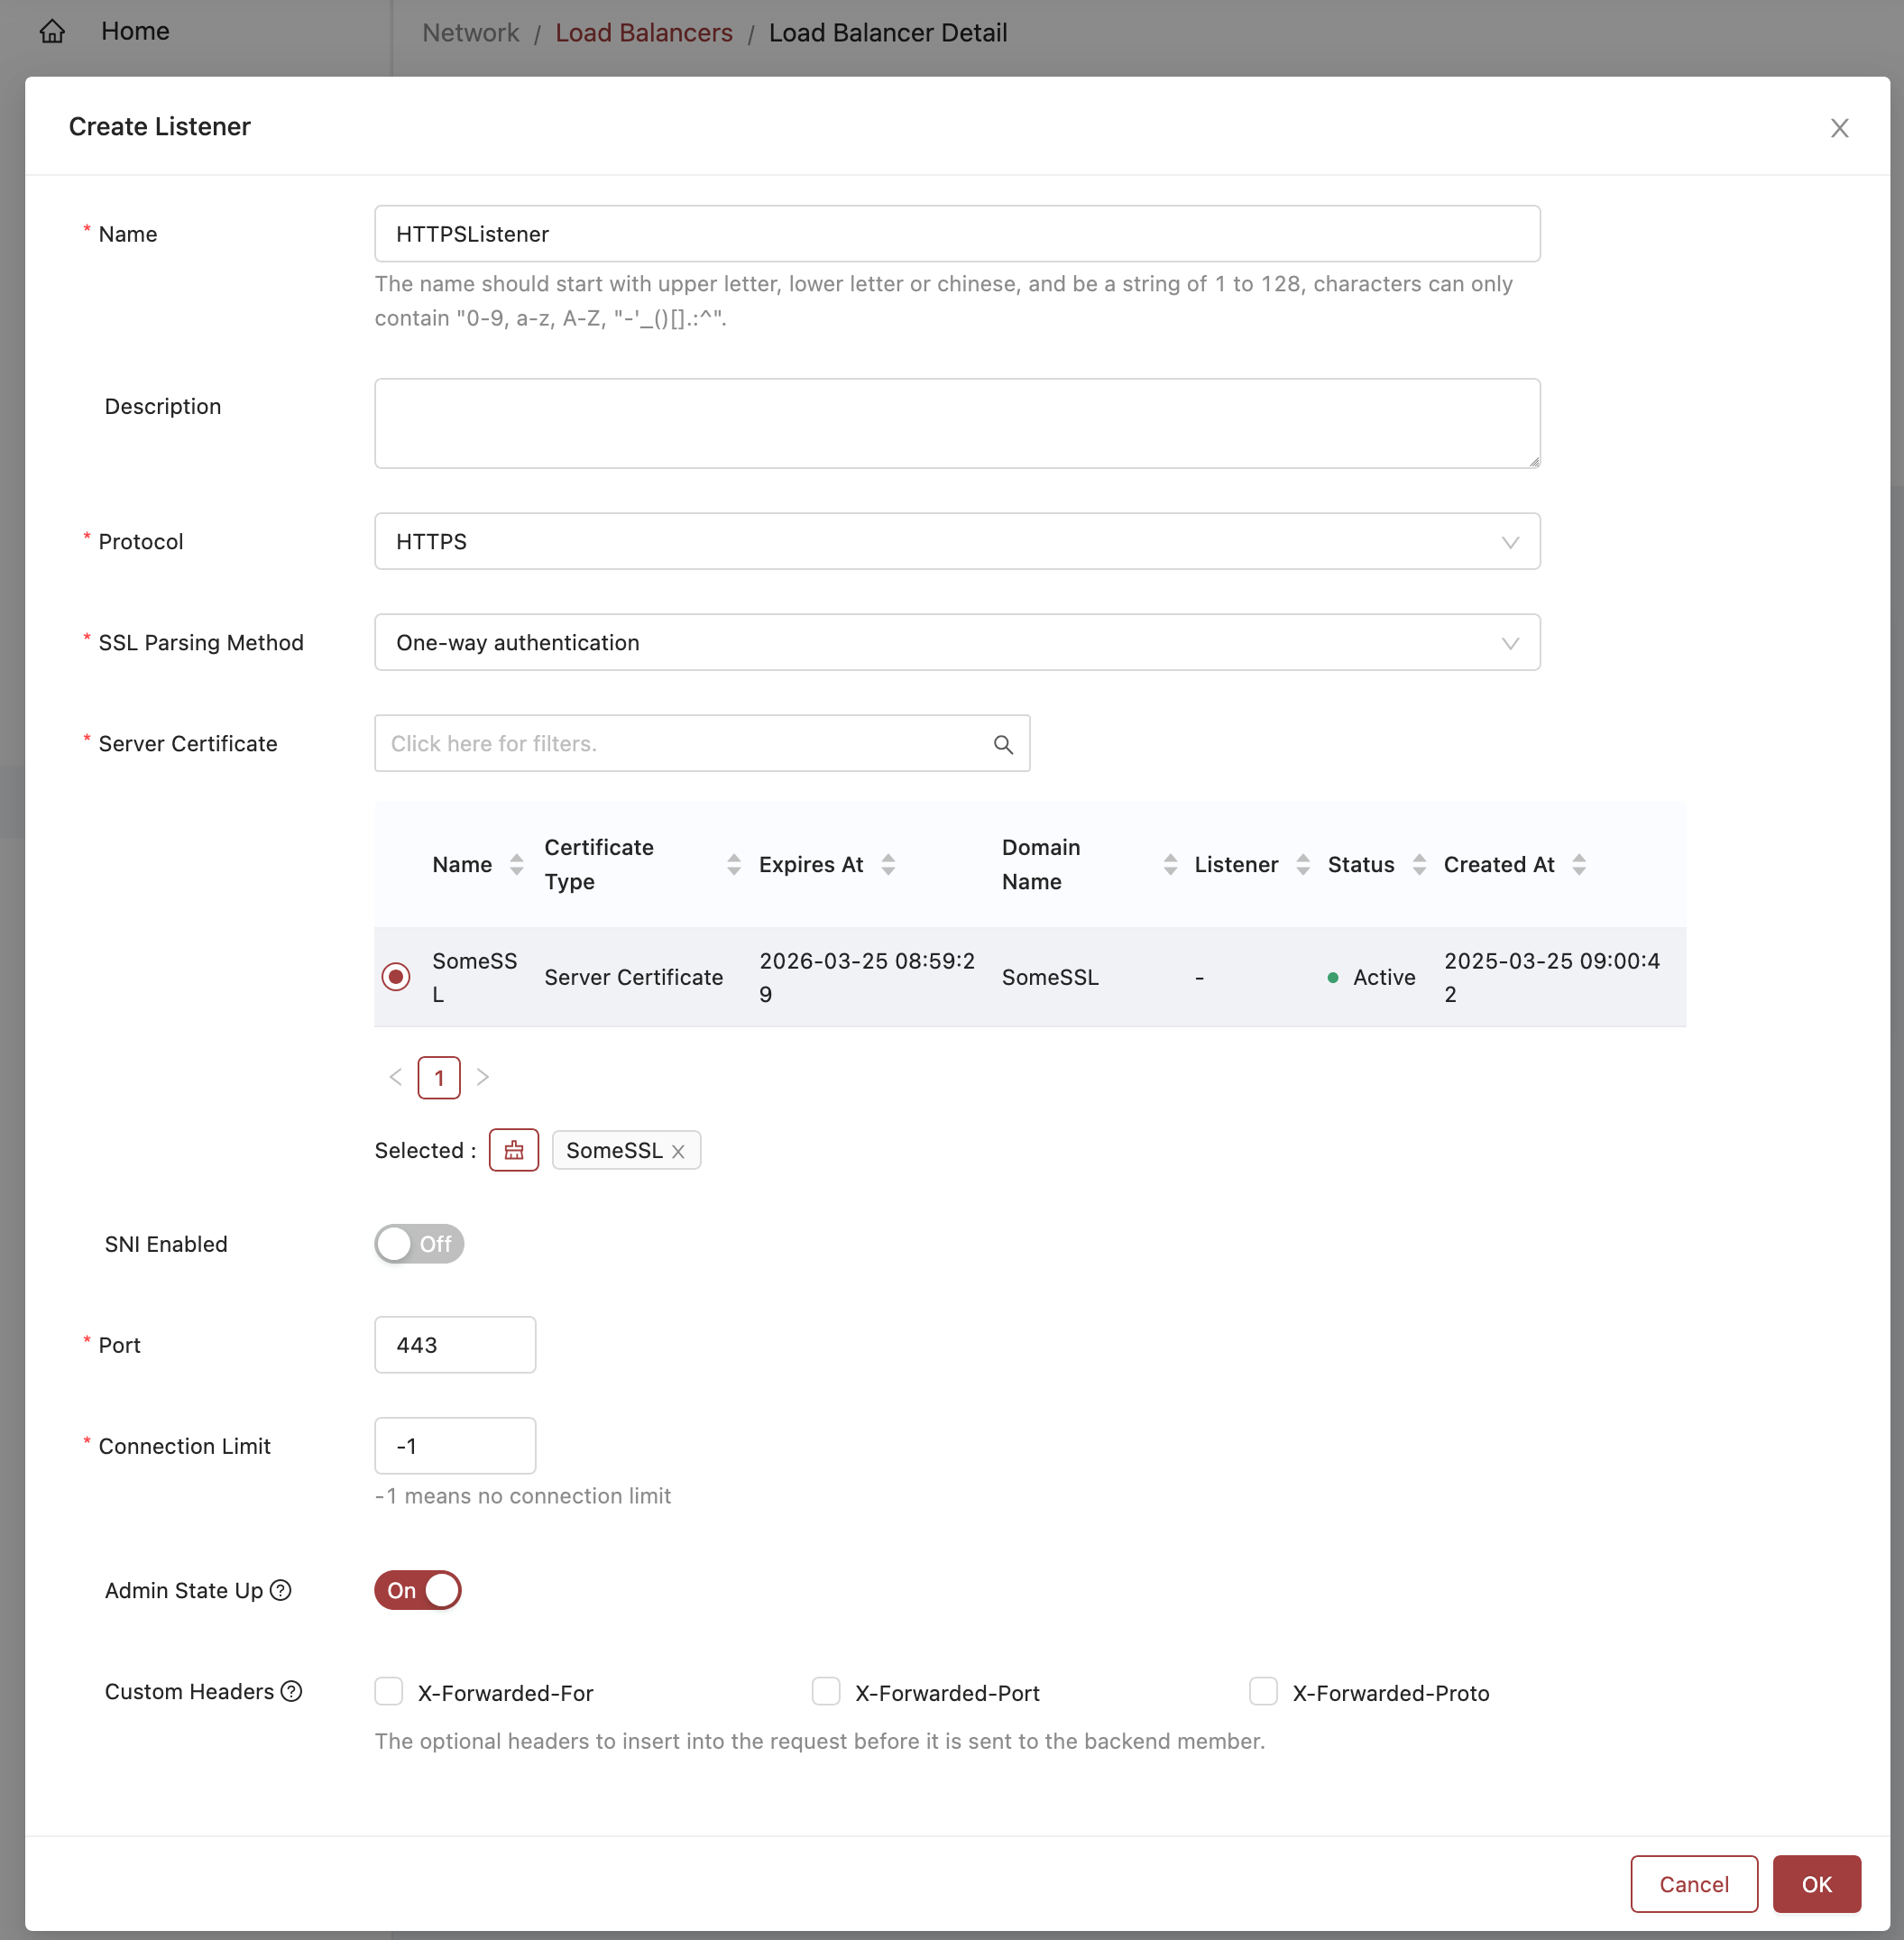
Example of a Listener with a Primary Cert
Verify Listener Configuration
- Once created, check that the listener is active.
- Ensure backend instances are configured to handle unencrypted traffic.
- Backend instances can inspect one or more of the enabled HTTP headers (X-Forwarded-For, X-Forwarded-Port, X-Forwarded-Proto) to determine whether the request used HTTP or HTTPS.
Enabling SNI Mapping and Additional Certificates
Server Name Indication (SNI) allows hosting multiple SSL certificates on a single listener.
Add Additional Certificates
- Navigate to Network →Load Balancers and click the desired Load Balancer.
- In the Listeners pane for your Load Balancer click Edit next to the Listener you're updating.
- Scroll down until you see SNI Enabled and toggle it On if it isn't already.
- Under the SNI Certificate section select the certificate you want to add as an SNI mapped certificate.
- Click OK
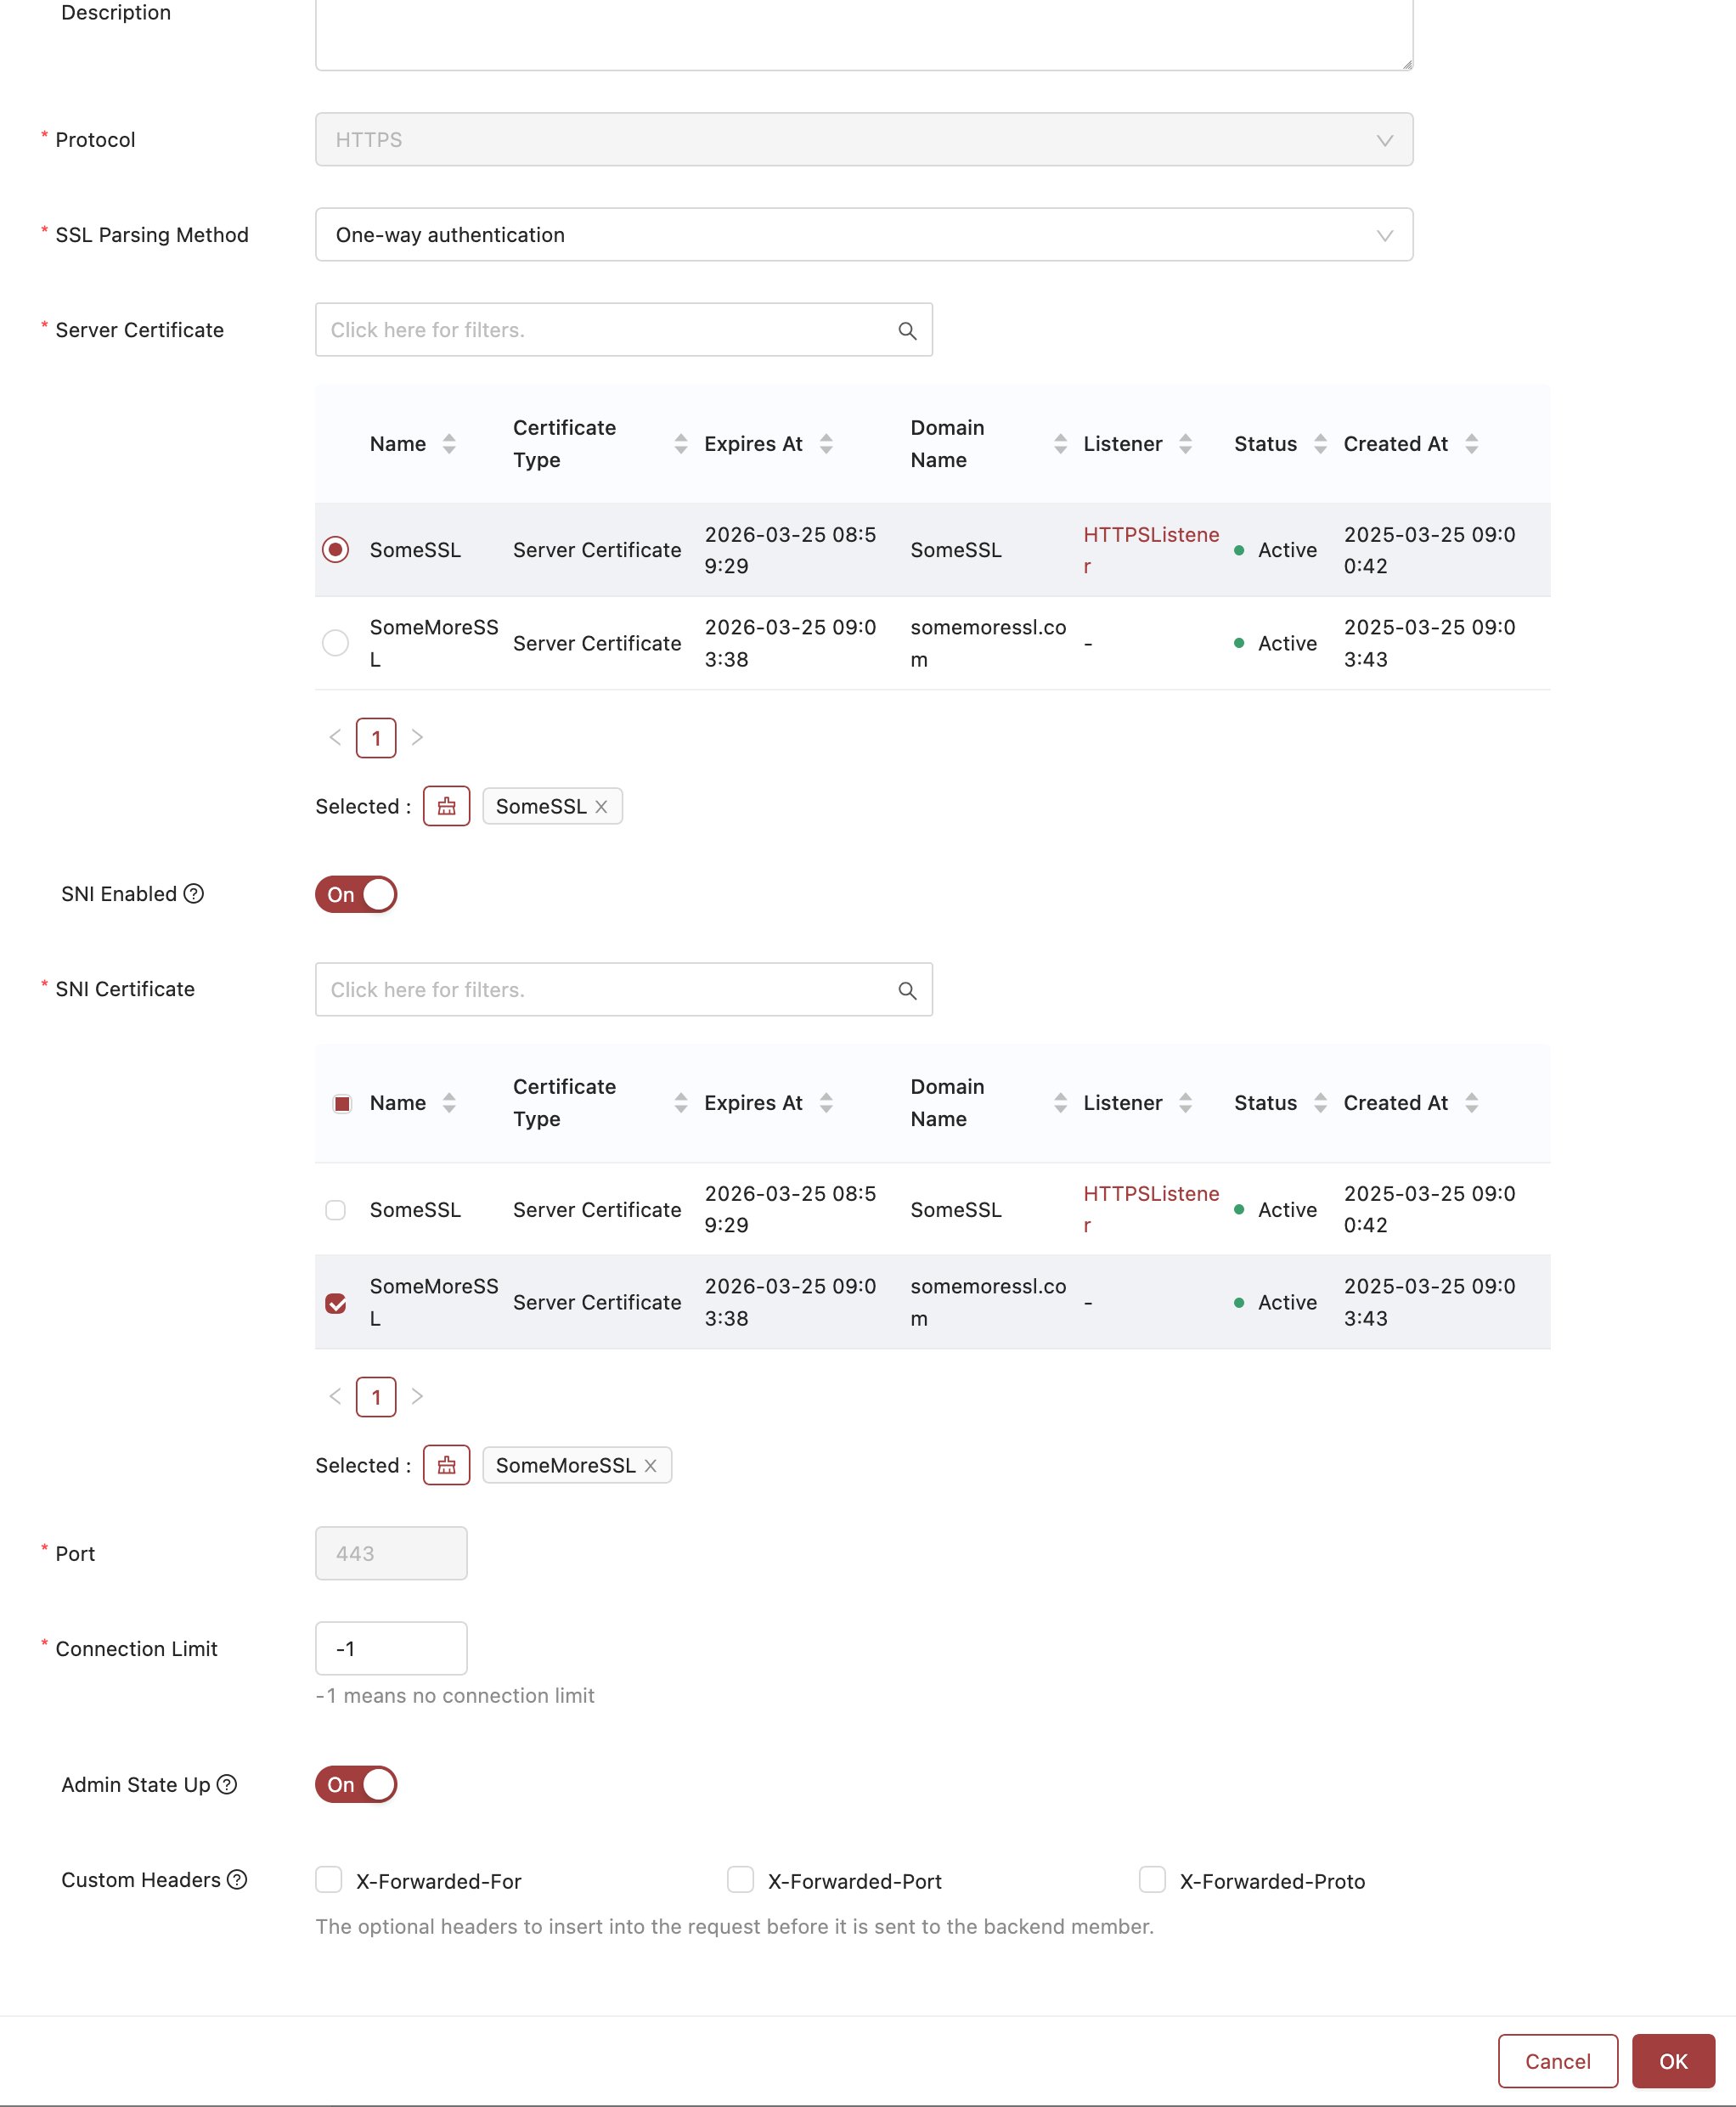
Example of a Listener with a Primary Cert and SNI Mapped Cert
Validate SNI Configuration
- Ensure multiple domain names are correctly mapped.
- Test with
curlor an SNI-supported browser:curl -v --resolve example.com:443:<LOAD_BALANCER_IP> https://example.com - Verify that the correct certificate is served.
Conclusion
By following these steps, you can successfully enable SSL Termination and manage multiple certificates with SNI mapping using the Rackspace Cloud Skyline UI.
Updated 7 months ago