
Run:AI - Harbor
Harbor is an open-source registry that enables you to securely store and manage container images without relying on DockerHub, ECR, or ACR. It provides additional security, identity, and management features on top of Docker's open-source registry. With Harbor, you can establish policies for your images, scan them for vulnerabilities, and manage access through role-based controls. This makes it an indispensable tool for developers seeking to ensure their container images are both secure and well-managed.
Login into Harbor
Access the Harbor Registry by entering its URL into your web browser, and you will be presented with a screen similar to the one depicted below:

In our case, we log in using SSO, proceed, and click the same if it applies to your situation:

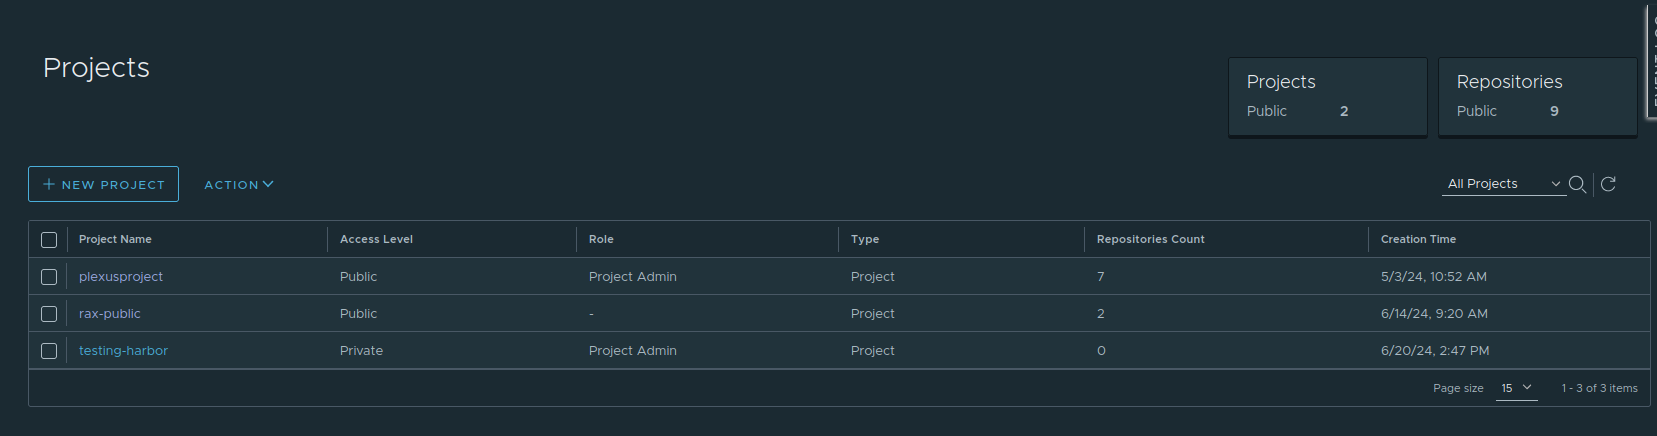
Working with Projects
Upon logging in, you will be presented with a screen similar to the one displayed here:
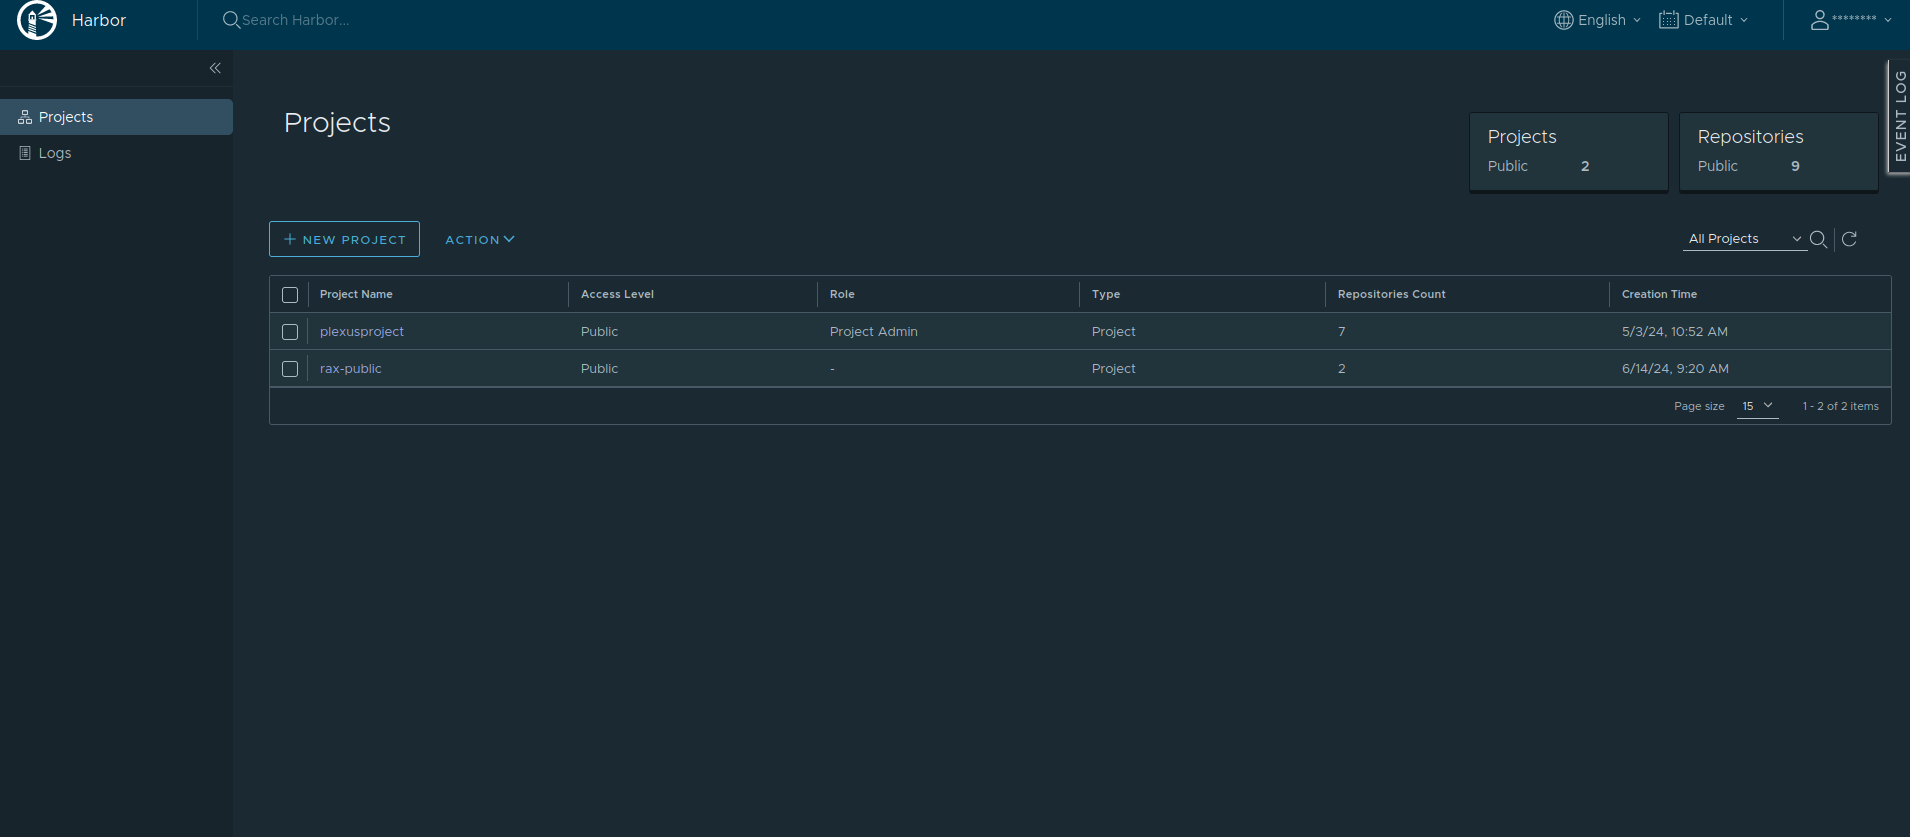
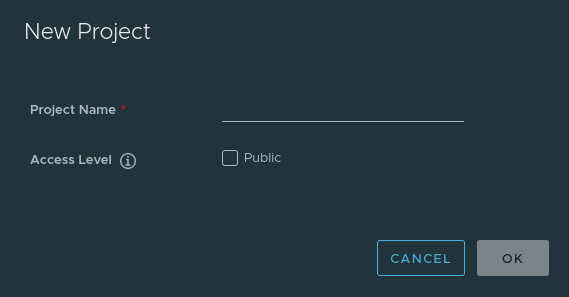
Create a project
Click on the button "New Project" and a new dialog will be displayed:
After the creation of our project, a banner will be displayed with the legend "Project Created Successfully." We save the name for pulling and pushing images; a method described below..
Login in Harbor via Docker
To pull or push images, we need to log in to Harbor. The steps are as follows:
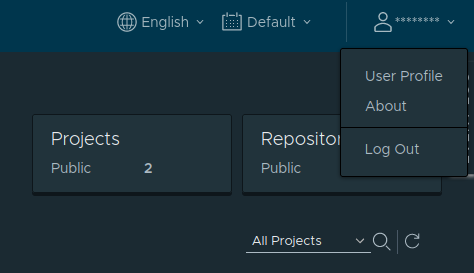
Retrieve your CLI Secret from your Harbor profile by clicking the "User Profile" link:
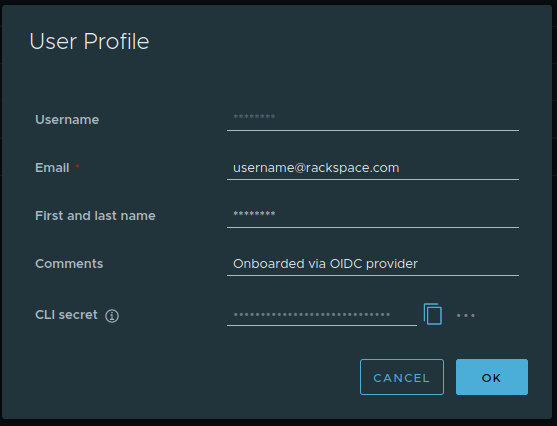
Upon opening the User Profile, generate a CLI Secret, copy it, and save it for the upcoming step, the logging process:
username@dell:~$ docker login <HARBOR_HOSTNAME>
Username: ********
Password:
WARNING! Your password will be stored unencrypted in /home/********/.docker/config.json.
Configure a credential helper to remove this warning. See
https://docs.docker.com/engine/reference/commandline/login/#credentials-store

Login Succeeded
username@dell:~$
With these steps, you are ready for the next stage of this tutorial: pulling, pushing, or tagging images in Harbor.
Pull, Tag, Push
Depending on the task at hand, the steps for creating a Docker image, pulling a Docker image, and hosting (mirroring) a Docker image are as follows:
Let's assume that we want to pull, tag, and host the hello-world image on our local Harbor registry. To do this, we first proceed with pulling the image:
username@dell:~$ docker pull hello-world
Using default tag: latest
latest: Pulling from library/hello-world
c1ec31eb5944: Pull complete
Digest: sha256:266b191e926f65542fa8daaec01a192c4d292bff79426f47300a046e1bc576fd
Status: Downloaded newer image for hello-world:latest
docker.io/library/hello-world:latest
username@dell:~$
Then we tag the Docker image:
username@dell:~$ docker tag hello-world:latest <HARBOR_HOSTNAME>/testing/hello-world:latestFinally, we push the tagged image to our Harbor registry:
username@dell:~$ docker push <HARBOR_HOSTNAME>/testing/hello-world:latest
The push refers to repository [<HARBOR_HOSTNAME>/testing/hello-world]
ac28800ec8bb: Pushed
latest: digest: sha256:d37ada95d47ad12224c205a938129df7a3e52345828b4fa27b03a98825d1e2e7 size: 524
username@dell:~$
Pulling a Harbor Hosted Image
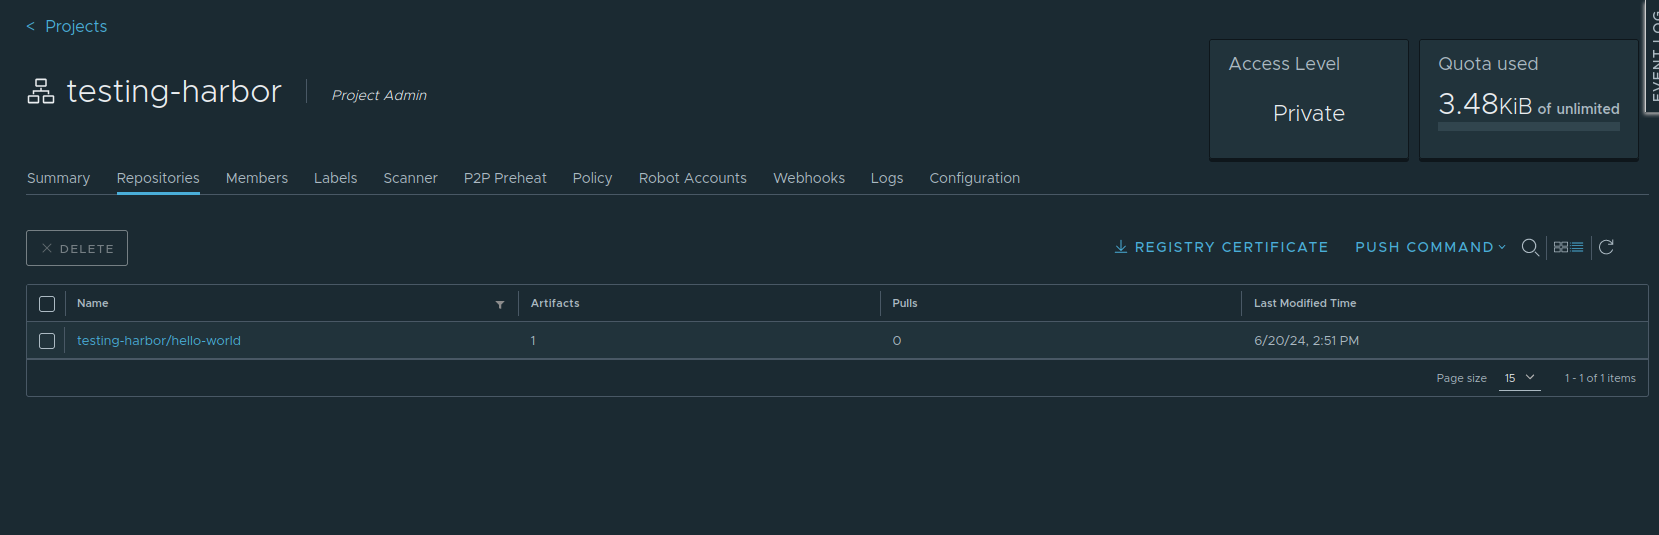
After our initial push to Harbor, we can locate the image in the project list. We select "testing-harbor" as it was specifically created for this purpose.
And then, we can observe our Docker image listed in Harbor:
To pull or run an image from Harbor, we need to include the Harbor address as follows:
username@dell:~$ docker run <HARBOR_HOSTNAME>/testing-harbor/hello-world

Hello from Docker!
This message shows that your installation appears to be working correctly.

To generate this message, Docker took the following steps:
 1. The Docker client contacted the Docker daemon.
 2. The Docker daemon pulled the "hello-world" image from the Docker Hub.
    (amd64)
 3. The Docker daemon created a new container from that image which runs the
    executable that produces the output you are currently reading.
 4. The Docker daemon streamed that output to the Docker client, which sent it
    to your terminal.

To try something more ambitious, you can run an Ubuntu container with:
 $ docker run -it ubuntu bash

Share images, automate workflows, and more with a free Docker ID:
 https://hub.docker.com/

For more examples and ideas, visit:
 https://docs.docker.com/get-started/

username@dell:~$
Sync images via rsync
When working with Docker images in a local environment, you may want to synchronize multiple images simultaneously. To achieve this, it is recommended to use rsync, as demonstrated in the following example:
rsync -avz --progress --partial -e "ssh -p <SSH_PORT>" <LOCAL_FOLDER> <USERNAME>@JUMPBOX_IP>:<REMOTE_PATH_WITH_SLASHES>Then, on our jump box, we load the image in the following manner:
docker load < IMAGE_NAME.tarThen tag and push as described on "Pull, Tag, Push"
With these examples, we are ready to use our Harbor Registry.
Updated 8 months ago