
Importing Images into the Rackspace Cloud
Preparing and Importing External Images into Rackspace Cloud based on OpenStack Flex
This guide walks you through preparing an external Image for import into your Rackspace Cloud project using the Skyline UI.
Prerequisites
- Access to the Skyline UI for your Rackspace Cloud project.
- A KVM-compatible image in a supported format (e.g., QCOW2, RAW, or ISO).
- [Optional]
qemu-imginstalled on your local system if converting image formats.
1: Prepare and/or Create the Image
If you're bringing an image or snapshot over from another provider, you'll want to be sure that you properly prepare it for use on the Rackspace Cloud platform. Below are some considerations and requirements to ensure your image is as compatible as possible in Rackspace Cloud.
Prior to creating the Image
- Ensure
cloud-initis installed if you want OpenStack to configure SSH keys and networking automatically. - Install the
qemu-guest-agentso that you can modify the password for the VM remotely. - For RHEL Based images, check that virtio_blk, virtio_net, and related modules are loaded: lsmod | grep virtio
- Ensure your server's device mappings are compatible with KVM. (See below for more info)
If you're coming from a Xen Hypervisor based environment, your VM have references to xen-based device paths which will render it unusable on the Rackspace Cloud Cloud. Below are some considerations if you're moving from a Xen environment:
Verify Disk Device Mappings:
Xen uses /dev/xvda, while KVM typically uses /dev/vda. Update configurations referencing Xen-specific devices.
- Update GRUB or bootloader configs in /etc/default/grub or /boot/grub2/grub.cfg if they reference /dev/xvda and replace them with /dev/vda
Convert the Image (if needed)
If your image is not in a QCOW2 or RAW format you'll need to install qemu-utils somewhere where you can convert the image. qemu-utils will allow you to use the qemu-imgutility so that you can convert the image. The command for conversion is shown below where input.img is your image filename and file extension.
qemu-img convert -O qcow2 input.img output.qcow2
2: Upload the Image via Skyline UI
Log In to Skyline
- Open the Skyline UI in your browser.
- Log in using your project credentials.
Navigate to Image Management
- Go to the Compute section.
- Select Images from the left-hand menu.
Upload a New Image
Click + Create Image, then fill in the fields provided with the necessary information. Below is a screenshot showing the fields selected.
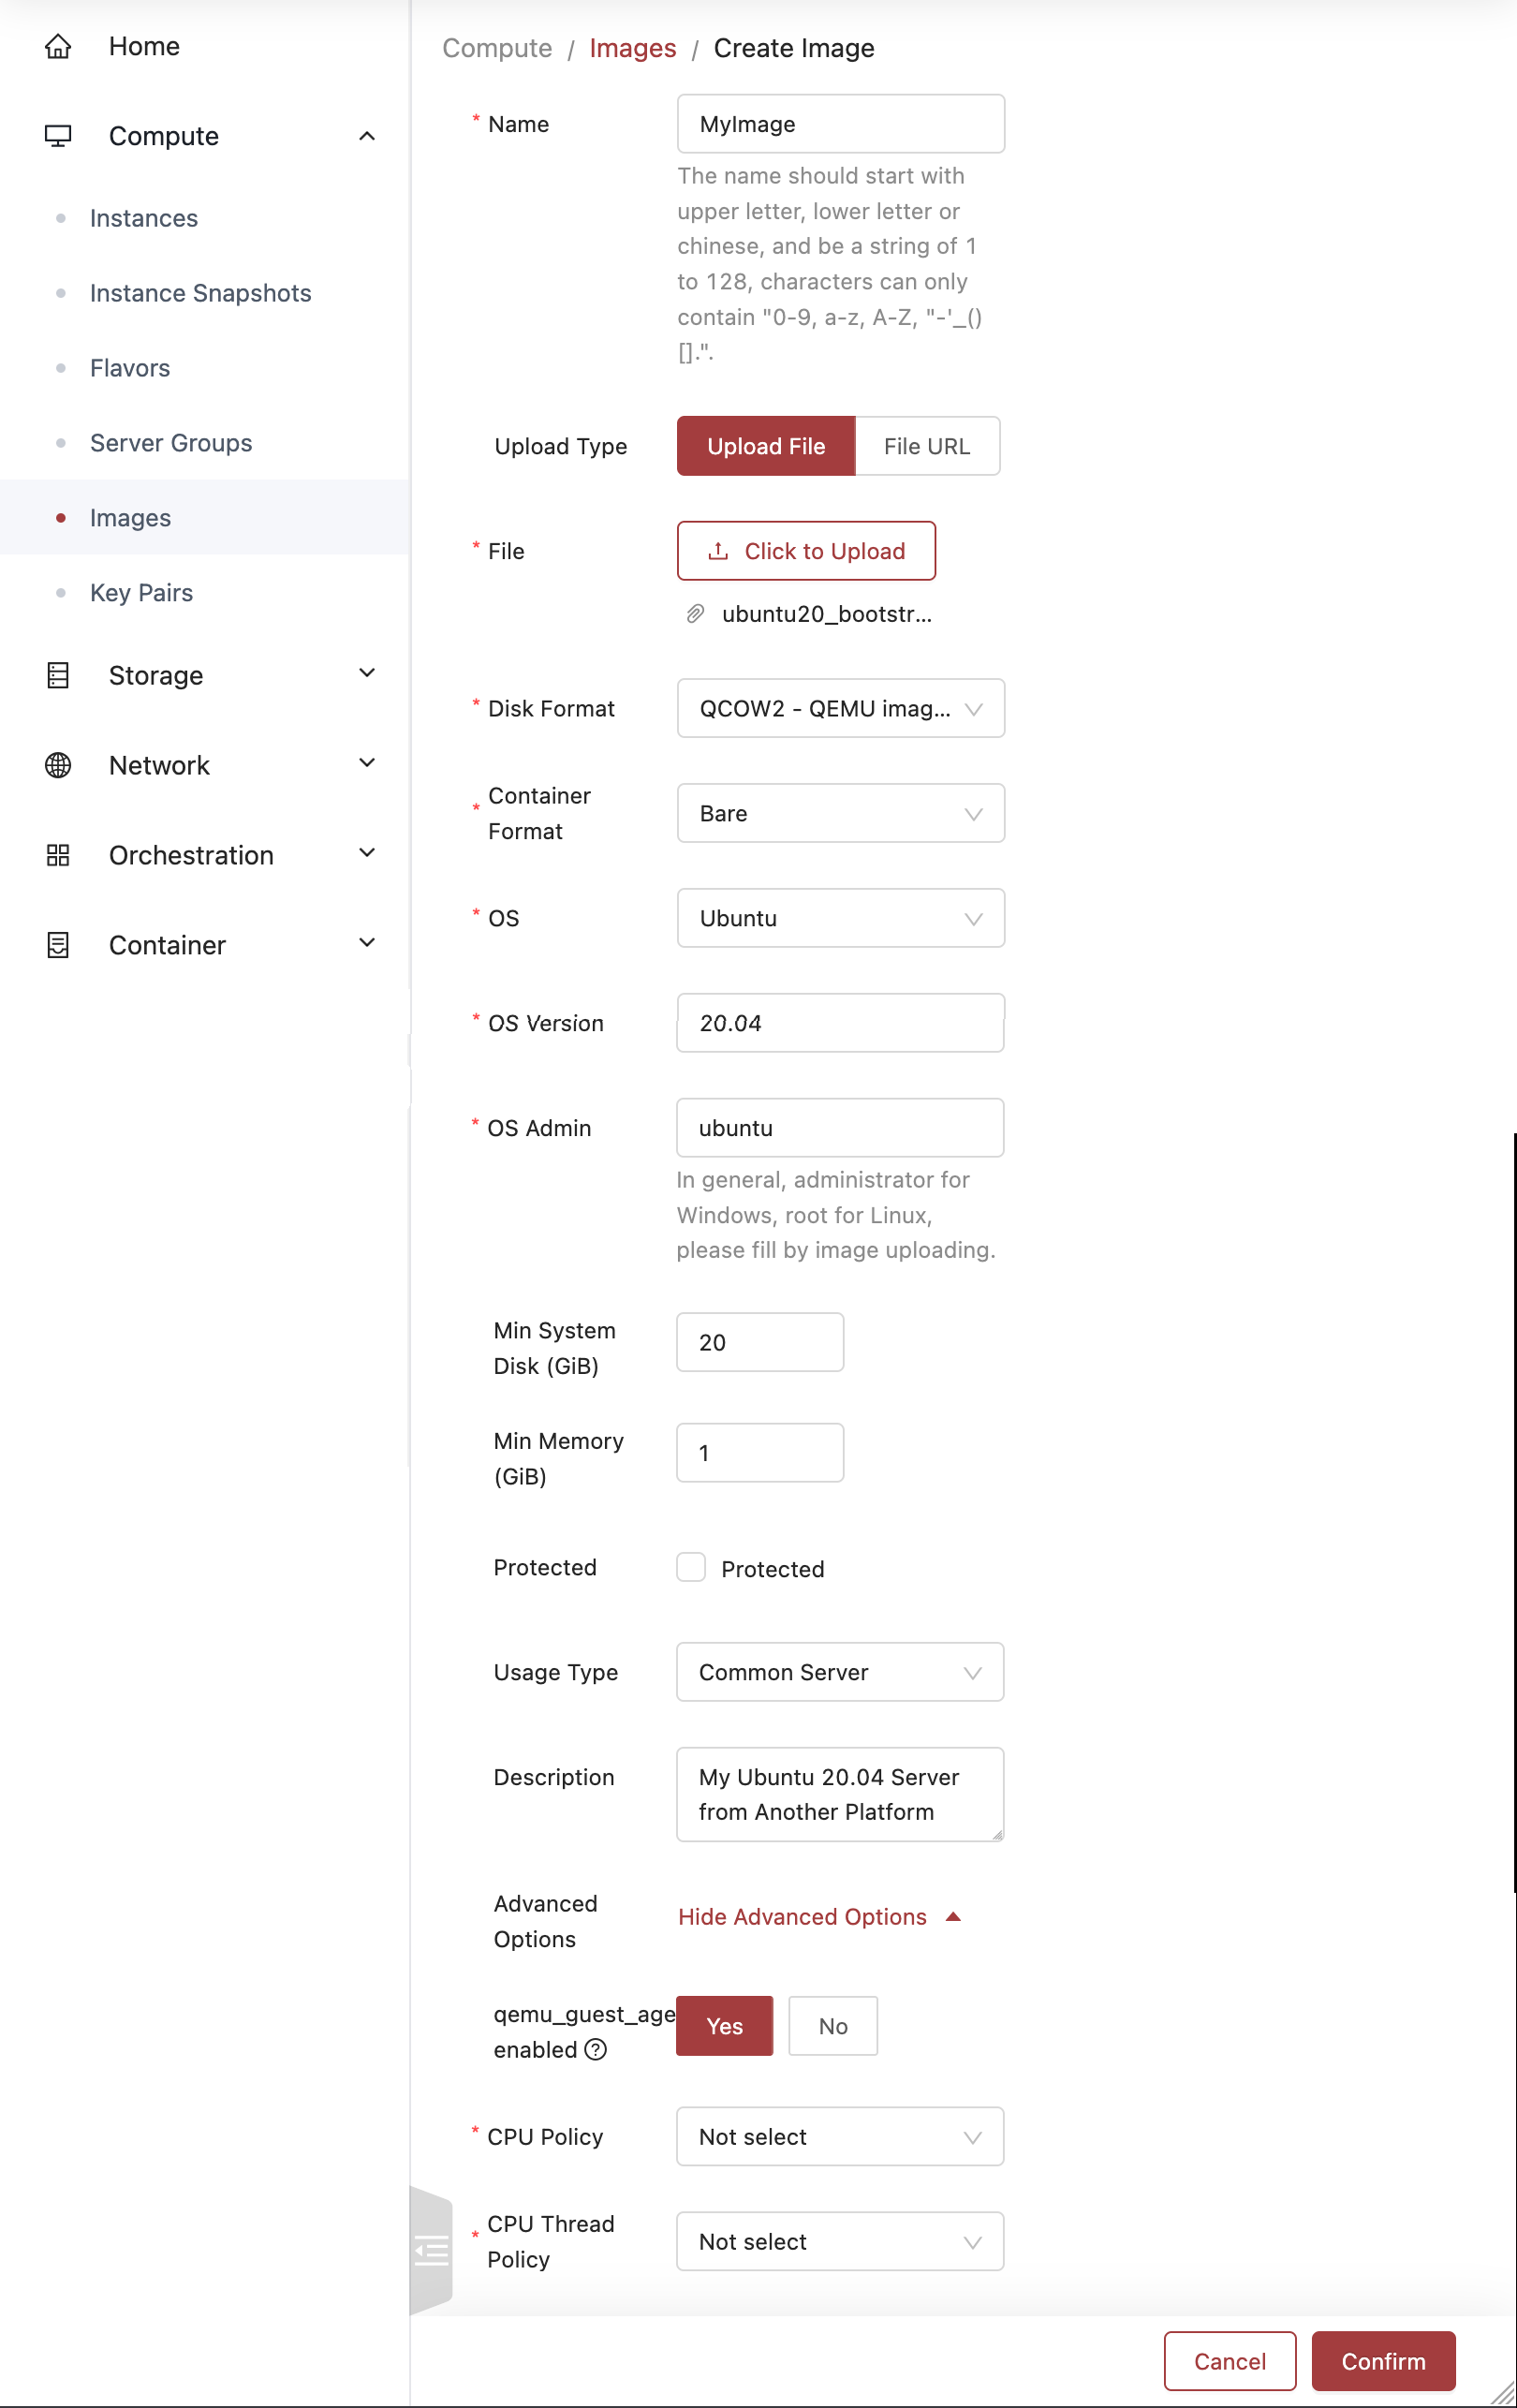
Example of Image Creation Process
Notes on Image Upload Fields
- Upload Type - Upload File allows you to select a file on your local machine to upload. File URL allows you to reference a URL from which the image can be downloaded.
- Protected - Flag on an image means that the image cannot be deleted through the API or user interface unless the protected status is explicitly unset first.
- OS Admin - The primary user for the OS, usually root or ubuntu.
- Min Disk & Min RAM - Prevents this image being built on VMs too small to support it.
- qemu-guest-agent enabled - If the qemu-guest-agent is enabled and starts automatically, you can set this to 'Yes'.
3: Verify the Image
Once the image is uploaded, you'll see it listed in the Images section of your Skyline UI. This image is only accessible from this Project - no one else on Rackspace Cloud can see it.
- Confirm the image status changes to Active
4: Launch a VM from the Image
For the steps to create a VM - see this guide .
Troubleshooting Tips
- SSH Inaccessible: Ensure cloud-init is installed, networking, and security groups are configured correctly.
- No Bootable Device Error: Confirm the image format and whether a bootable OS is present. If you migrated from a Xen based infrastructure - it may be looking for device paths that do not exist like /dev/xvda instead of /dev/vda