
Generating a Network via QuickNet
Quickly generate a functional Rackspace Cloud OpenStack Flex Network from Top to Bottom
One of the most challenging things for users unfamiliar with OpenStack is having to create their network topology out prior to being able to effectively use their OpenStack project. To alleviate this and lower the barrier to entry to customers who may not be as technical we've created the QuickNet feature in our Skyline UI. This guide will show you where it is, what it does, and how you can use it to save yourself time creating a functioning Rackspace Cloud network!
Prerequisites
Creating the Network via QuickNet
When you first log into the Skyline UI with your user, you'll see a list of icons along the top of the screen. At the center of these icons you should see the QuickNet icon as shown below.
The QuickNet Icon
- Click the QuickNet Icon to bring up the QuickNet creation pane as seen below. The values are all populated with working valid data by default - but you can customize the values as you need.
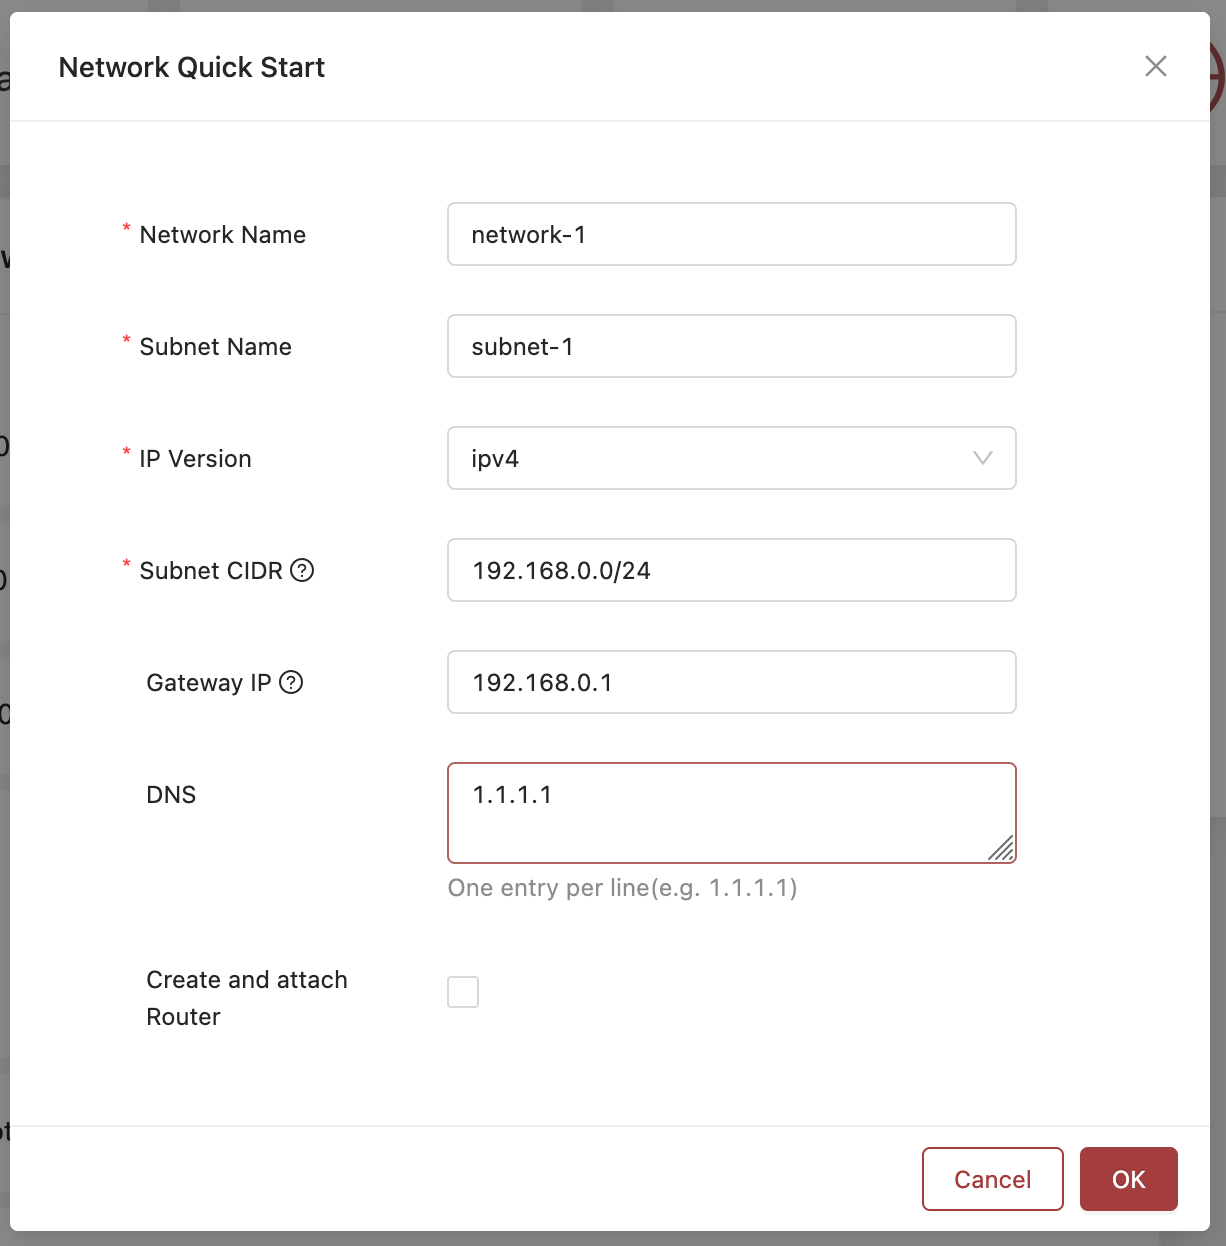
The QuickNet Creation Pane
-
Now you can provide the values in the supplied fields to allow for network creation. By default, the values will create a private network - if this is what you want you can click OK to create only the private network now.
-
If you want to create a network that allows public traffic to reach VMs attached to this network you'll need to click the Create and attach Router button to expand the QuickNet creation pane to present the additional options as shown below:
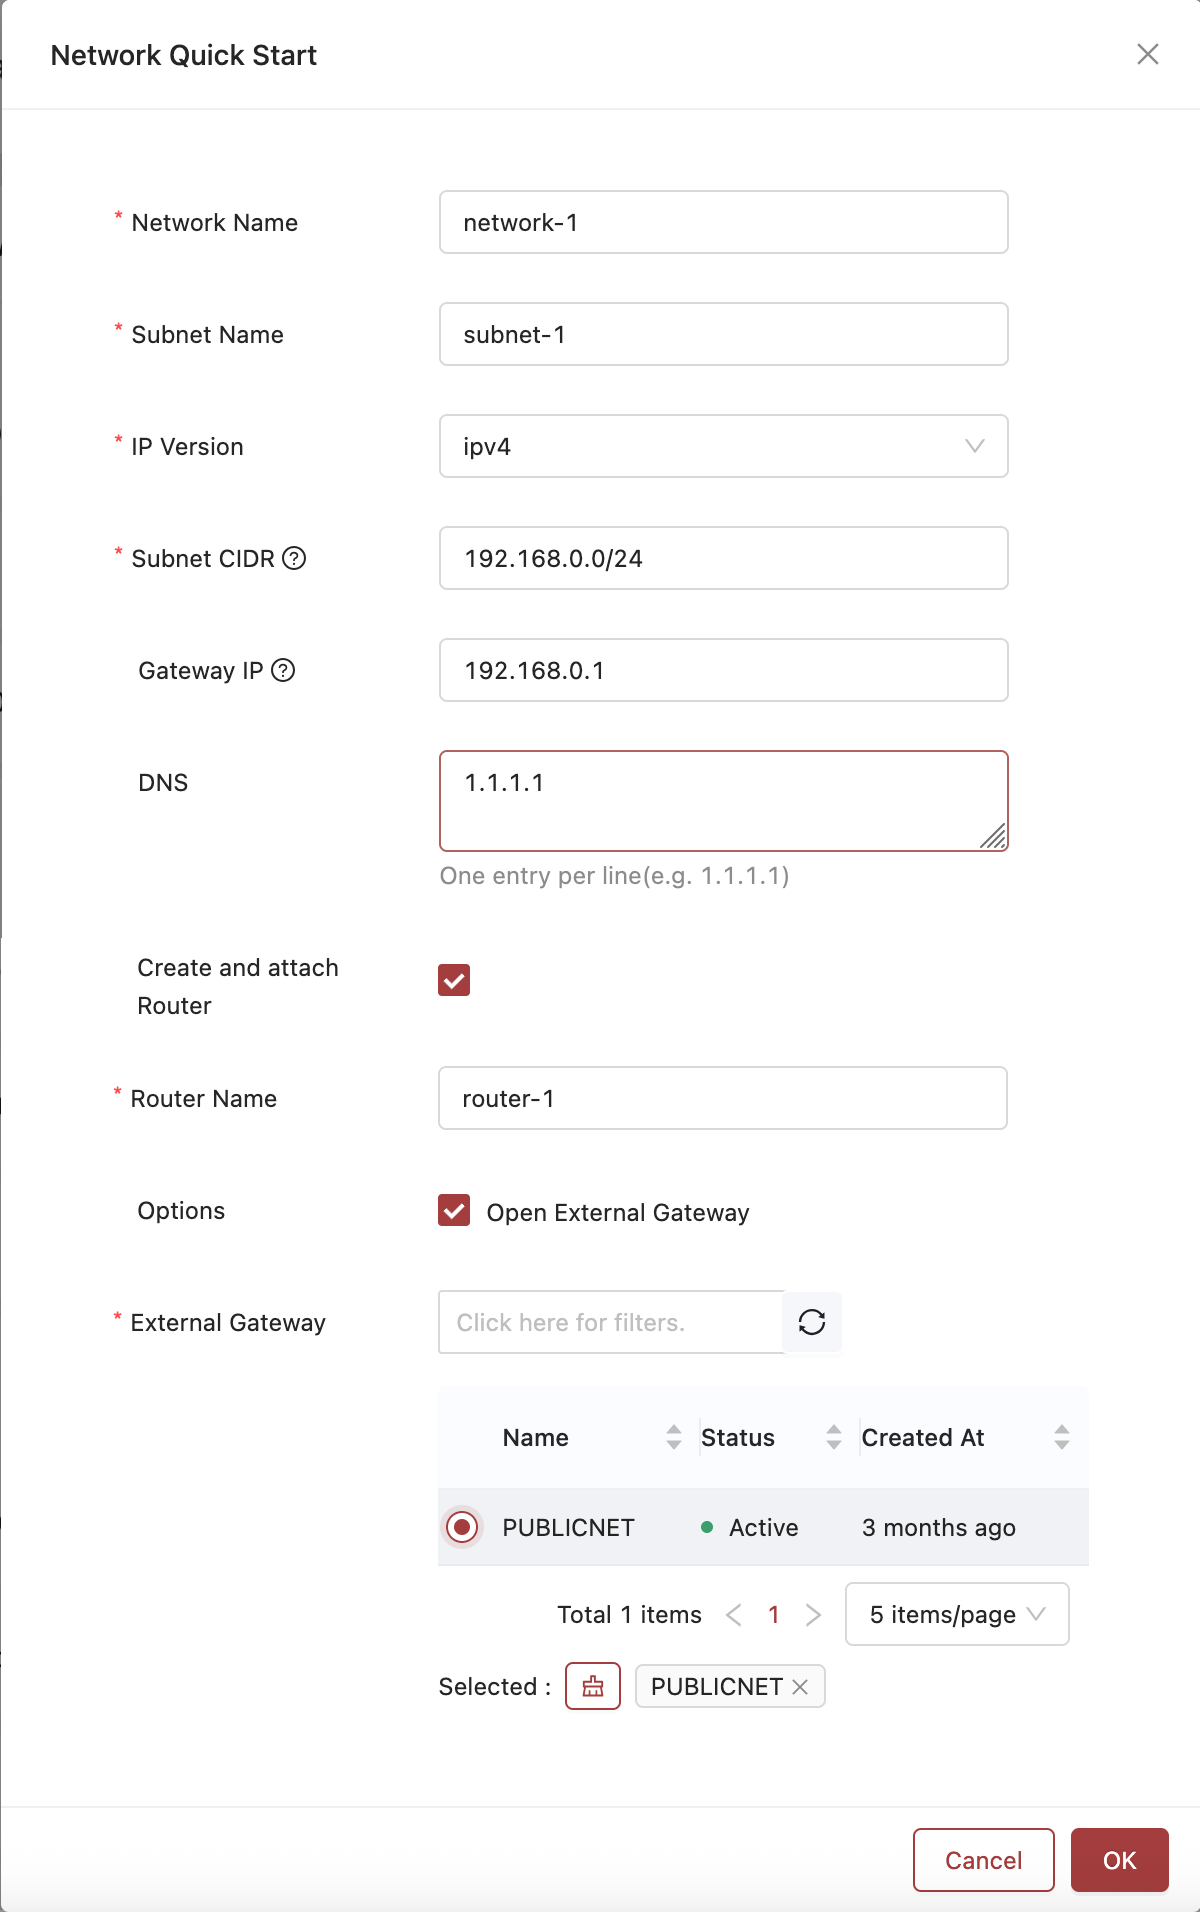
The QuickNet Pane with the expanding Public Access options.
-
Now you're presented with some additional options.
- Router Name: The name for your router.
- Options - Open External Gateway: This must be checked in order to allow public traffic in through the router.
- Select the default PUBLICNET network to allow it through the External Gateway.
-
Now click OK to create your publicly accessible Neutron Network.
You've now got a working network on your OpenStack project! You can view it in it's entirety by clicking Network > Topology from the left-hand toolbar. You'll be presented with a visual representation similar to what you see below:
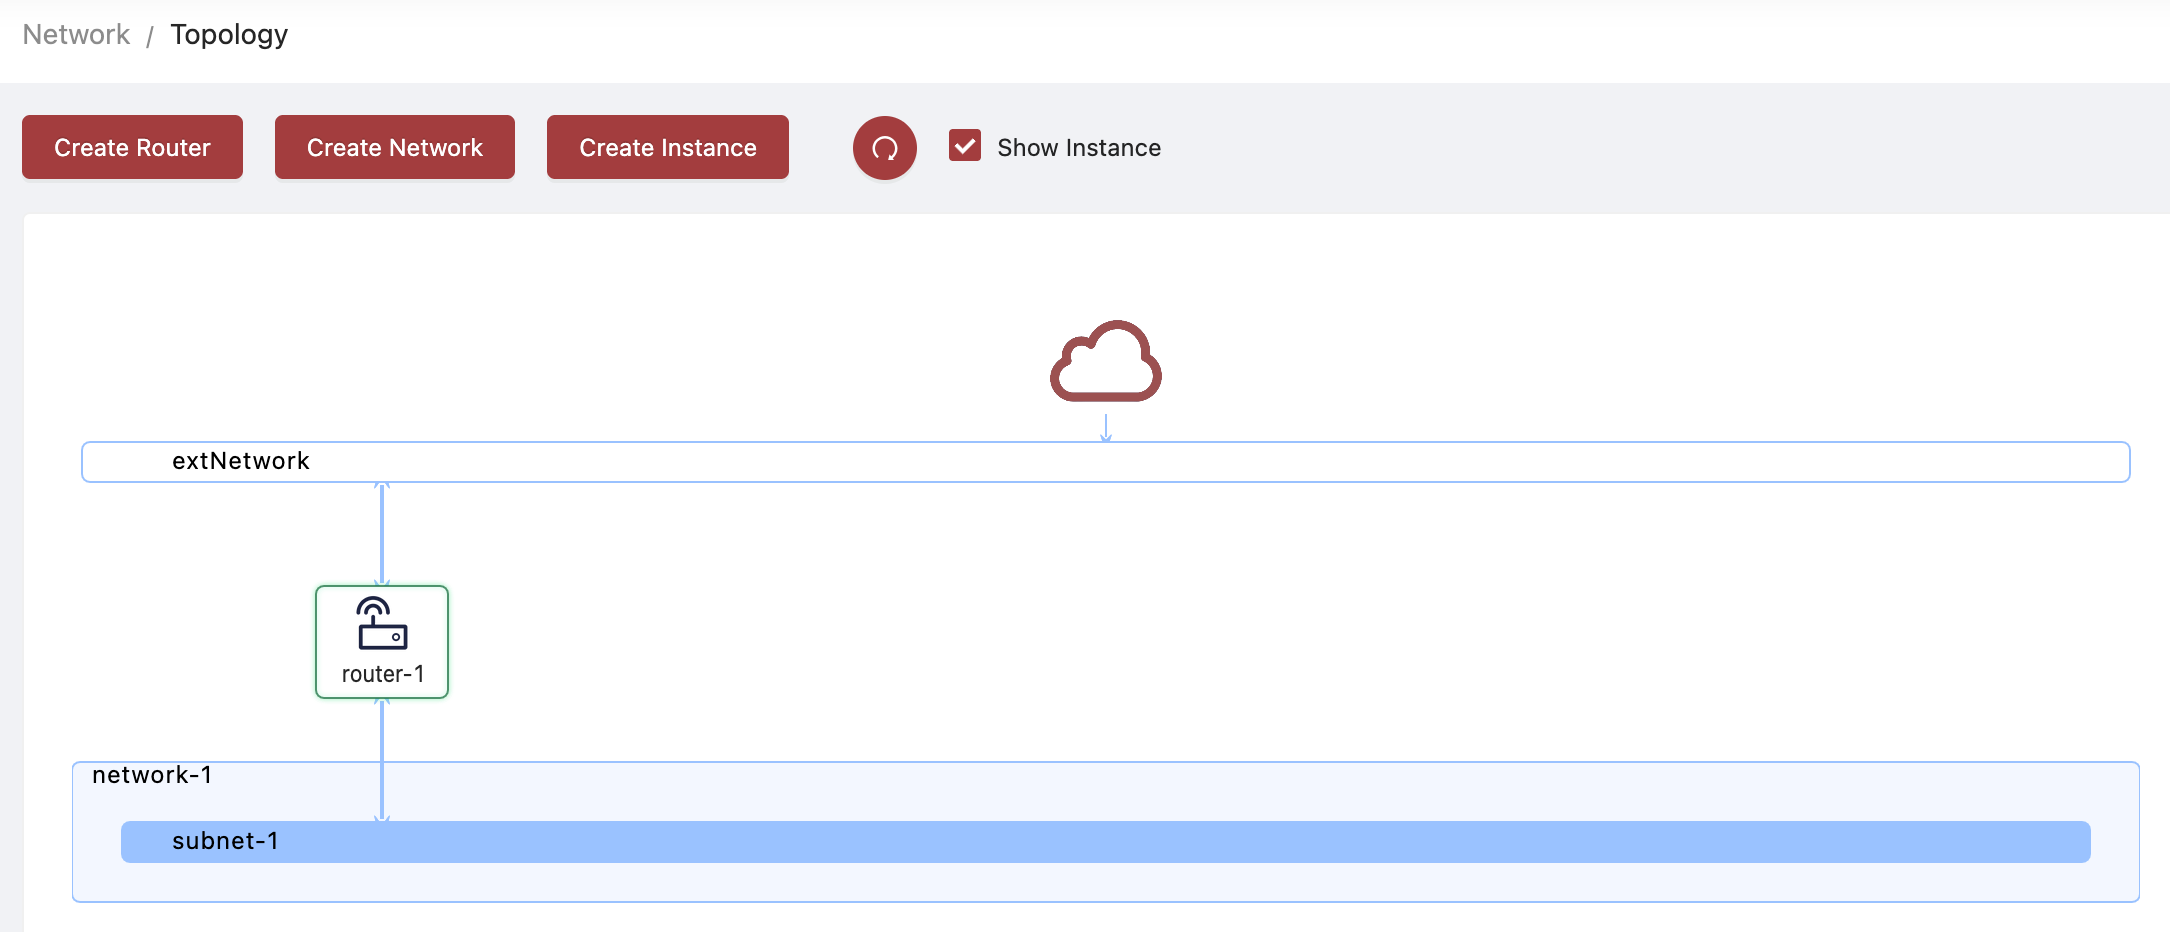
Network Topology
Updated 6 months ago
What’s Next
Now you can begin creating VMs and resources that use this network!