Manage Local Users in the MyRackspace Portal
This article explains how to use a ticket template to manage local users.
Create a Ticket in the MyRackspace portal
Step 1. Log in to the MyRackspace portal with
your username and password.
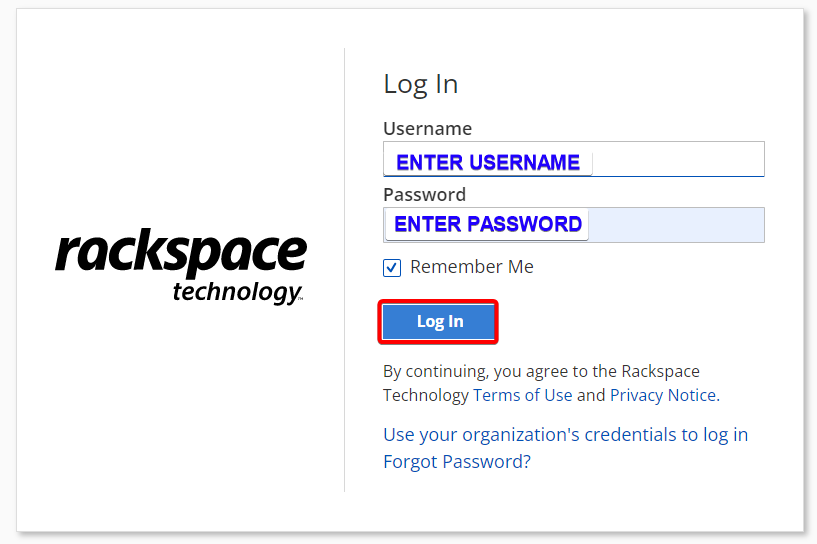
Step 2. In the top navigation bar, select Support > Support Center.

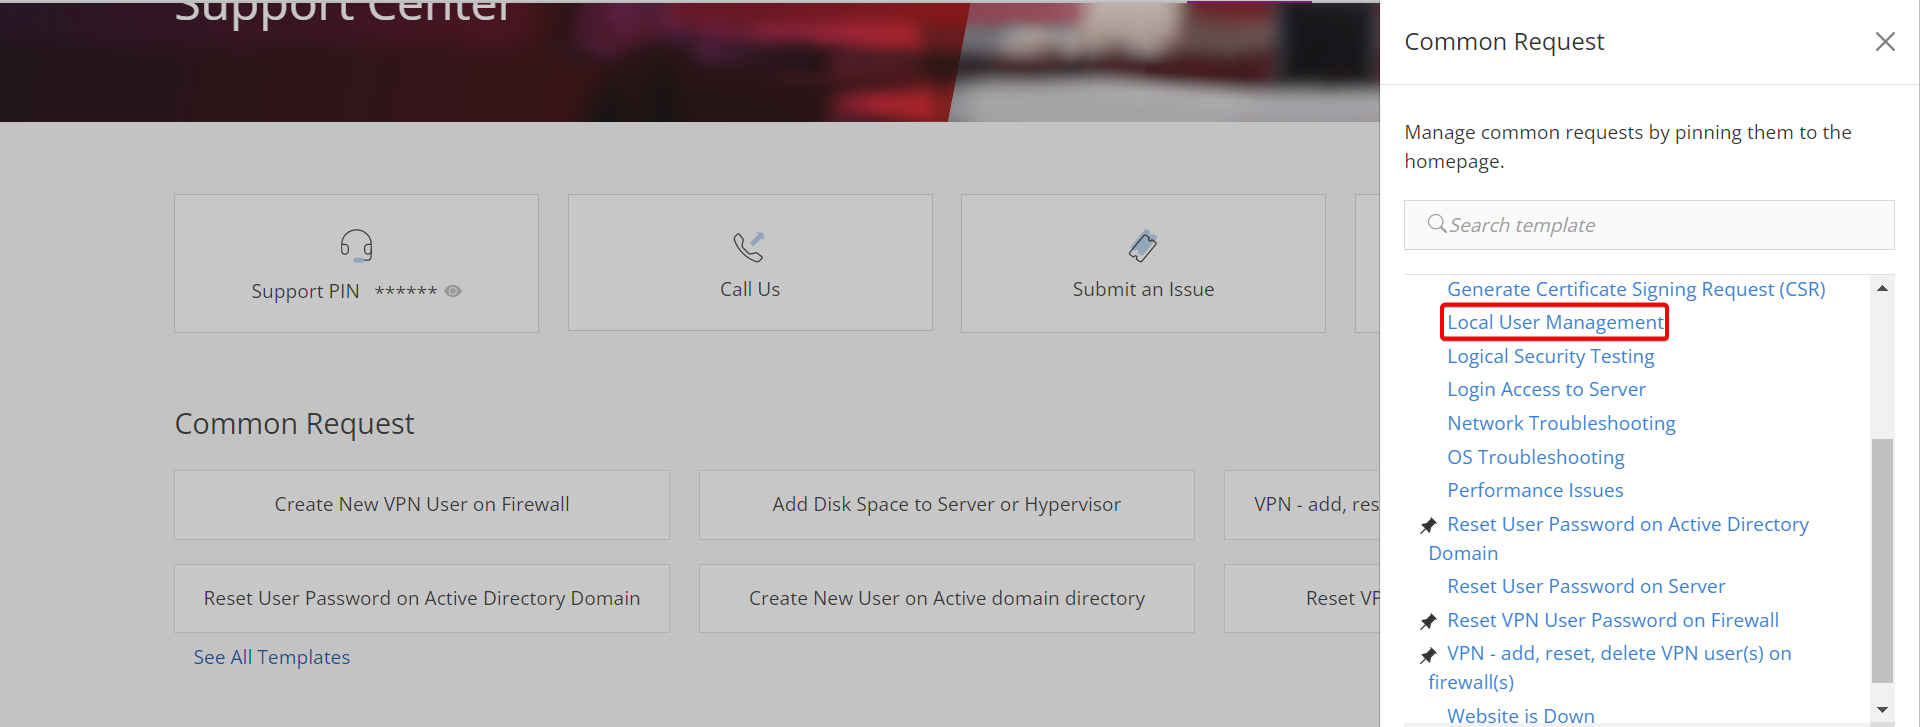
Step 3. Under Common Request menu, click See All Templates. It displays list of all templates and select Local User Management
Step 5. In Issue Details section you can select the appropriate Device(s) and Action Type.
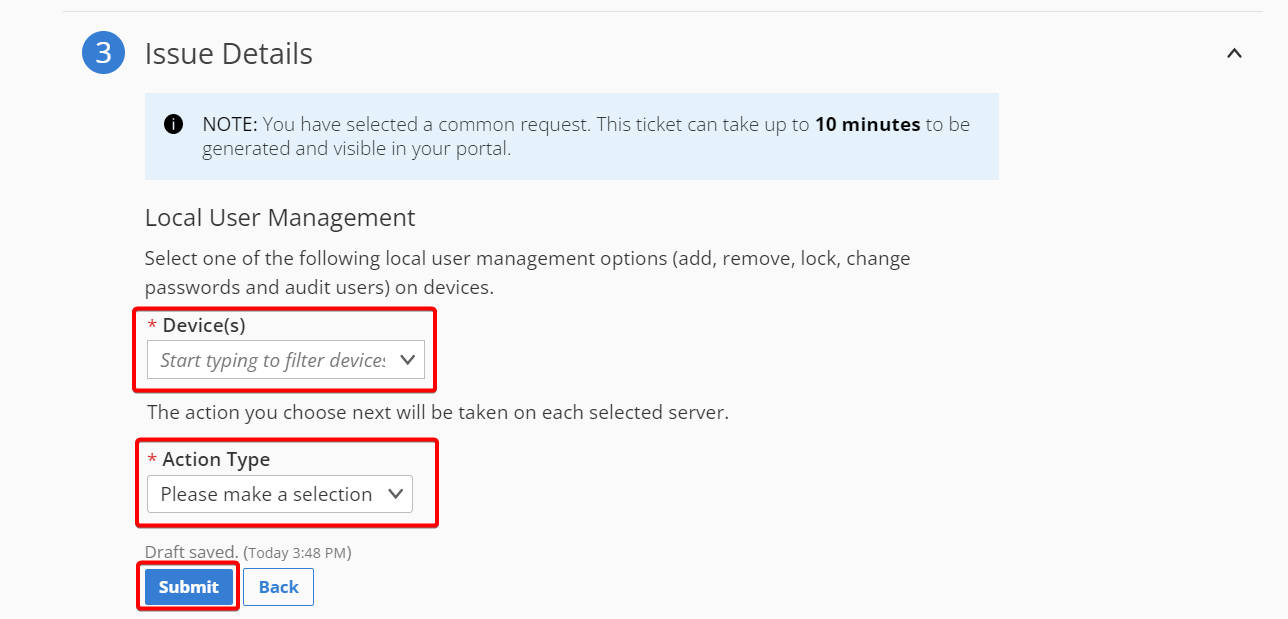
On each chosen server, the action you choose next will be executed. The details of each action are described below:
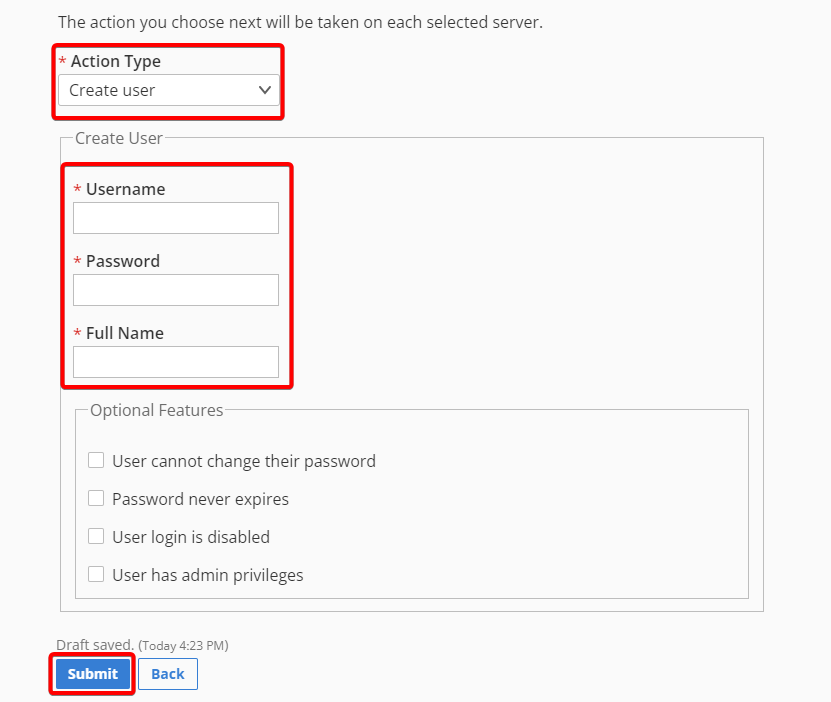
Create a User on the Selected Device
Step 1. Enter the Username, Password, and Full Name of the user you want
to create on the selected devices.
The Password should be at least eight characters, with at least three
character types (uppercase, lowercase, numeric, and symbol).
Step 2. You can also assign the following optional features to the user:
- User cannot change their password
- Password never expires
- User login is disabled
- User has admin privileges
Step 3. Click the Submit button.
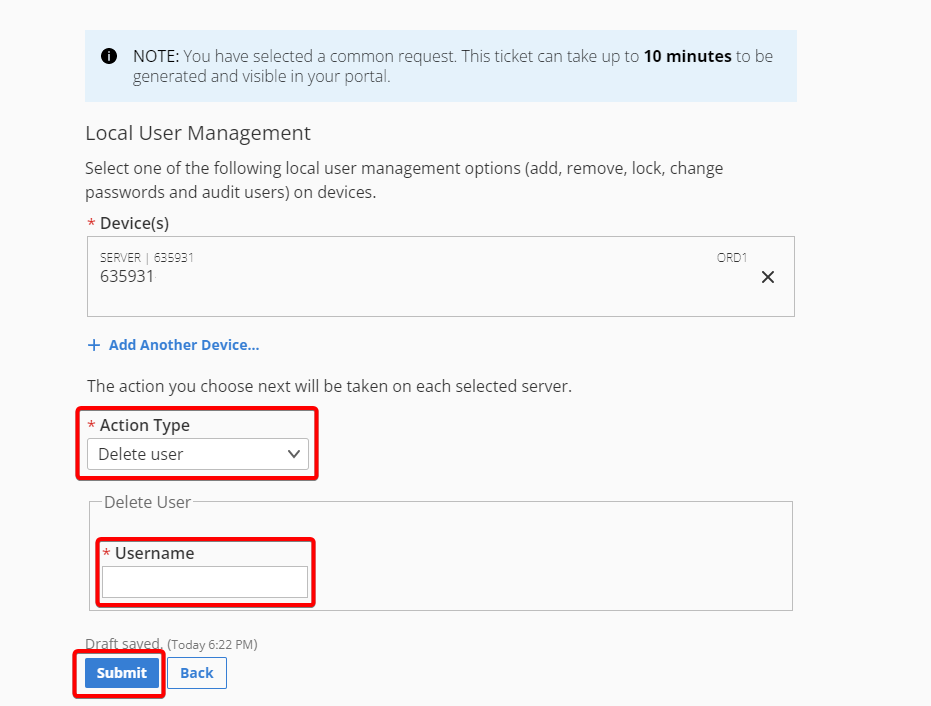
Delete, Enable or Disable/lock a User on the Selected Device
Step 1. Select the desired action from the Action Type drop-down menu.
Step 2. Enter the username. Deleting a user completely removes them from the selected devices.
Step 3. Click the Submit button.
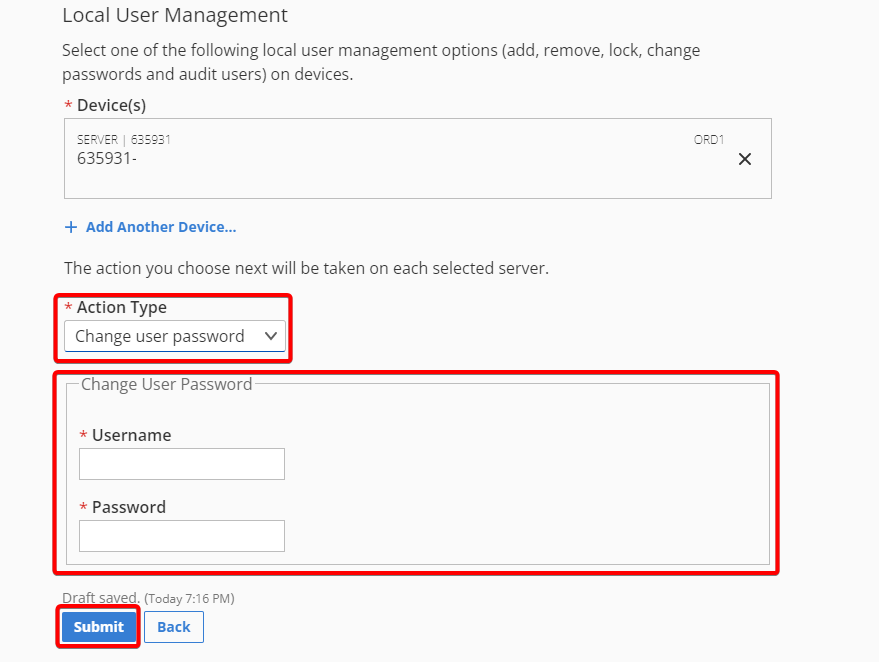
Change a User Password on the Selected Device
Step 1. Enter the Username and Password to reset on the selected devices.
The Password should be at least eight characters, with at least three
character types (uppercase, lowercase, numeric, and symbol).
Step 2. Click the Submit button.
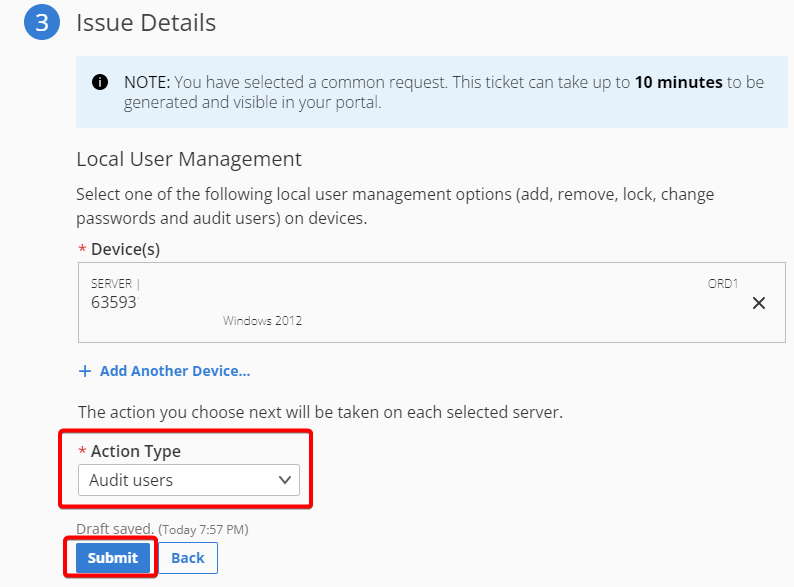
Audit Users or User Groups on the Selected Device
These actions provide a list of users or user groups on each selected server and
require no additional input.
After the ticket is generated, you can see your ticket list in the MyRackspace Portal.
It takes a few minutes for the ticket creation process to complete.
Updated 3 months ago