
Accessing Your Platform
Accessing Your Platform
For security reasons, you must establish a VPN connection to the Rackspace firewall to access your SDDC Business environment. You can establish either a site-to-site or client-to-site VPN to satisfy this requirement.
Your SDDC environment includes DNS servers, which provide local DNS resolution. Therefore, you must configure conditional forwarding in your DNS infrastructure to correctly resolve DNS records for SDDC Business management services. Contact your support team for more details.
Rackspace creates ticket with the details of how to establish a VPN connection and how to access the various services in your environment. If you have purchased several environments in different data centers, you will receive individual tickets specific to each environment.
Log in to the Rackspace Customer Portal
After we build your environment to your specifications, you receive an email that includes your username and password to the Rackspace Technology Customer Portal using below link.
To get started, we recommend reviewing the contents of the:
The portal onboarding guide shows you how to create tickets, manage notifications, and perform several administrative tasks.
Support Ticket Creation
- Log in to the MyRackspace Portal
- Select Tickets > Create New Ticket.
Step 1. Choose Category.
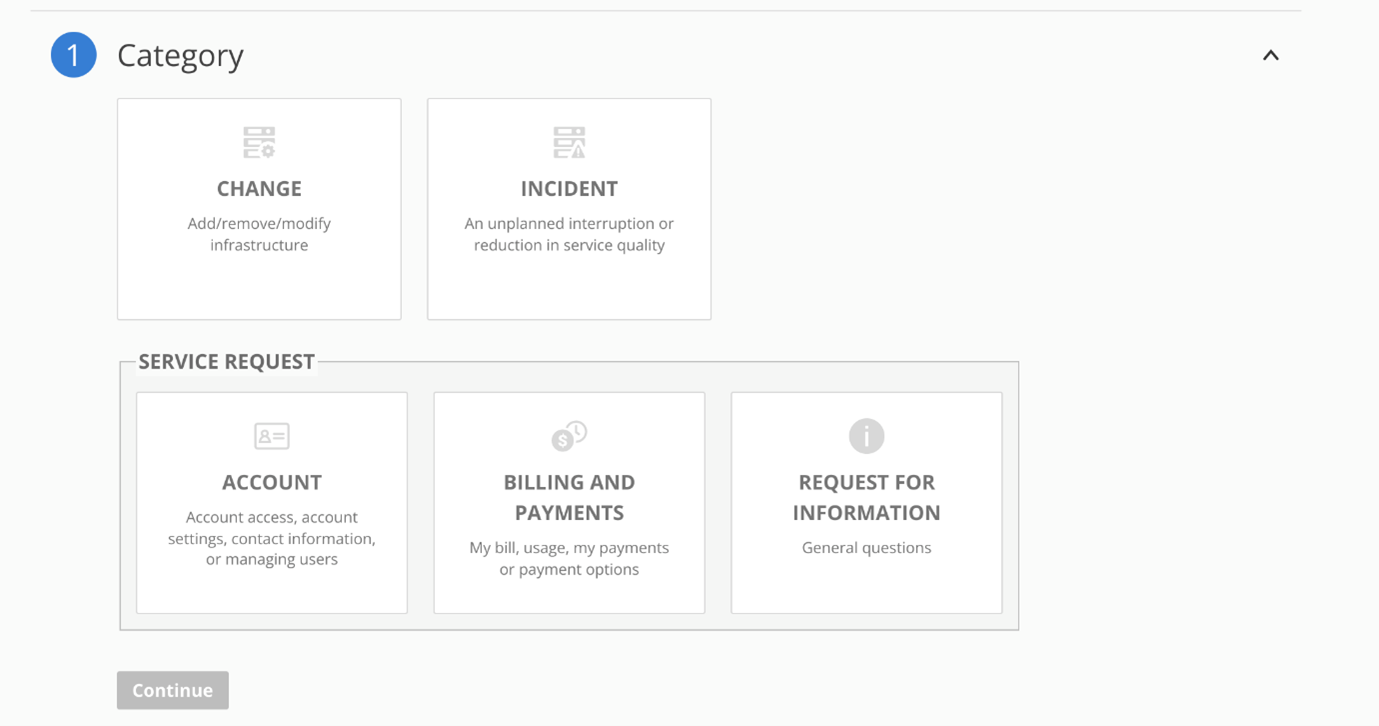
You must choose the required category from the pre-defined ITIL/ITSM management options. Below is the list of categories:
-
Change: Change category is used to raise the ticket for add, remove or modify the infrastructure. Examples of change category are Configuration of Manager Console, add or remove hosts, add or remove device and so on.
-
Incident: Incident category is used to raise the unplanned interruption or reduction in service quality. Examples of incidents are email delivery issues, lack of access to the network, website down and so on.
-
Account: Account category is used to raise an issue related to overall account access, account settings, contact information or managing users.
-
Billing and Payments: The Billing and Payments category is used to raise an issue related to usage and payments or payment options.
-
Request for Information: Request for Information category is used to request general information. Examples of general information are the address of the organization, headquarters location, and so on.
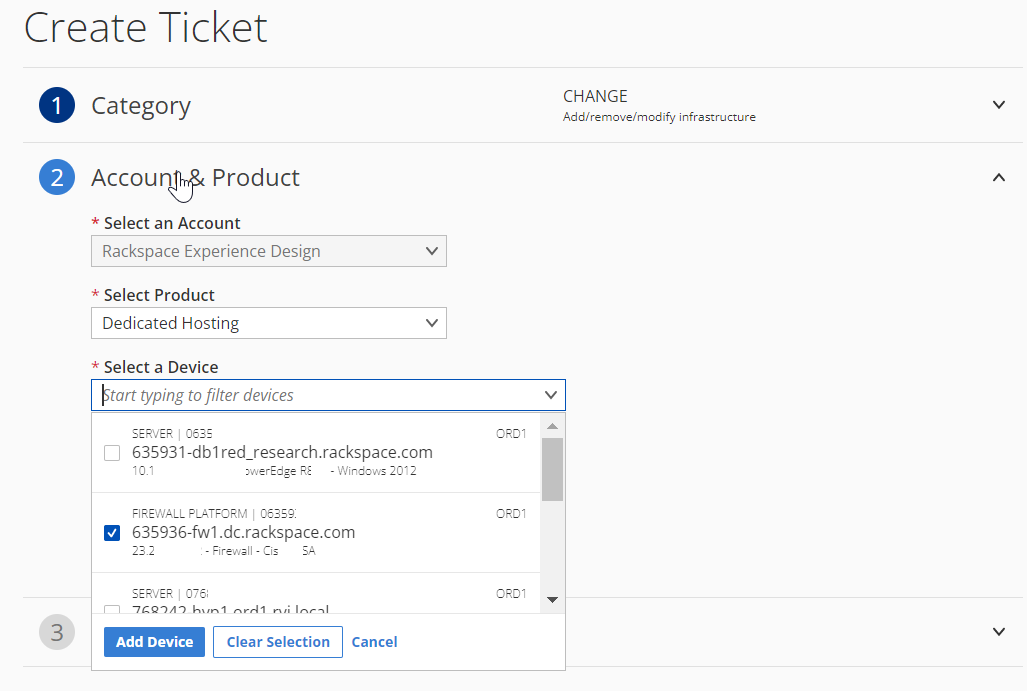
Step 2. Account & Product
-
If you only have access to one account, then that account will auto populate. The input will also be disabled since no other options exist for selection.
-
If you only have access to one product, then that product will auto populate. If you have access to multiple products, then select the product that best relates to your request from the options in the drop-down list.
-
The application only allows for dedicated devices to be added to a ticket. Adding multi-cloud devices is not allowed at this current time.
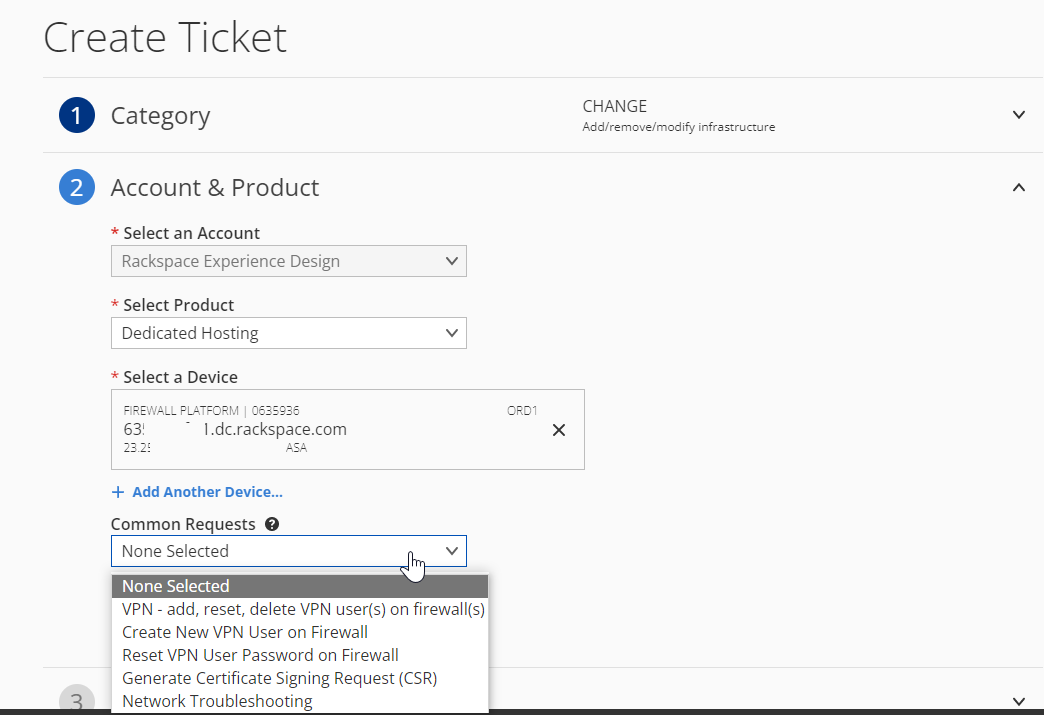
- This option drop-down depends on the previous selections you have made. Only the list of options that relate to your previous device, product, and account selections will display. Leave this field with the "None Selected" value in order to create a Custom Ticket or choose one of the template options to create a ticket based on common change requests. Visit our Common request templates article for more information about accessing each template.
Draft Saved (Autosave)

At the bottom of step two you will see a message that says, Draft Saved. A ticket draft tracks the selected step, selected field values, and progress of you create ticket page. This allows you to continue the ticket in a different browser, or device at any time. The draft does not have a time limit and can be continued days, or months later. Each time you visit the "Create Ticket" page the application will check for the most recent draft.
Step 3: Issue Details
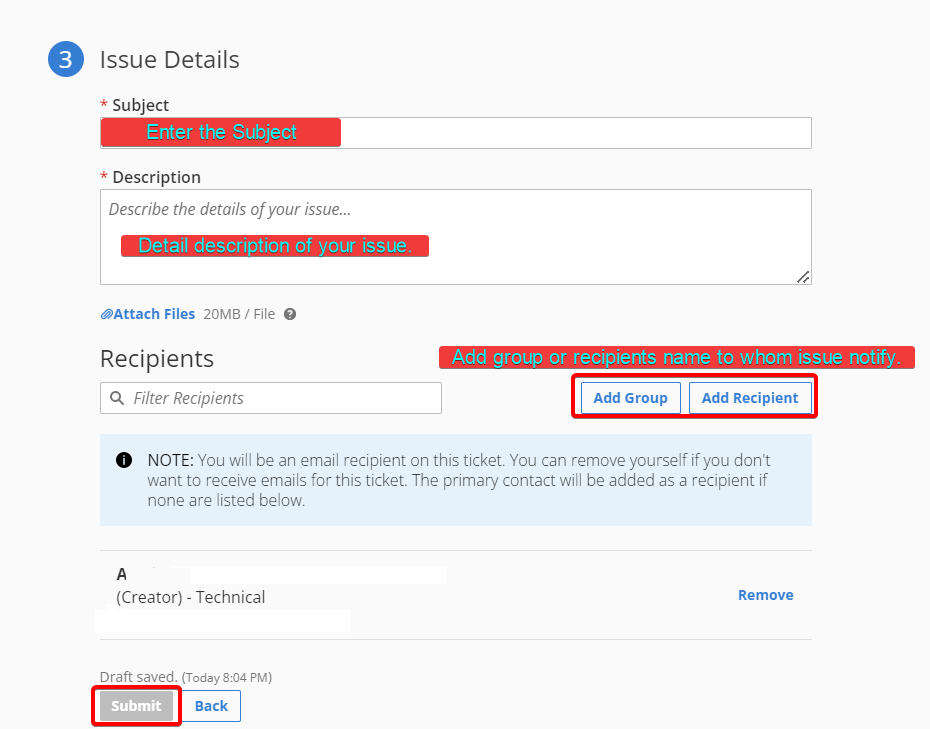
You fill in details of subject, description, and recipient(s). Optionally you can upload attachments up to 20MB per file. After clicking the Submit button, the draft will be cleared, and a new ticket will be available at the top of the ticket list.
Requesting A New VM
You may submit a support ticket to Rackspace requesting a new VM deployment from a pre-defined template on your behalf using the following request form:
Hi Rackspace,
Please create a Virtual Machine with the following specifications:
Template Name and Location:
Virtual Machine Name:
Storage Specs:
- Datastore: (where the Virtual Machine configuration and vDisk files will be located)
vNIC: (Insert destination port group)
IP allocation details:
- IP address:
- Subnet Mask:
- Gateway:
- DNS (Domain Name System) Servers:
By default, virtual hardware configurations are predefined by the template you choose; if customized hardware configurations are required, please also specify the hardware components and their desired allocations as follows:
vCPU: (Insert # of vCPUs (sockets, cores))
vRAM: (Insert amount of vRAM)
vDisk(s): (Insert disk size(s) and datastore)
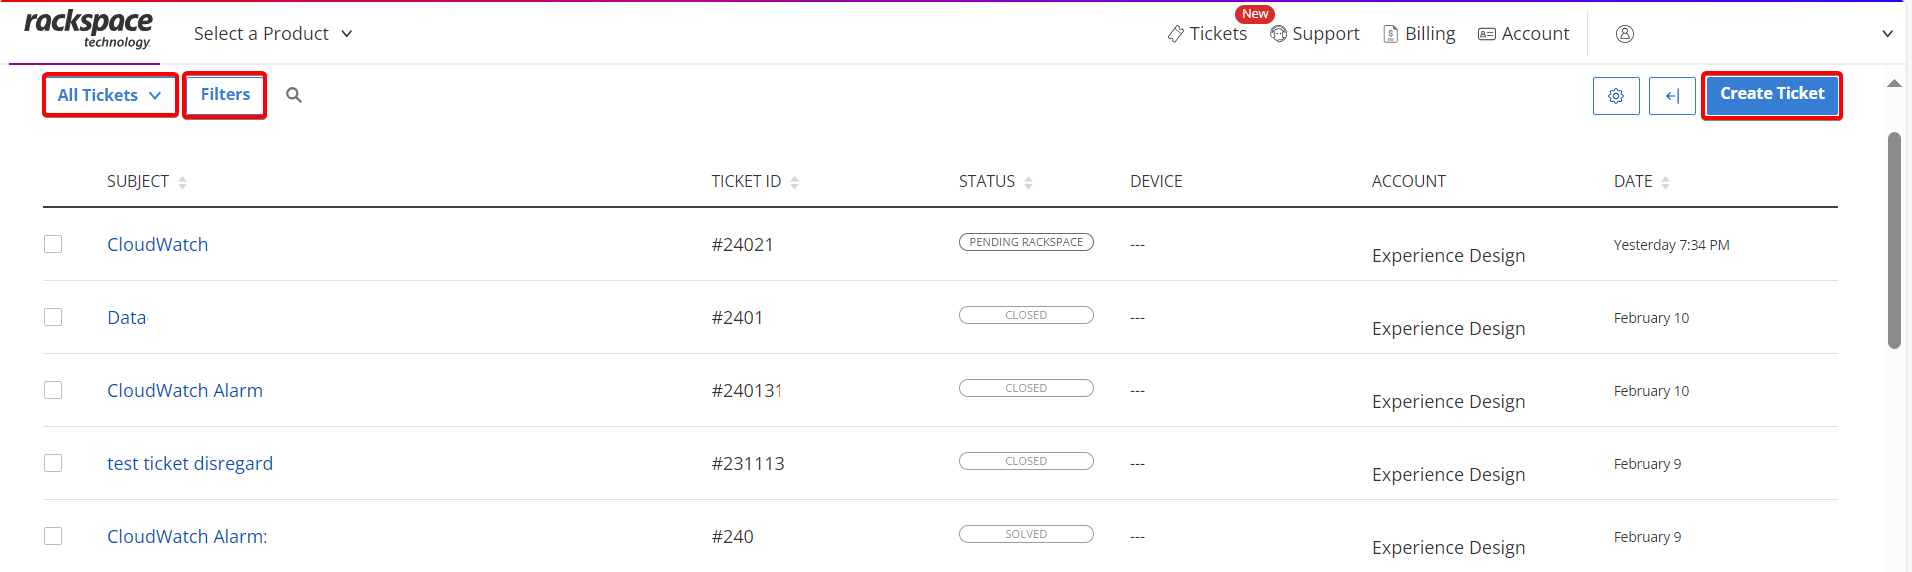
Your Support Ticket List
The ticket list allows you to create new support tickets and review previously opened or closed support tickets.
Updated 8 months ago