
Creating a Load Balancer
Creating and setting up a Load Balancer in the Rackspace Cloud
A Load Balancer in Rackspace Cloud is a service that distributes incoming network traffic across multiple instances to ensure high availability, scalability, and reliability of applications. It acts as a single entry point, automatically directing traffic based on predefined rules, such as round-robin or least connections. This helps prevent any single instance from being overwhelmed and improves performance. The Load Balancers are designed to be highly integrated with Rackspace Cloud's OpenStack networking, making it easy to deploy and manage within the cloud environment.
Prerequisites
Before you begin building and configuring your Load Balancer, be sure you've got the following:
- You have access to Rackspace CloudSkyline UI.
- You have existing instances that will be part of the load balancer.
**NOTE:**This guide will focus on setting up the Load Balancers in the Skyline UI, if you prefer to use the CLI you can refer to upstream documentation from OpenStack
1: Navigating to Load Balancer Section
To get to the location in Skyline where you'll create your Load Balancer, follow the steps shown below.
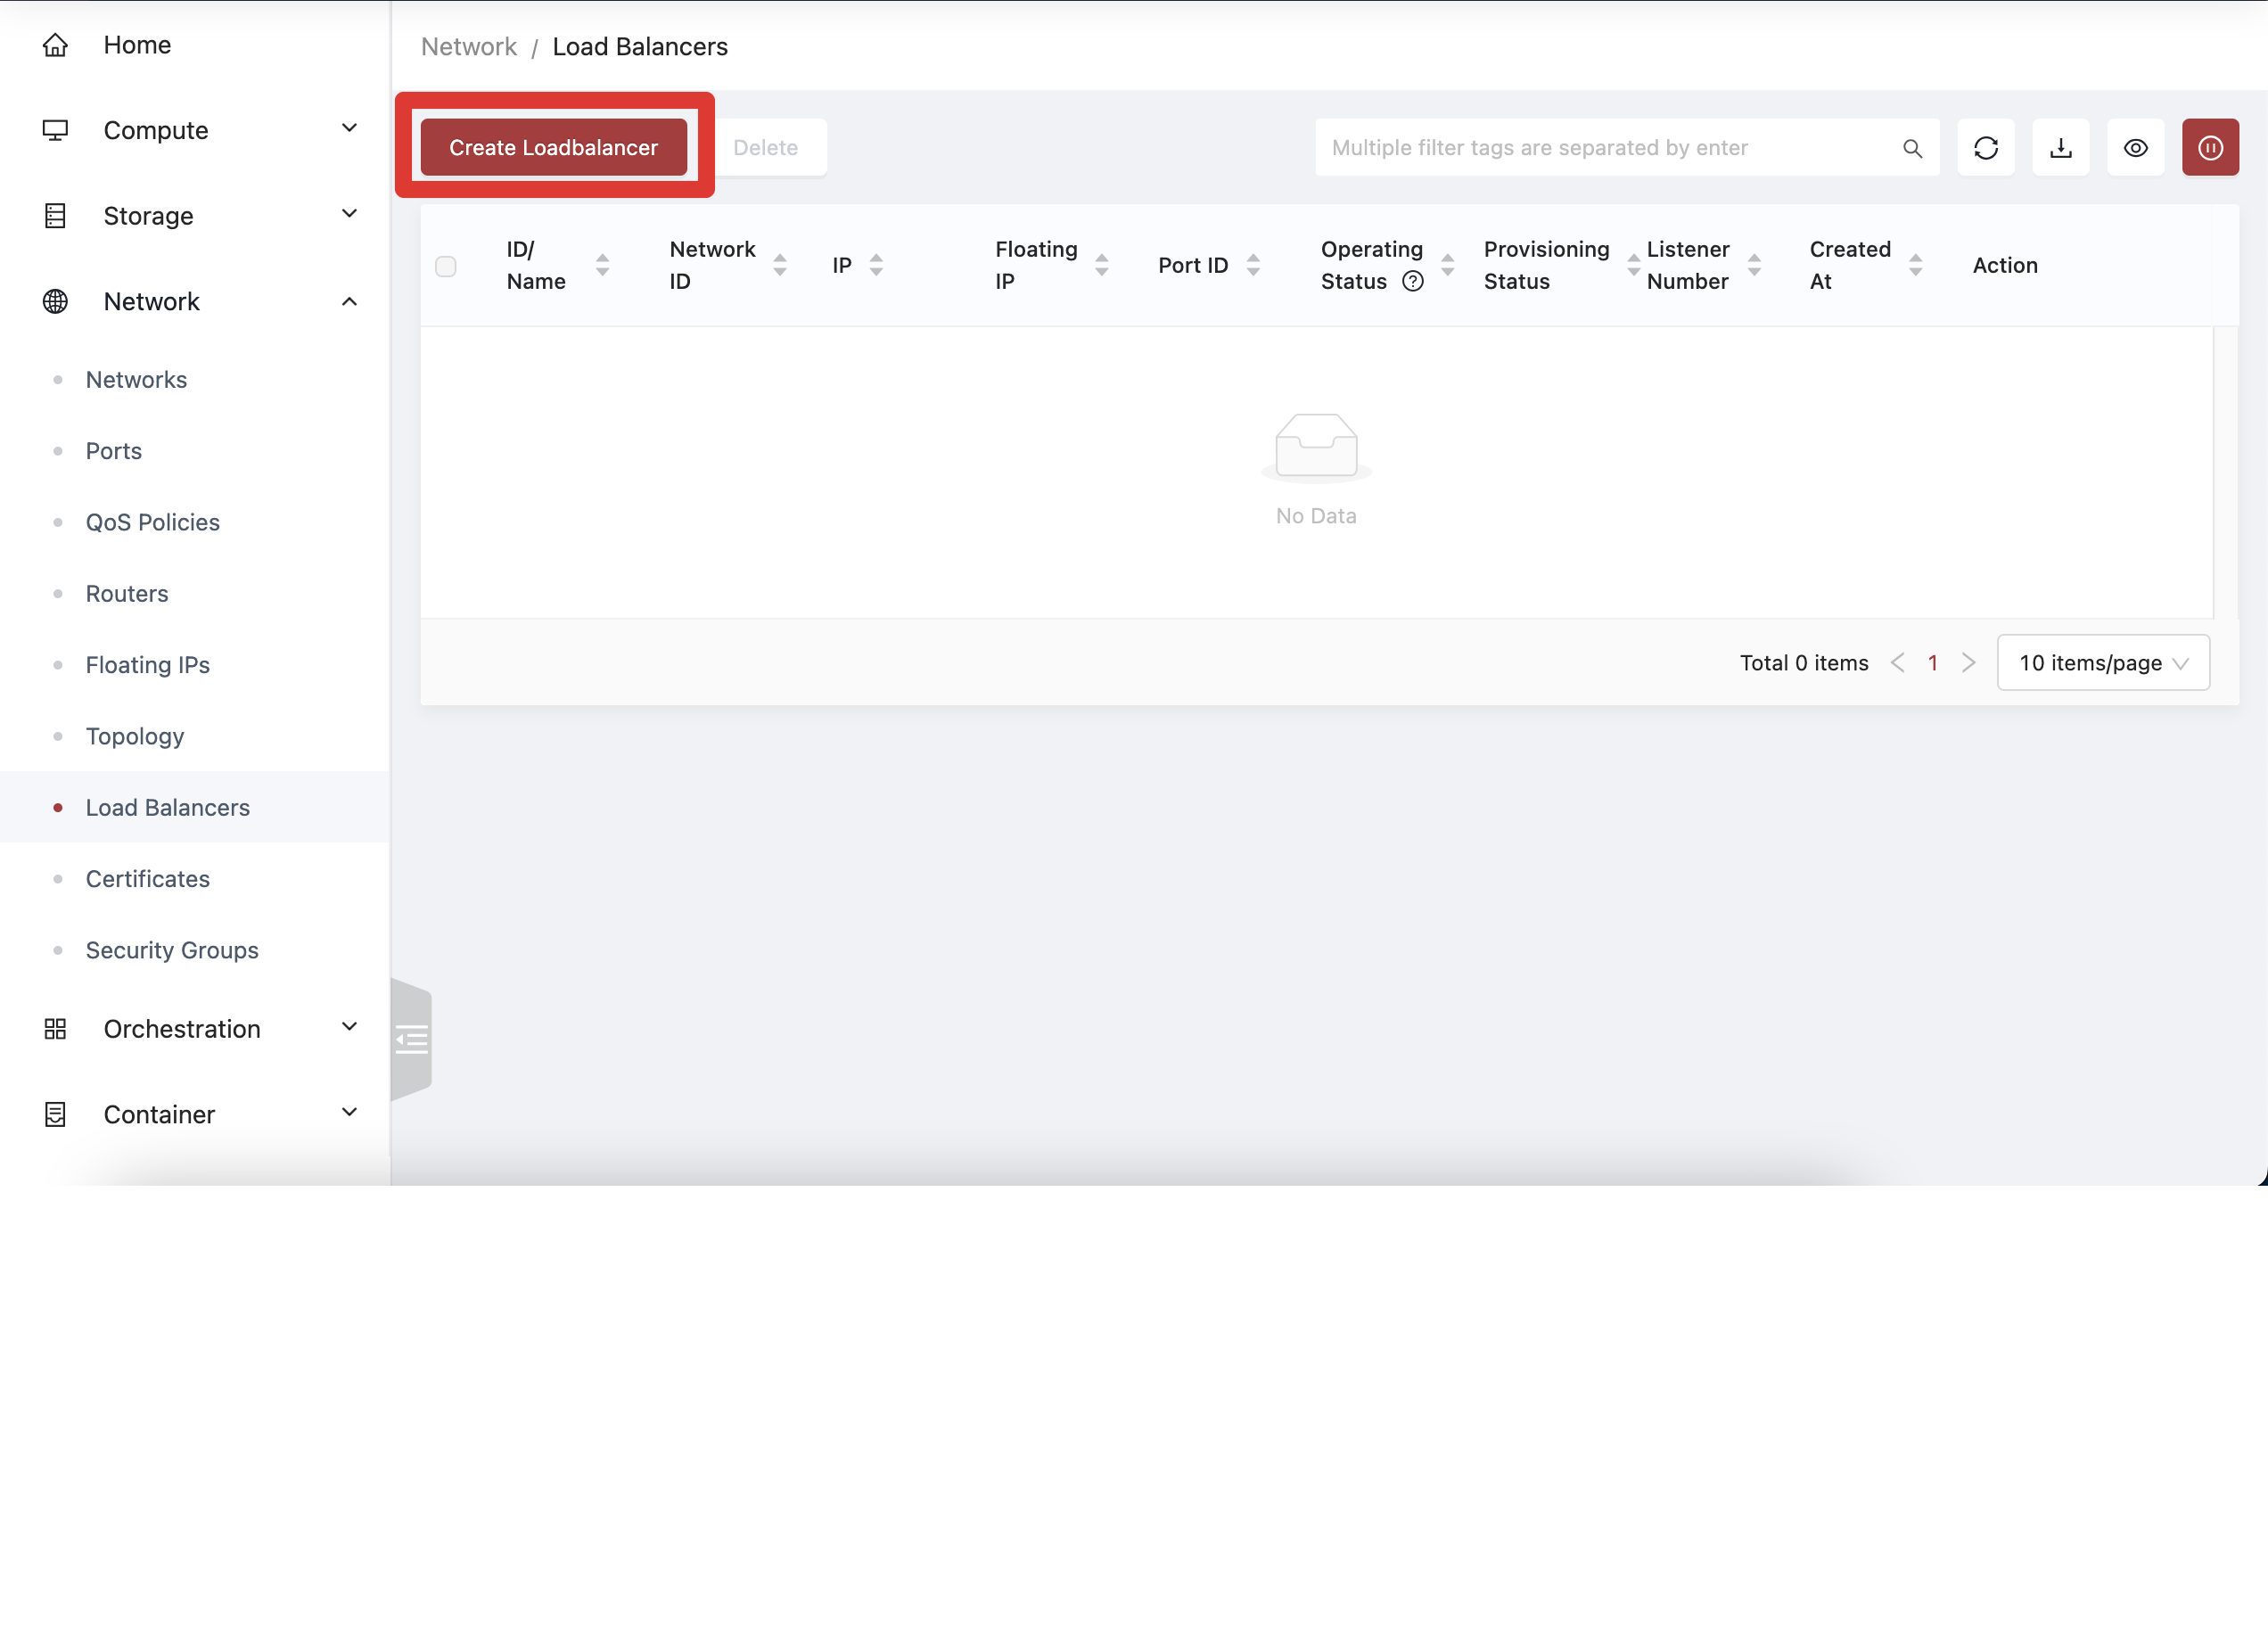
The 'Create Loadbalancer' button in Skyline
- Log in to Skyline UI.
- In the left-hand menu, navigate to Network → Load Balancers.
- Click the Create Load Balancer button.
2: Configure the Load Balancer
Next we'll set up the base configuration for our Load Balancer. Here we'll tell it what its name will be, the network it works with, subnet, and initial state.
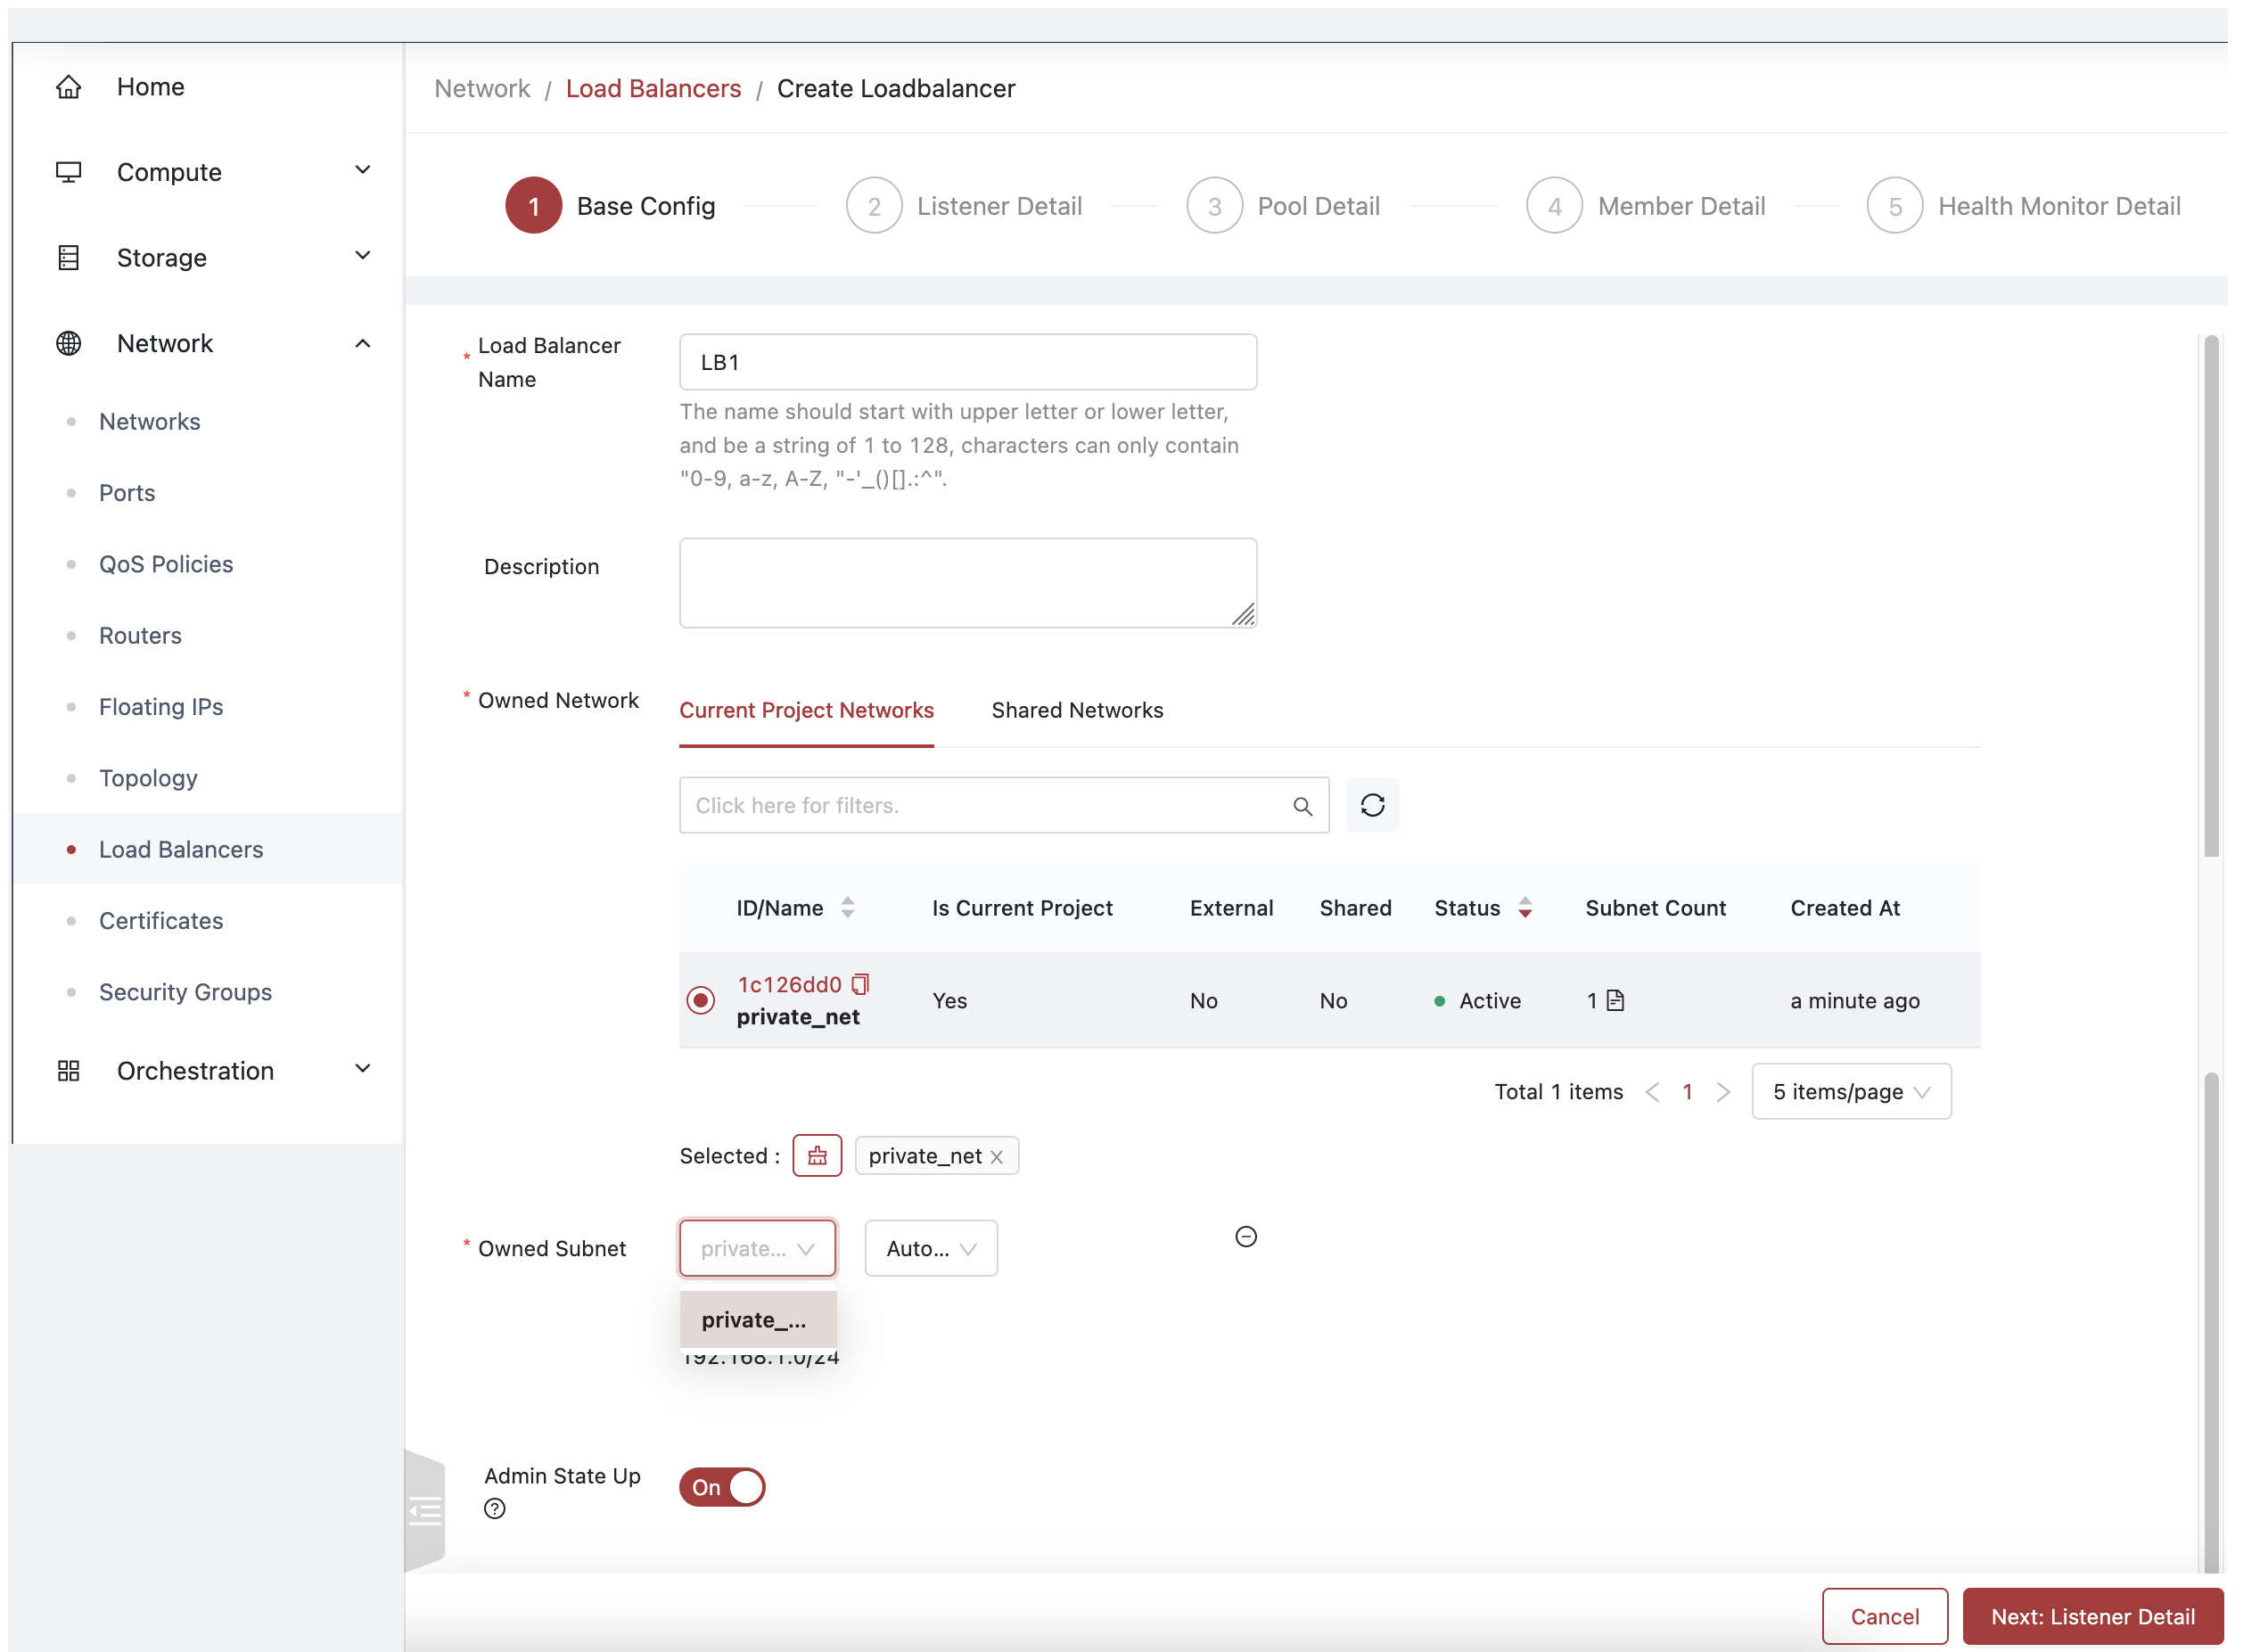
Example of Base Config
- Name: Enter a name for your load balancer.
- Description: (Optional) Add a description.
- Owned Network: Choose the network where the load balancer will be created.
- Owned Subnet: Select the subnet for the VIP (Virtual IP).
- Admin State: Determines whether the Load Balancer should be created in an online, or offline state.
- Click Next: Listener Detail
3: Configure Listener
Next we'll create the 'Listener'. In OpenStack Load Balancers, the listener is an endpoint on the Load Balancer that listens for traffic on a specific protocol/port.
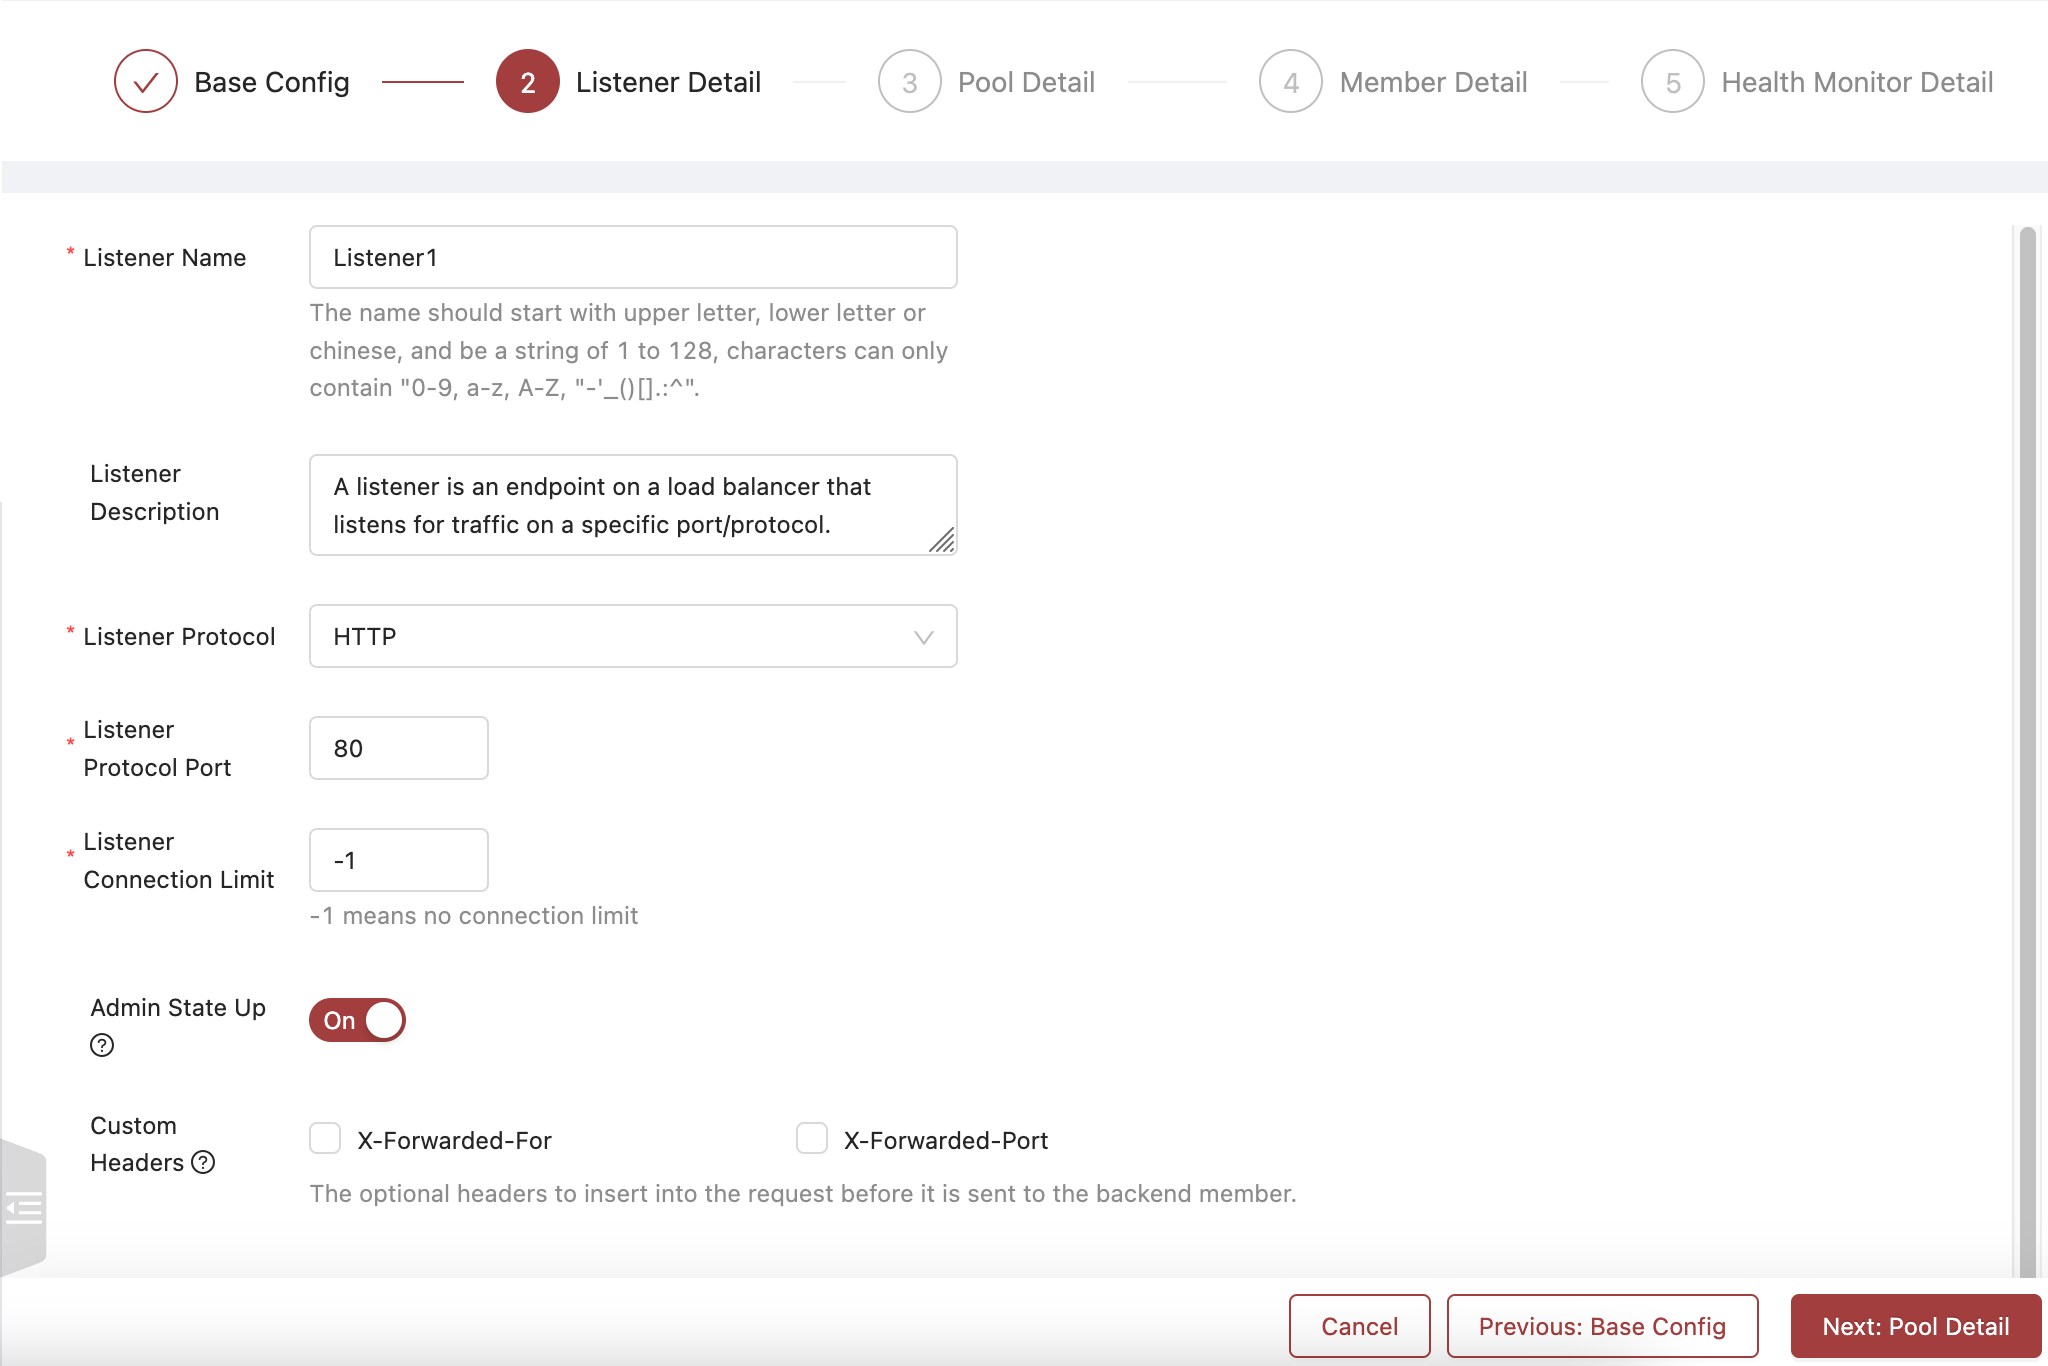
Listener Detail Example
- Name: Give the listener a name.
- Protocol: Choose a protocol (e.g., HTTP, HTTPS, TCP).
- Port: Set the port for the listener (e.g., 80 for HTTP, 443 for HTTPS).
- Admin State: Dictates whether the listener is active or offline.
- Custom Headers: It's suggested that if you're going to use this Load Balancer for web traffic, you enable these options so that you can see additional client information in your web application's logging.
- X-Forwarded-For: A header is included to specify the client IP address
- X-Forwarded-Port: A header is included to specify the listener port
- Click Next: Pool Detail
4: Configure Pool
Now we'll configure the 'pool'. The pool on a Load Balancer refers to a group of servers that are known as 'members' that the Load Balancer will distribute traffic to.
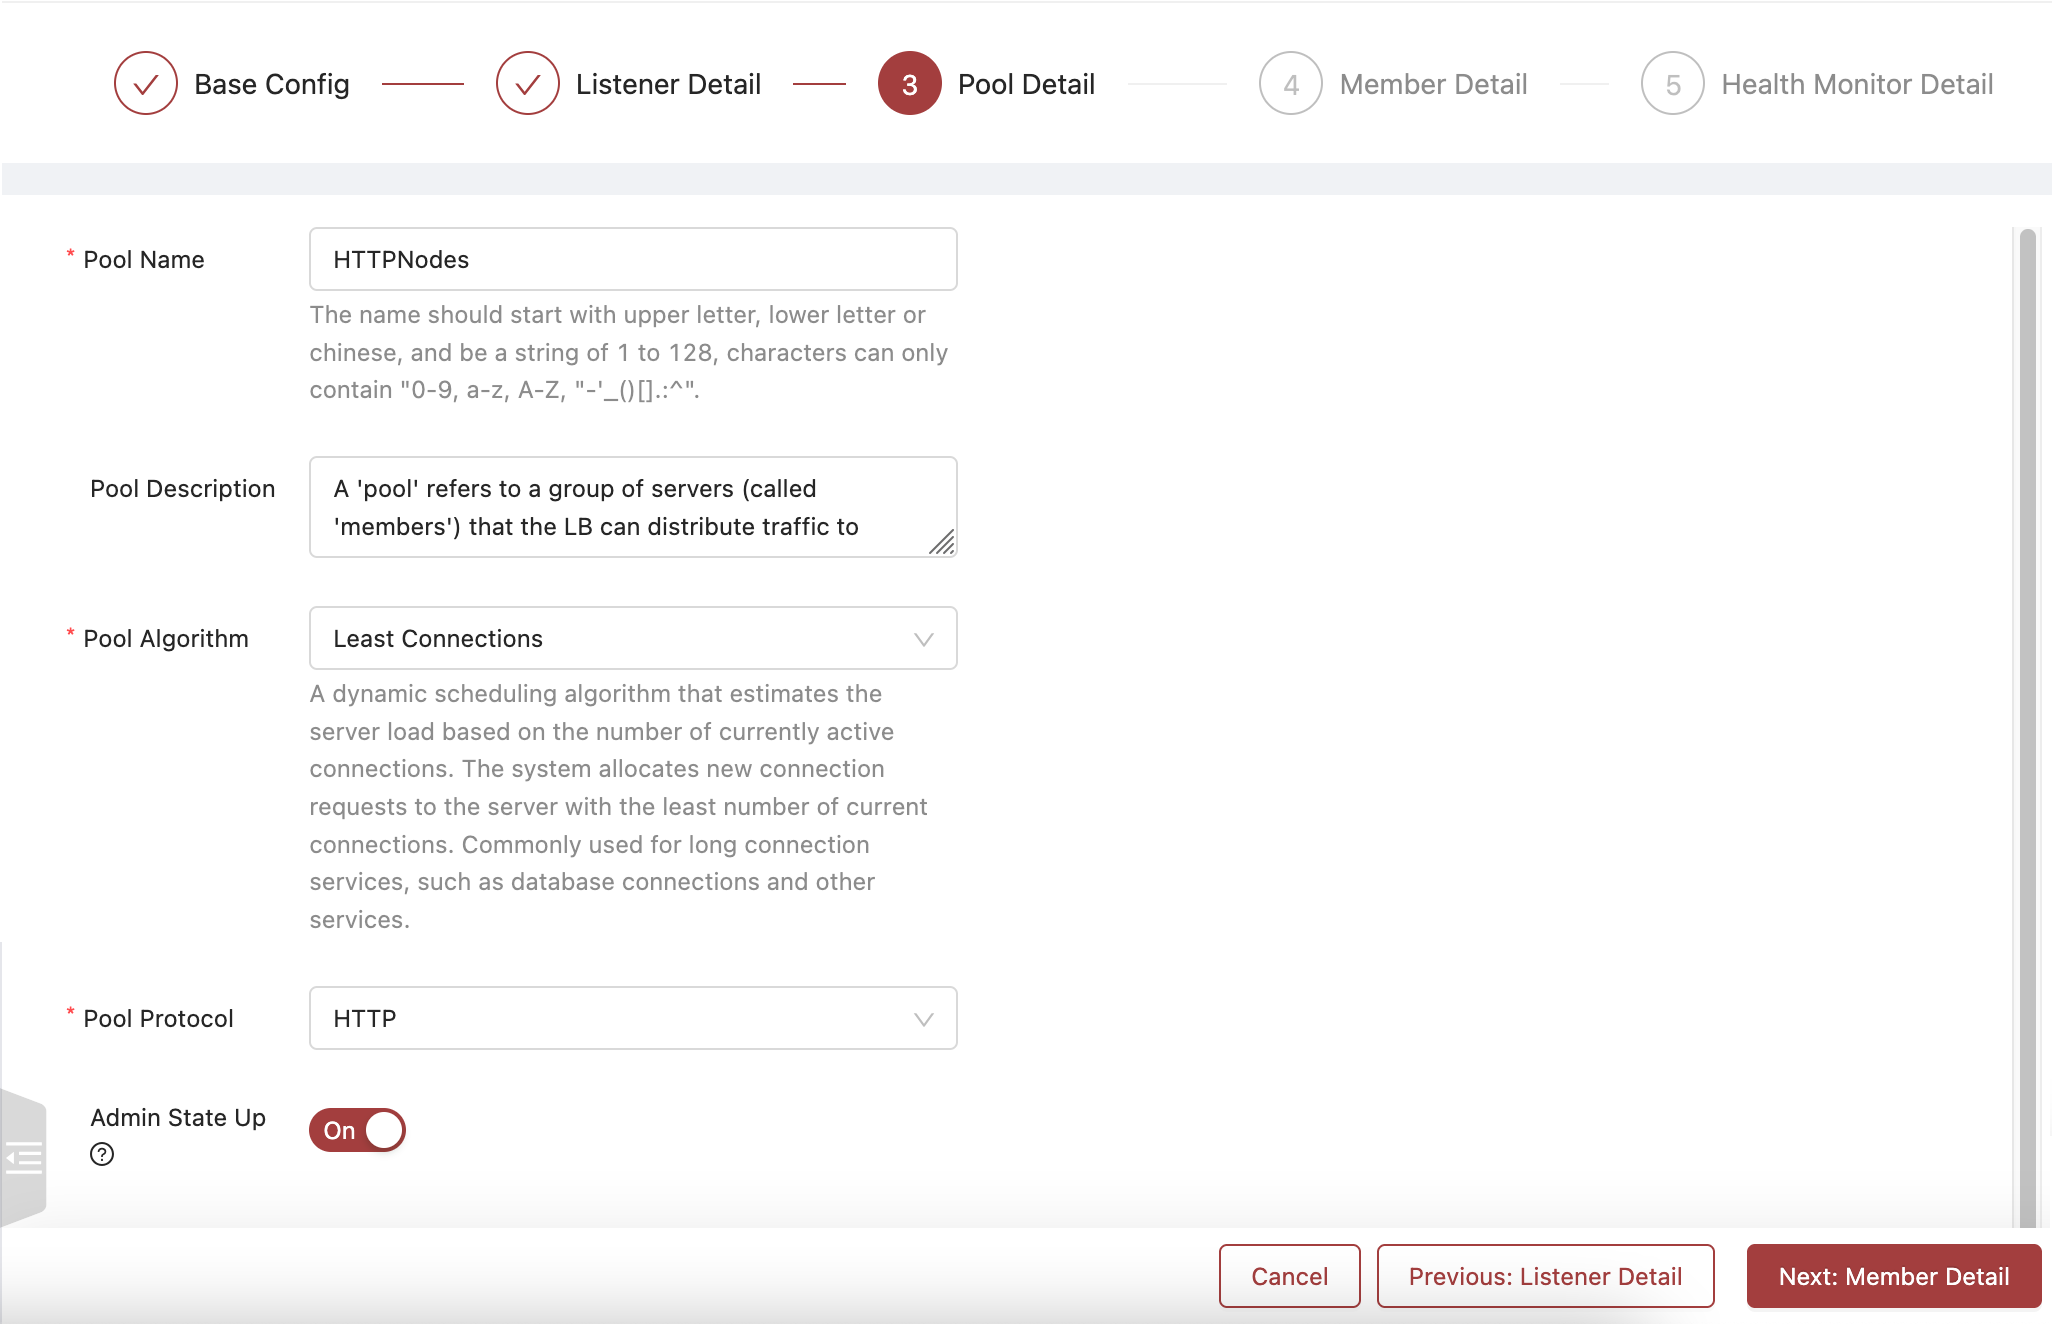
Pool Details Example
- Name: Enter a name for the pool.
- Pool Description: A description of the pool.
- Pool Algorithm: Choose one:
- Round Robin – Distributes requests evenly.
- Least Connections – Sends requests to the instance with the fewest connections.
- Source IP – Sticks clients to a specific instance.
- Pool Protocol: The protocol for the pool, should be the same as the listener protocol.
- Click Next: Member Detail
5: Add Members
For OpenStack Load Balancers, the instances which you add behind the Load Balancer are known as 'members'. Here we'll be selecting the internal IP addresses of our existing instances so that traffic can be passed to them.
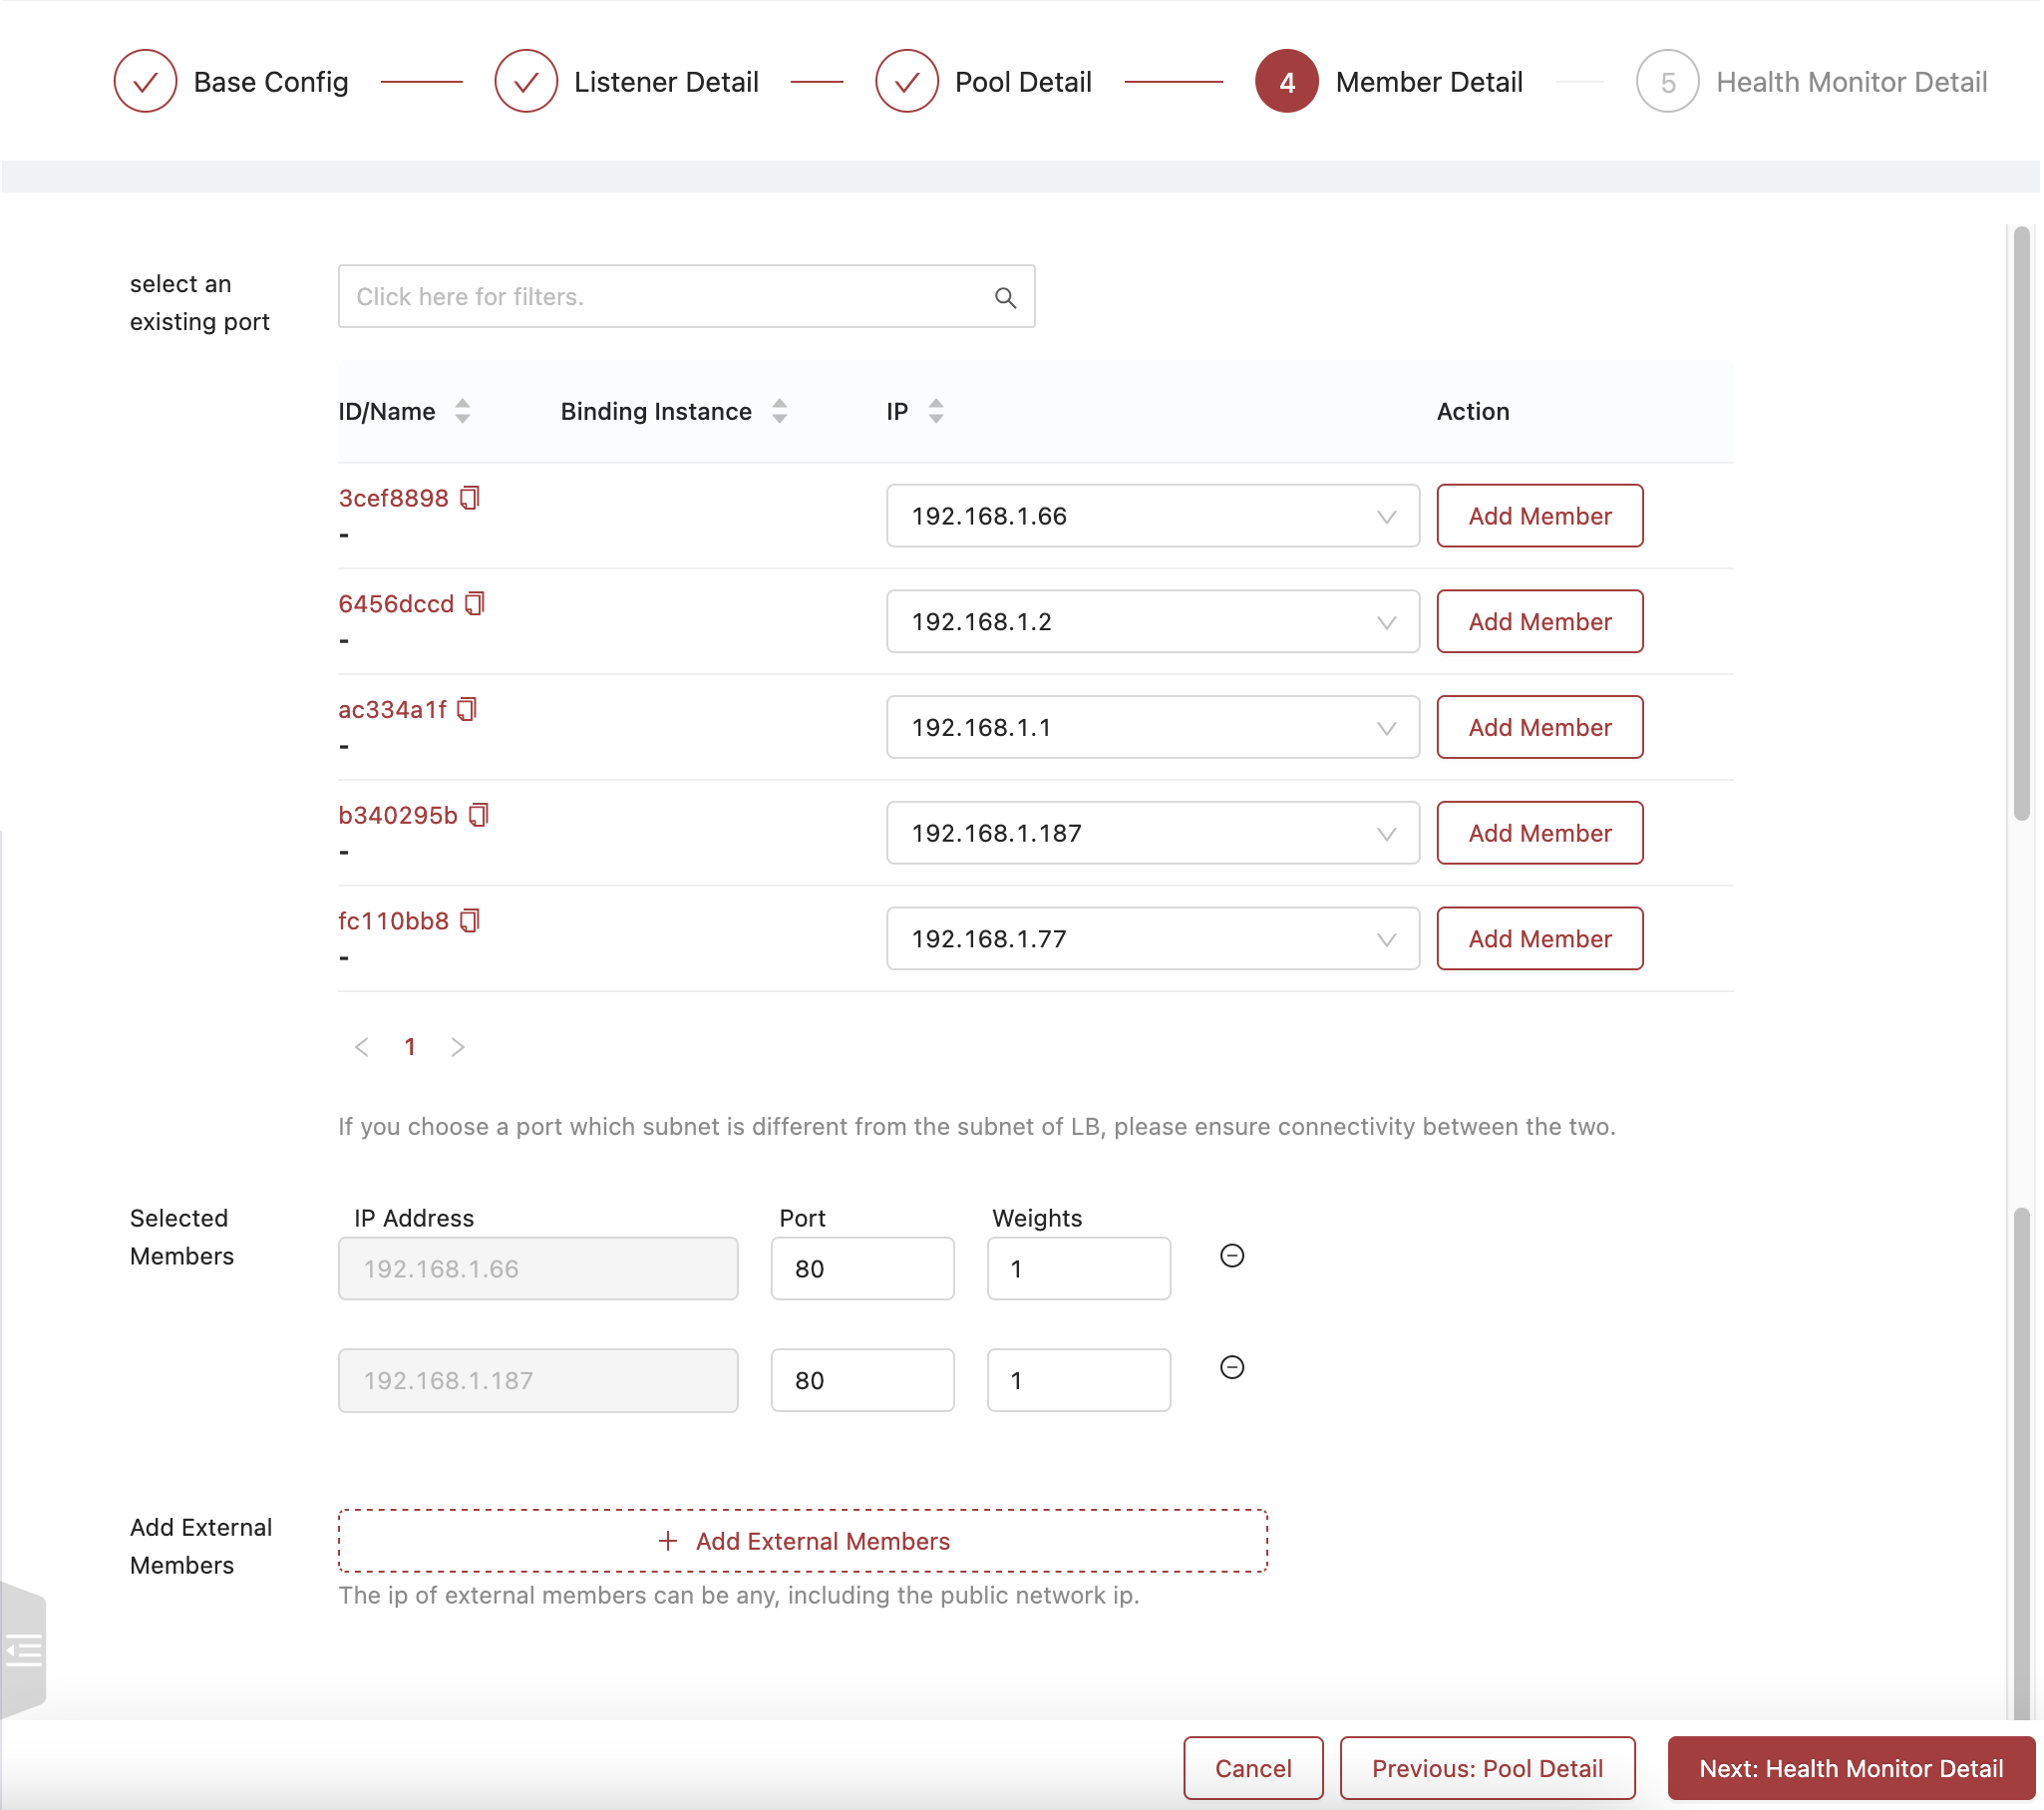
Member Detail Example
-
Click Add Member next to each instance's private IP you want to add.
-
Selected Members:
- Enter the Port and Weights for each of the members you selected.
-
Click Next: Health Monitoring Detail
6: Configure Health MonitorHealth Monitoring allows for remote checks to your members nodes to ensure that they can be reached. If they cannot, they will be placed in an offline state to avoid routing traffic to them. Health Monitoring is optional.
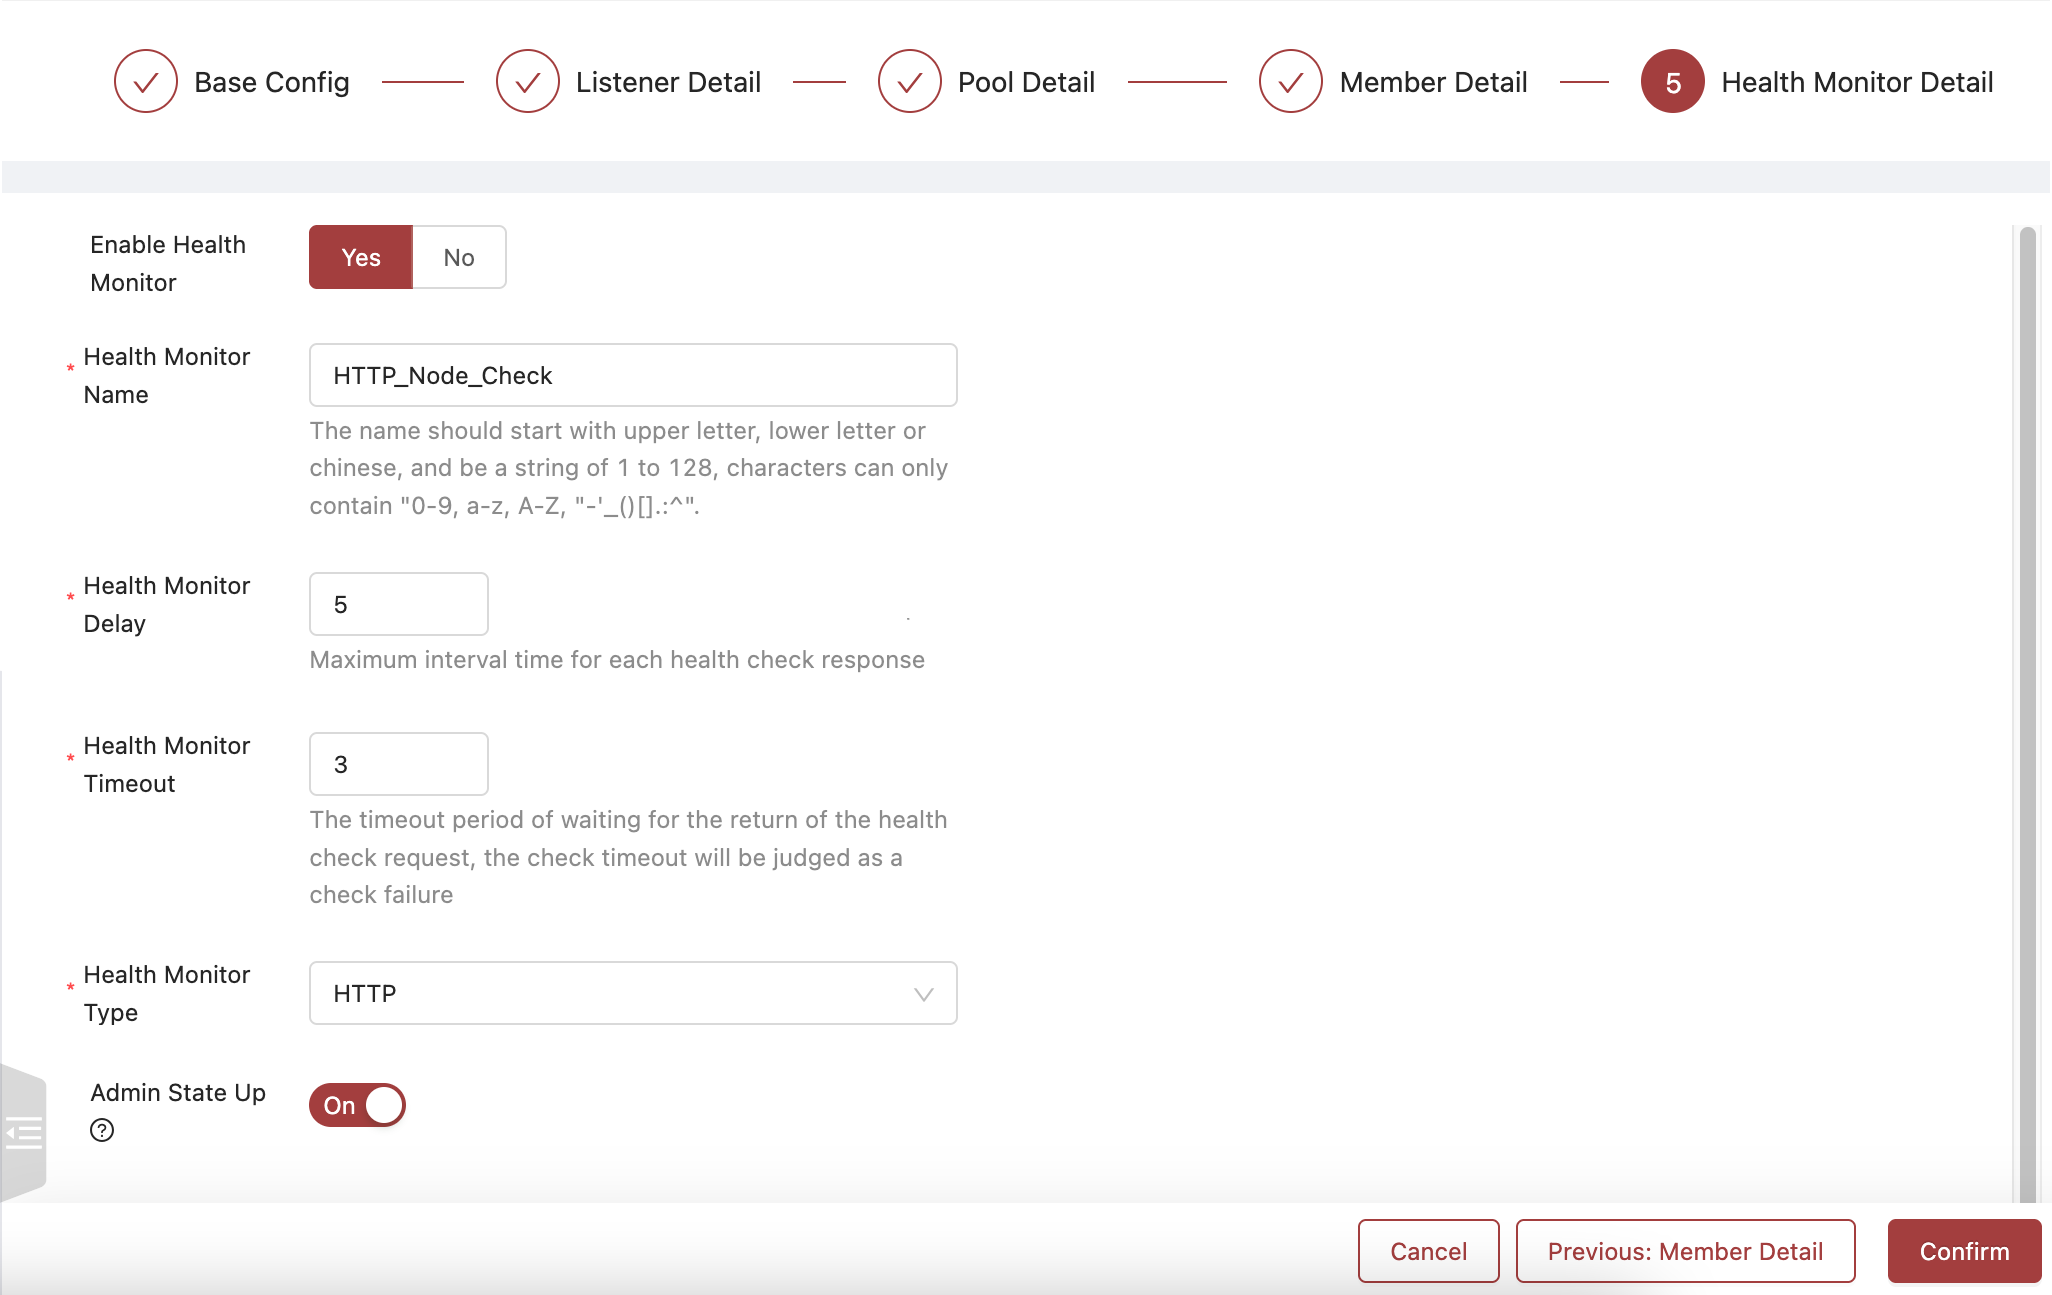
Example Health Monitor
- Enable Health Monitor: Choose Yes or No
- Health Monitor Name: Give this health monitor a name.
- Health Monitor Delay: The maximum interval between each check's response.
- Health Monitor Timeout: How long the check will wait for a response before considering it a time out.
- Health Monitor Type: The type of check being performed.
- Admin State Up: Whether to enable or disable the check.
- Click Confirm to create the Load Balancer.
(Optional) 7: Add a Floating IP Address
If you plan on making your Load Balancer publicly accessible, such as in the case of being the load balancer of a forward facing website, you'll need to add a Floating IP Address to your Load Balancer.
NOTE: If you haven't created a Floating IP before, check this document
- To assign the Floating IP, navigate to Network > Floating IPs > click 'More' beside the unassigned IP and then 'Associate'.
- Switch the 'Resource Type' tab from 'Instance' to 'Virtual Adapter' and choose the Load Balancer.
- Select the Fixed IP to assign the Floating IP with and click OK
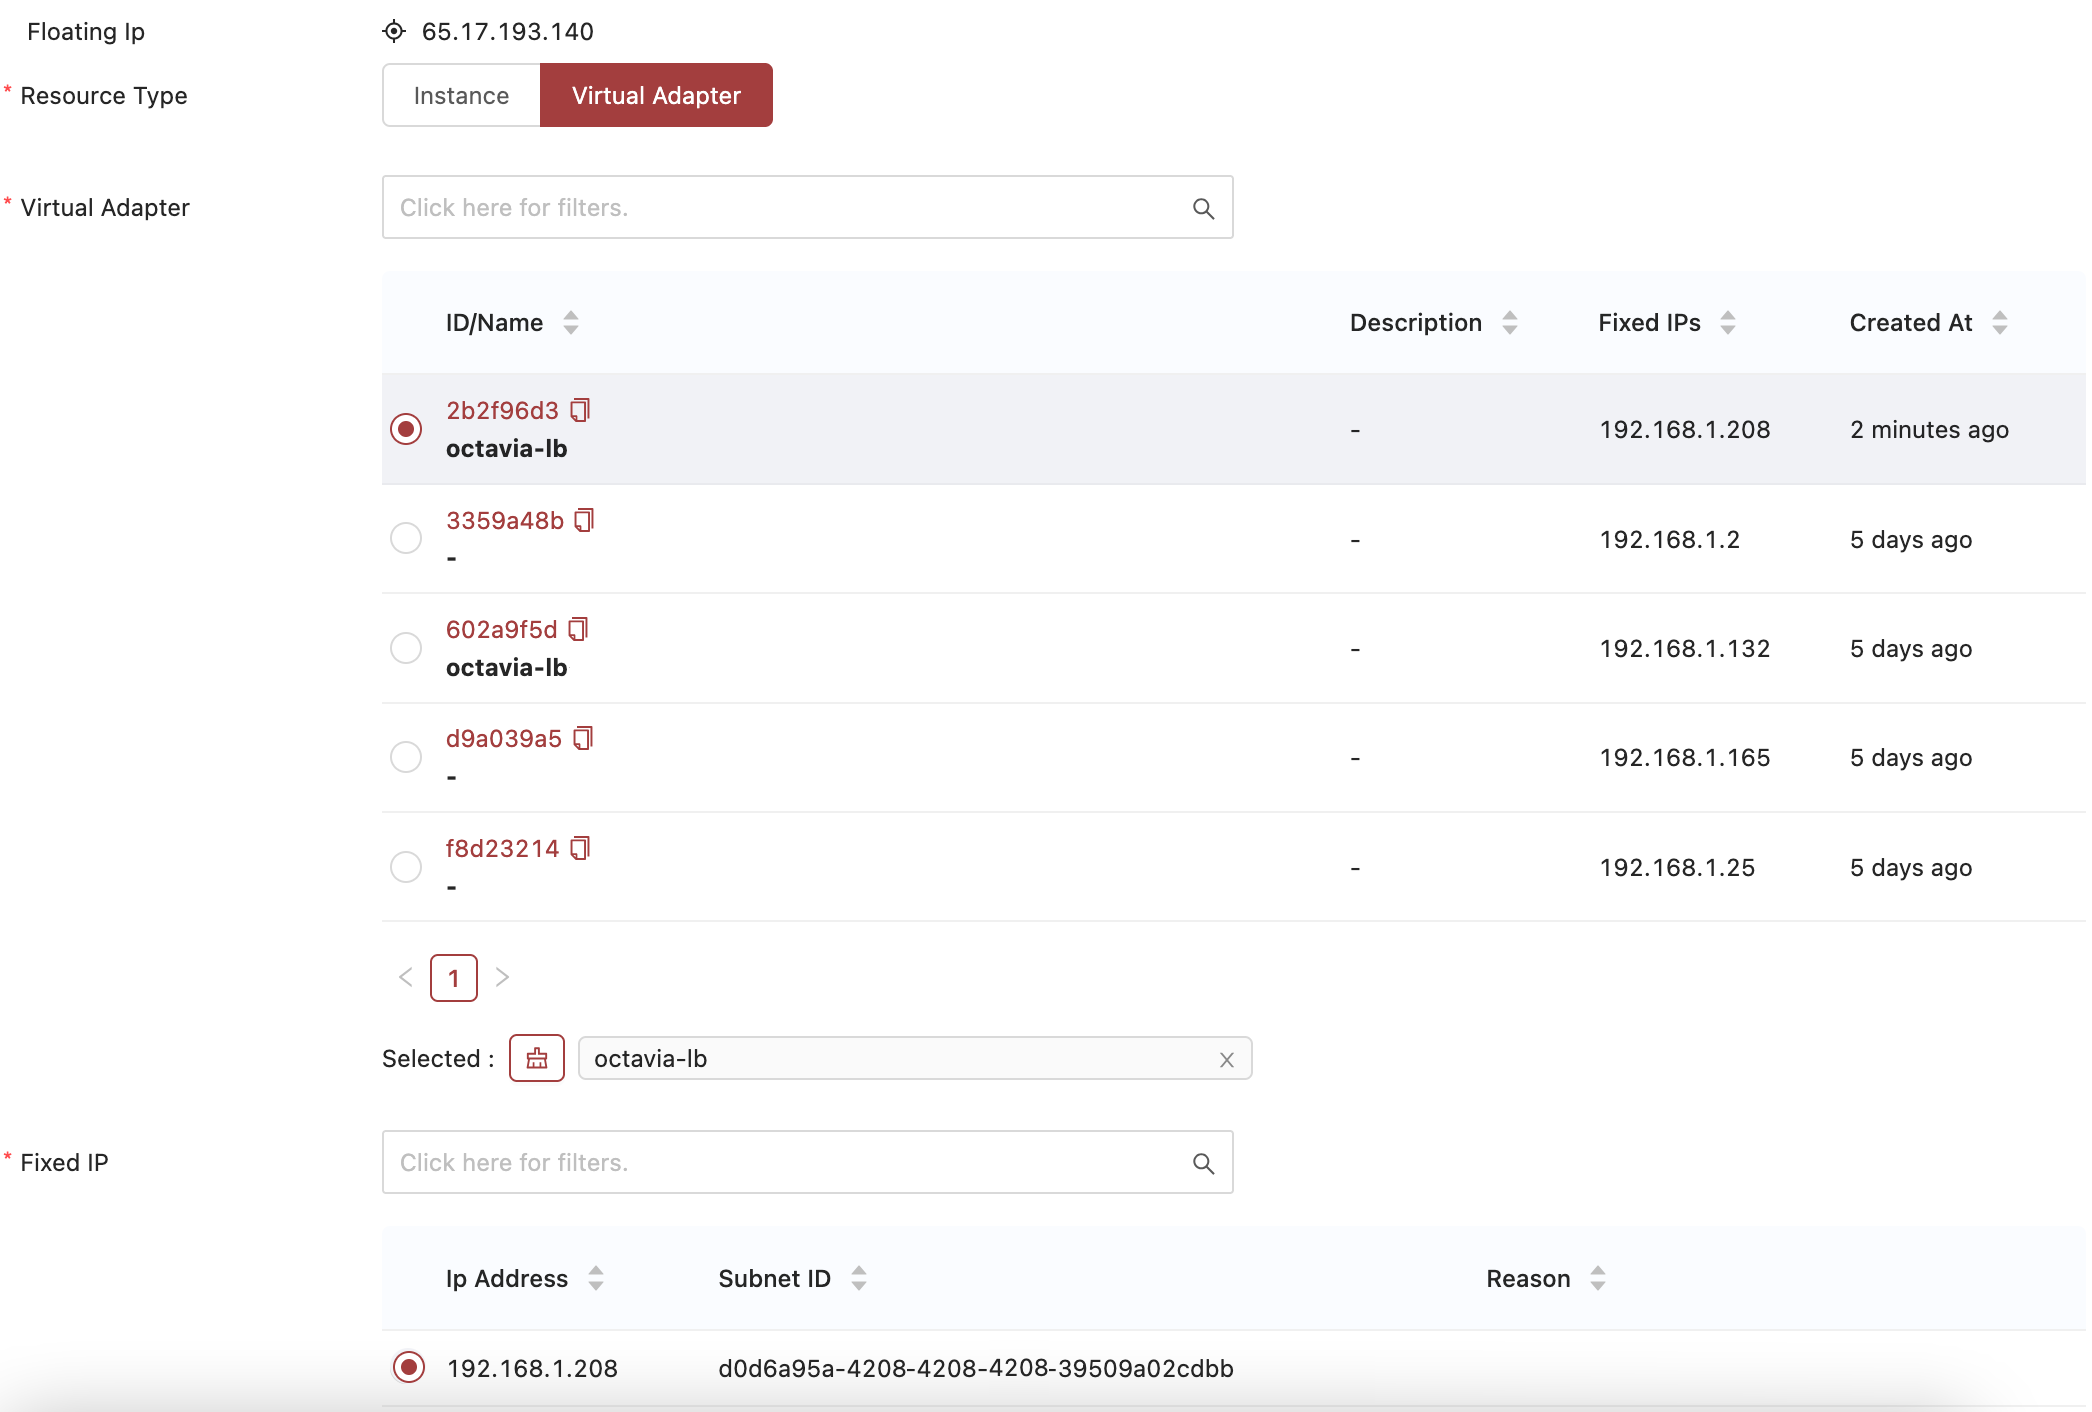
Assigning a Floating IP to a Load Balancer
Confirm
Now that your Load Balancer is set up and ready to serve traffic to your member instances, you'll need to test your application to ensure the traffic flows as expected.
Updated 7 months ago