Manage Your Notifications
Notifications
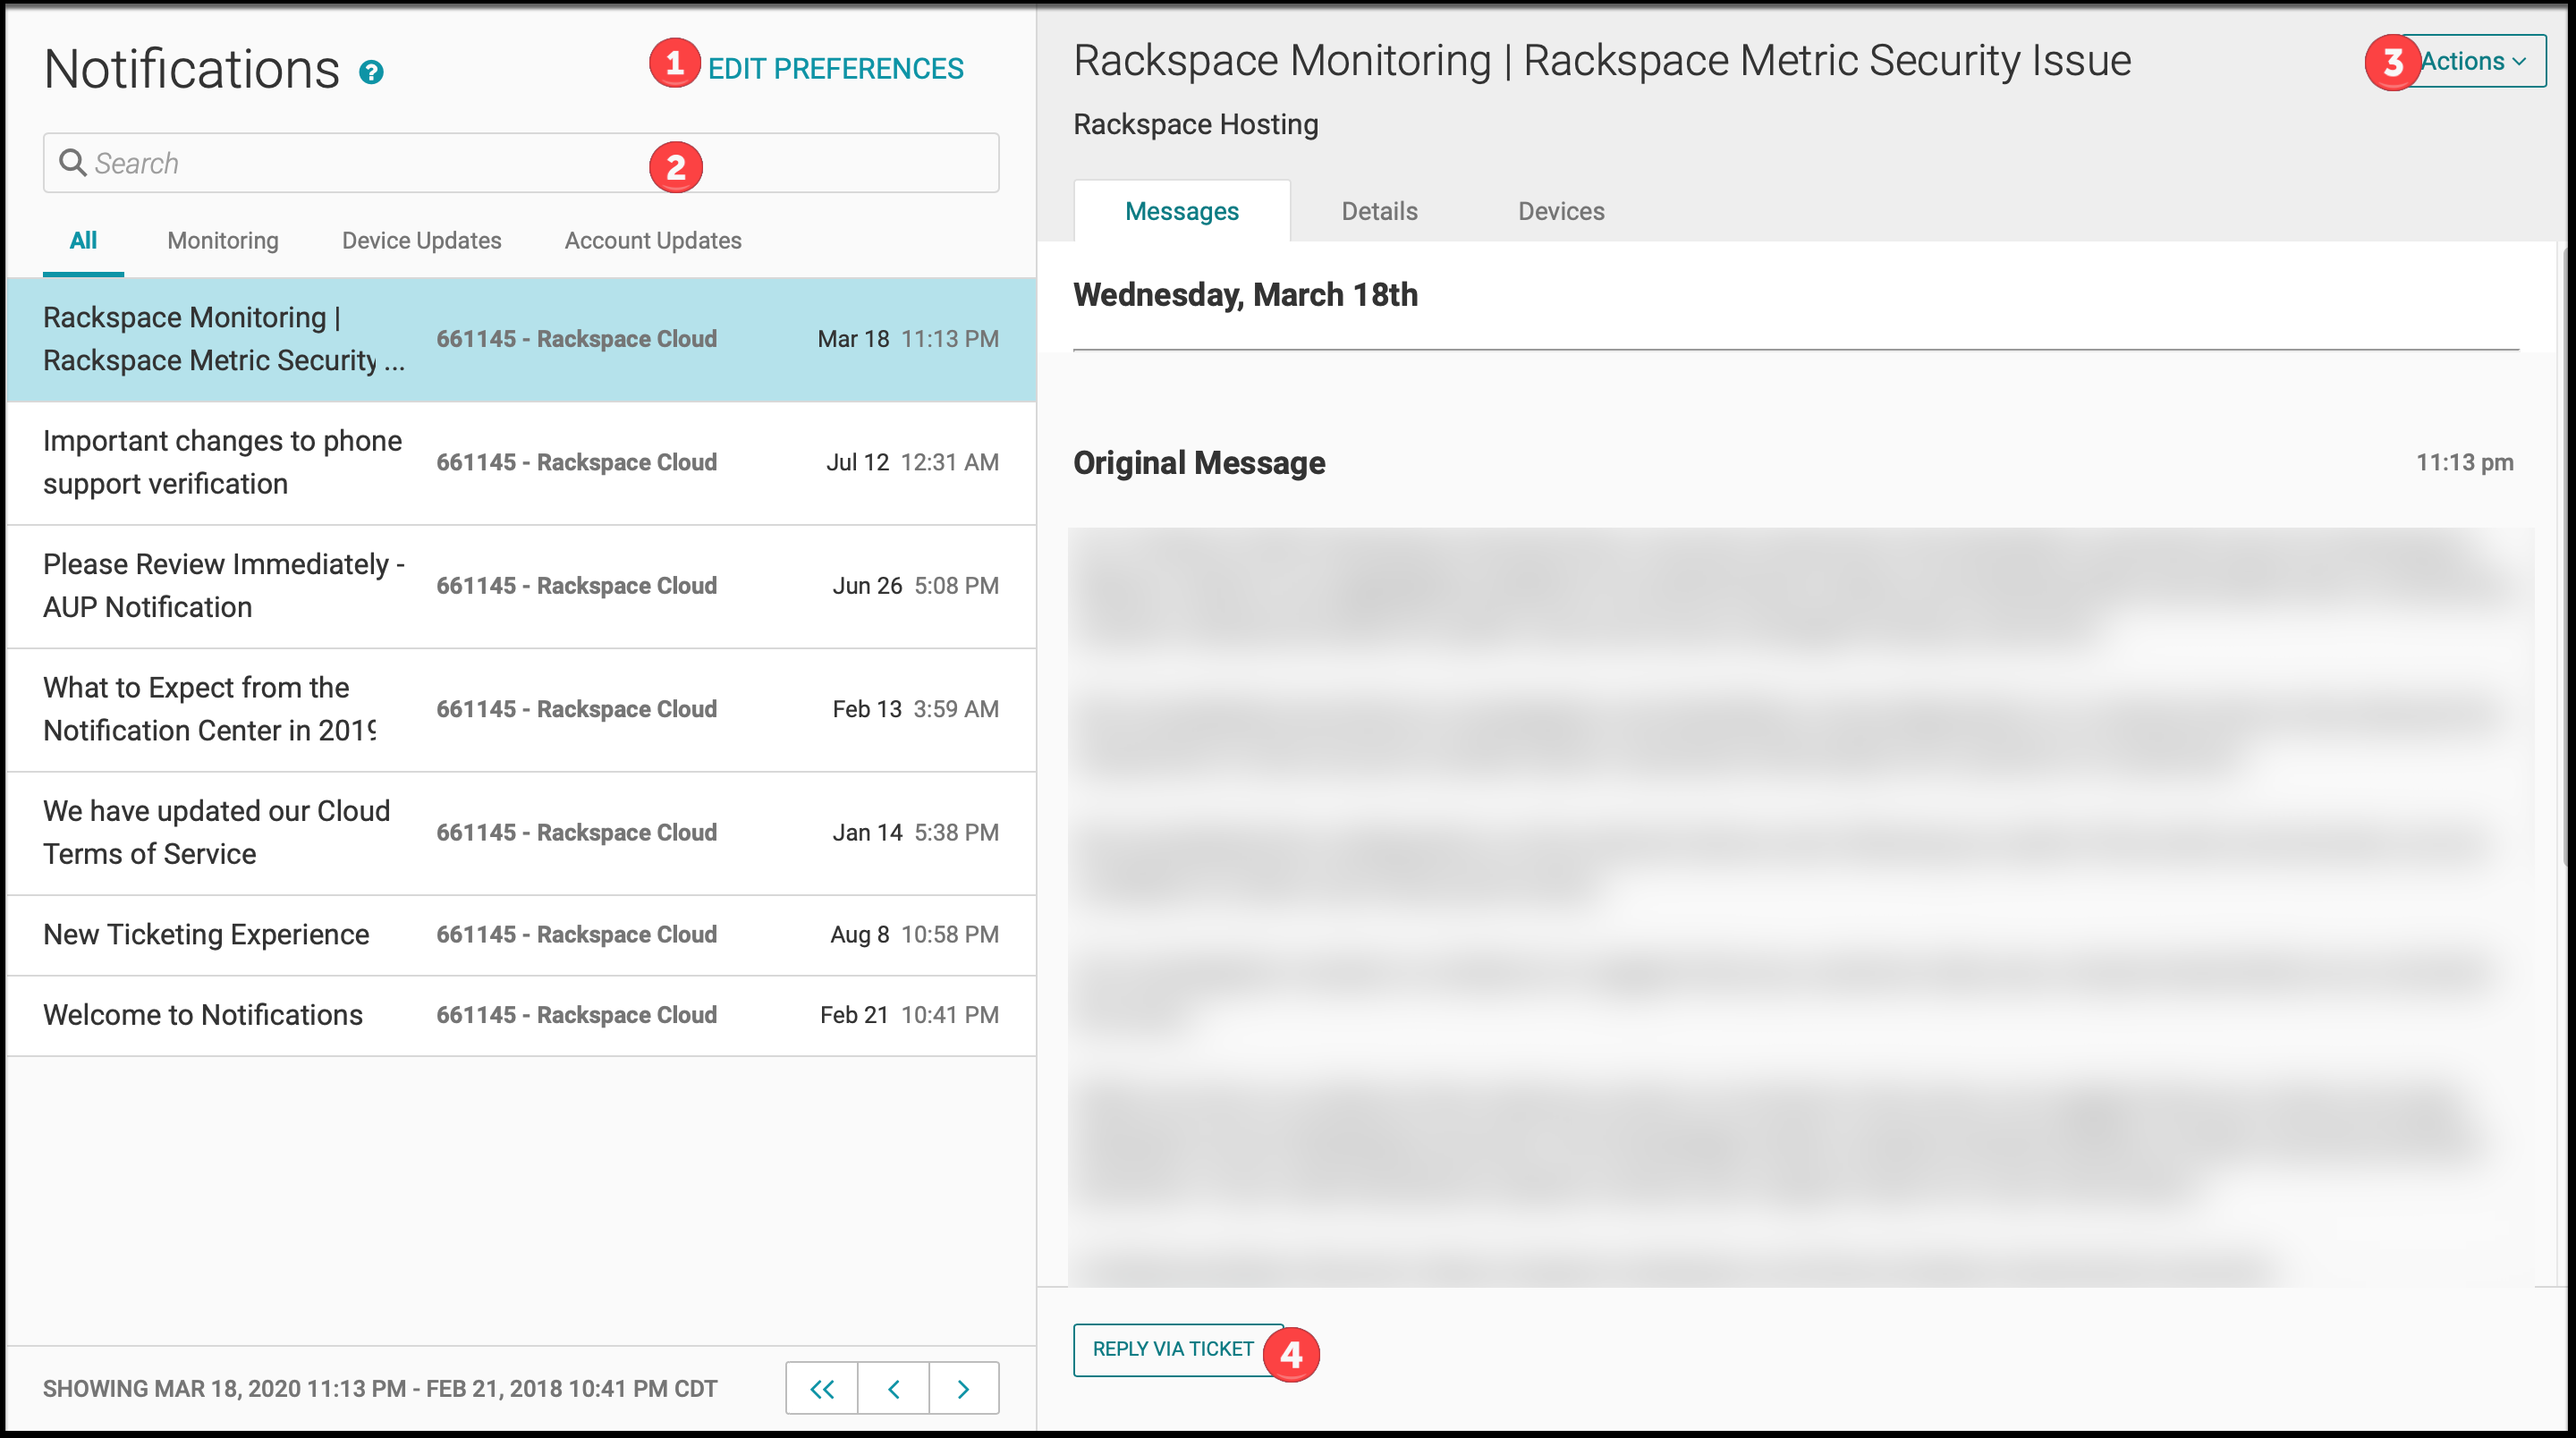
Selecting the Notifications drop-down menu from the main portal dashboard allows you to view important updates related to your account.

You can perform the following actions from the Notifications page:
- Edit notification preferences
- Search and view notifications
- Perform additional actions related to this notification
- Reply to a notification by creating a ticket
Managing Account Notifications
Use the notifications drop-down menu from the global navigation menu to view and edit notifications for all users on your account.
Filter and View Notifications
Select the Notifications tab from the global navigation drop-down menu to display the Notifications page.
- To sort by notification type, select the tabs above the notifications list.
- To search by keyword, use the search bar above the notification list
- To display additional information, select a notification.
Reply to a Notification by Creating a Ticket
Use the following steps to create a ticket to reply to your notification.
- Select a notification from the notification list.
- Click Reply Via ticket from the bottom of the page or select the Actions dropdown at the top of the page and click Reply via ticket.
- Enter a detailed description in the text box and select Create Ticket.
My Notification Preferences
You can make updates to how your account receives standard notifications by selecting My Notification Preferences from the user settings drop-down menu.
Current options are within the Rackspace portal or by email.
If there is a critical event about which you need to be immediately informed, Rackspace might override your user settings.
Edit User Notification Preferences
If you are an administrator then you can edit notifications for the entire account:
- Select the Notifications tab.
- Select Edit Preferences in the upper-right of the notifications list.
- Select from the Users, Categories, and Devices tabs and use the checkboxes to edit your preferences.
You can’t disable Rackspace portal notifications.
Situation Tickets
In addition to manual tickets that you and the Rackspace Technology support team generated, there are also system-generated tickets, known as situation tickets.
Rackspace Technology uses artificial intelligence to help streamline how your notifications work. In this process, an AIOps integration maps the event properties to the AIOps data fields and identifies the source event as an AIOps event. These events are grouped into a single alert called a situation. This technology collects events as raw data and uses machine learning to group them based on similarity into situation tickets.
AIOps groups events by using machine learning algorithms, based on their similarities.
Alerts can be grouped or clustered in several different ways, including:
- by arrival time
- by the time, text string, or description
- by a deterministic logic set up by your administrator
AIOps also correlates with information from other systems. AIOps identifies any information that is related to the situation ticket and notifies the necessary people. AIOps also identifies and suggests for any similar historical tickets.
Interpret a Situation Ticket
The following section explains how to interpret the three parts of a situation ticket:
- Subject line
- Initial and additional comments
- Ticket summary
Subject Line
When a situation ticket is generated or AIOps adds alerts to the situation, the subject line dynamically updates to reflect the most recent information.
The following table describes the parts of a situation ticket subject line:
| Section | Description |
|---|---|
| Situation number | A unique situation number. |
| Alert description | The number of alerts associated with the situation ticket. |
| Alert count | The number of alerts associated with the situation ticket. |
| Ticket number | A unique ticket number. |
Initial and Additional Comments
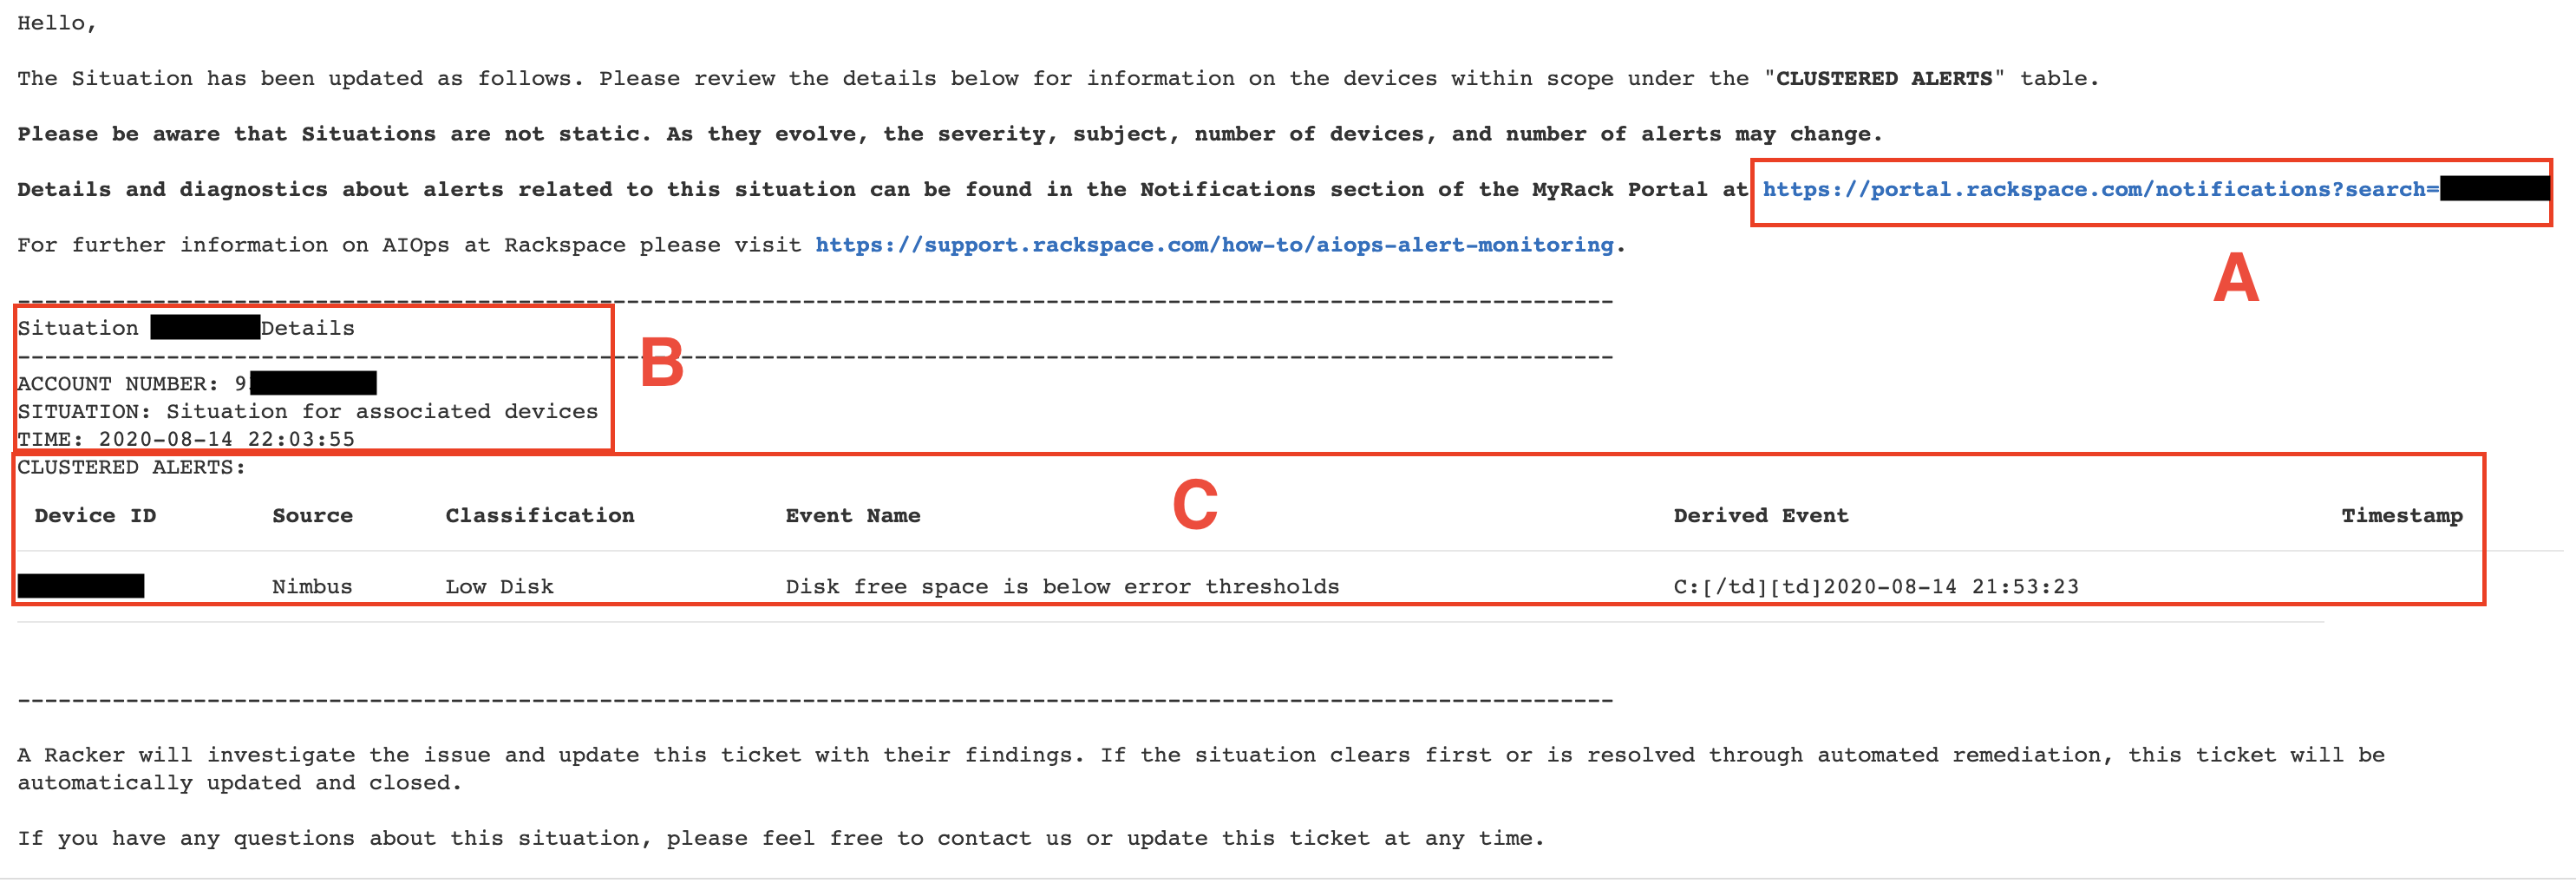
Situation tickets update when AIOps adds an alert to the situation. Each update includes the new alert, a link to the situation, and the Rackspace Notification System (RNS). The following image shows an updated sample situation ticket:****
The following table explains how to interpret a situation ticket.

| Section | Description |
|---|---|
| A | Notifications Link: Shows the link to the notifications. Click the link to view the associated alerts on the Notifications page of the Rackspace Technology Customer Portal. Important: You do not see notifications for devices for which you do not have permissions. If you do not see any related notifications, review your device permissions. After you adjust the permissions, you will see alerts generated from that point forward. |
| B | Situation Details: Shows the unique situation number, the Account Number associated with the situation, and the date and time the system generated the situation ticket. |
| C | Clustered Alerts: Lists the alerts associated with the situation ticket. |
Ticket Summary
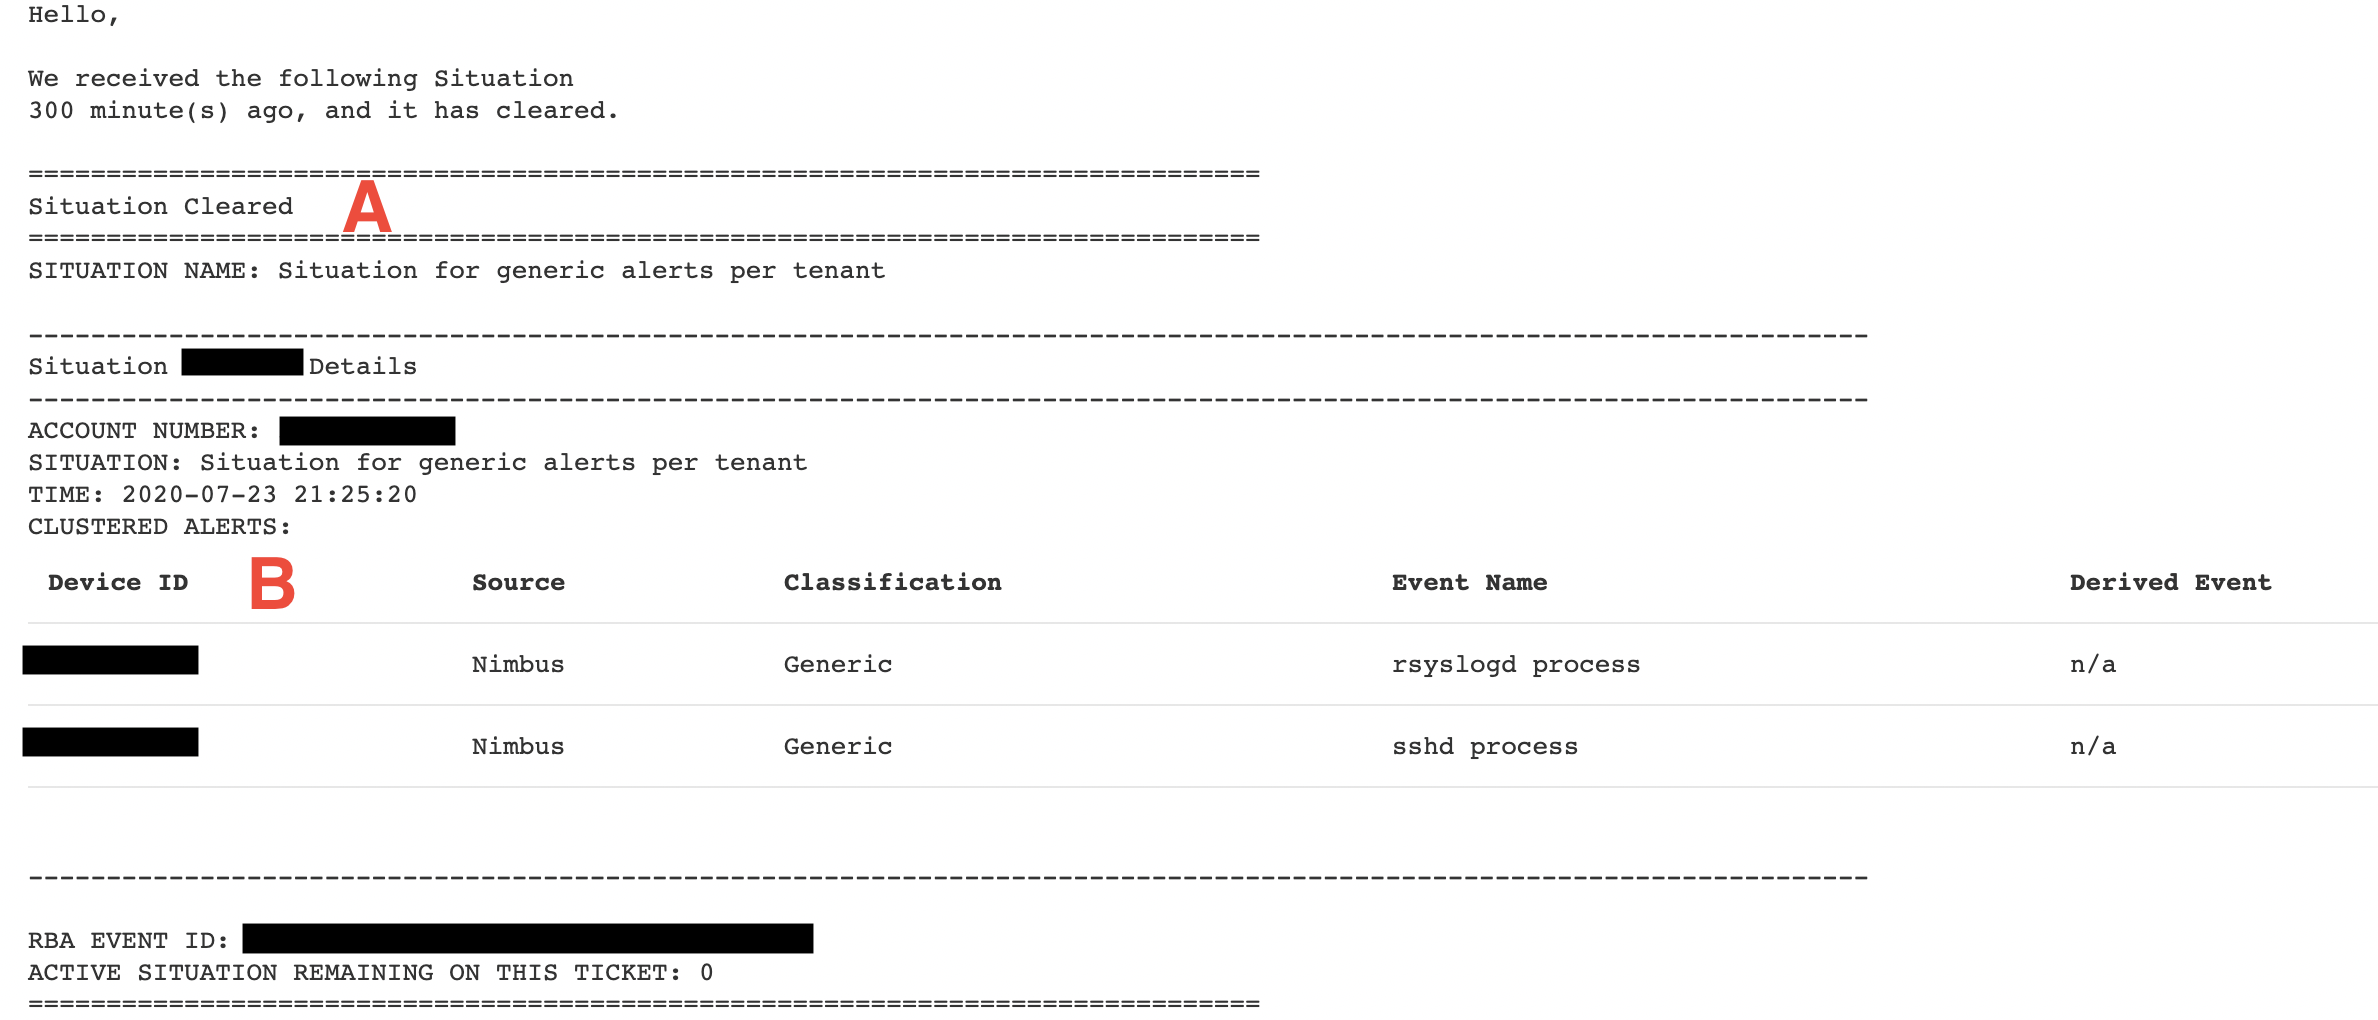
When the support team clears a situation, the system updates the situation ticket with summary information.
The summary includes all alerts associated with the ticket, including any alerts that you did not previously receive because they were initially internal to Rackspace Technology.

Refer to the following table to understand how to interpret a situation ticket summary:
| Section | Description |
|---|---|
| A | Situation Cleared: Identifies a resolved situation as cleared. |
| B | Clustered Alerts: Lists the alerts associated with the situation ticket that have also been cleared. |
Navigate to Alerts in RNS
The Rackspace Notification System (RNS) contains all alerts associated with a situation ticket. From within the ticket, you can navigate to the Notifications page in the Rackspace Technology Customer Portal.
To navigate to the Notifications page, click the link in the ticket.

RNS filters the Notifications page to include only the notifications associated with the selected situation ticket. On the Notifications page, you can perform the following actions:
- Use the left panel to select the alert you want to view.
- Use the right panel to see the alert message, view its details, and see the associated device.
- Click Actions to reply to the ticket or modify preferences so that you do not receive notification emails for each alert posted to the Notifications page.

Notification Emails
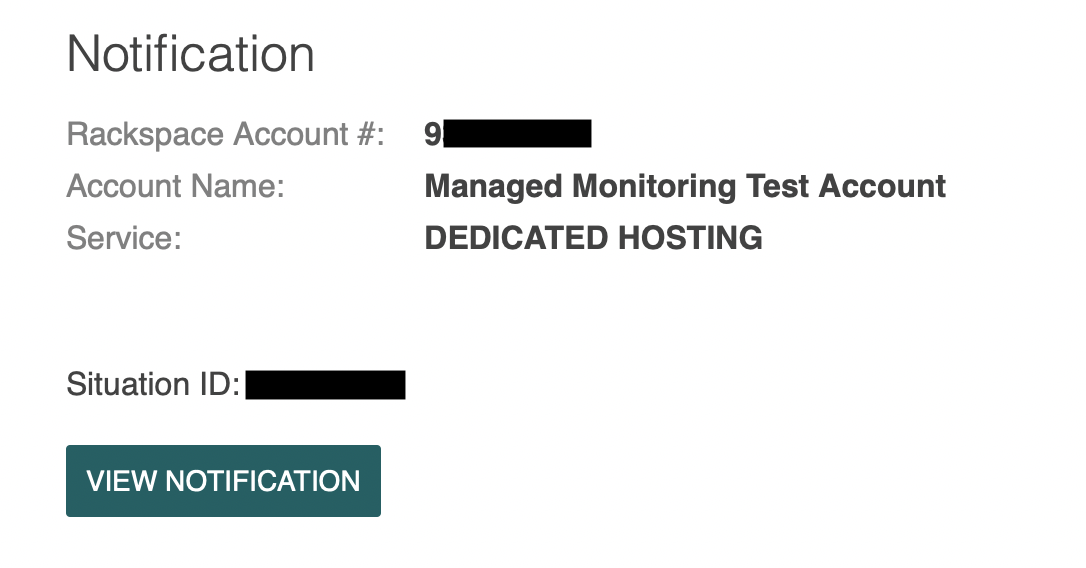
By default, the notification system sends you an email for each alert associated with a situation ticket. This default setting means that you receive an email for each situation ticket and all associated alerts. To receive emails for only the situation ticket, refer to Configure notification email preferences.

Configure Notification Email Preferences
By default, you receive an email for a situation ticket and associated alert notifications. This setting can produce many emails. For example, when a server goes down, you receive a ticket email and separate alert notification emails informing you of insufficient memory, unavailable Apache® service, and a Secure Shell (SSH) error.
You can modify notification preferences to reduce the number of emails you receive. You can turn off email notifications globally for all devices or select the devices for which you do not want to receive email notifications.
NOTE:When you turn off email notifications, either globally or for specific devices, you do not receive any notification emails, including warning notifications that are not associated with a situation ticket.
For example, consider a disk usage scenario where the monitoring system generates a warning alert at 75% usage and an error alert at 90% usage. In this scenario, RNS displays the 75% warning alert but does not generate a ticket. When disk usage exceeds 90%, the monitoring system generates a ticket.
Updated 3 months ago