
SDDC Business Networking
SDDC Business Networking
This section explains networking concepts that are important to understand when you use the SDDC platform.
Understanding Distributed vSwitches
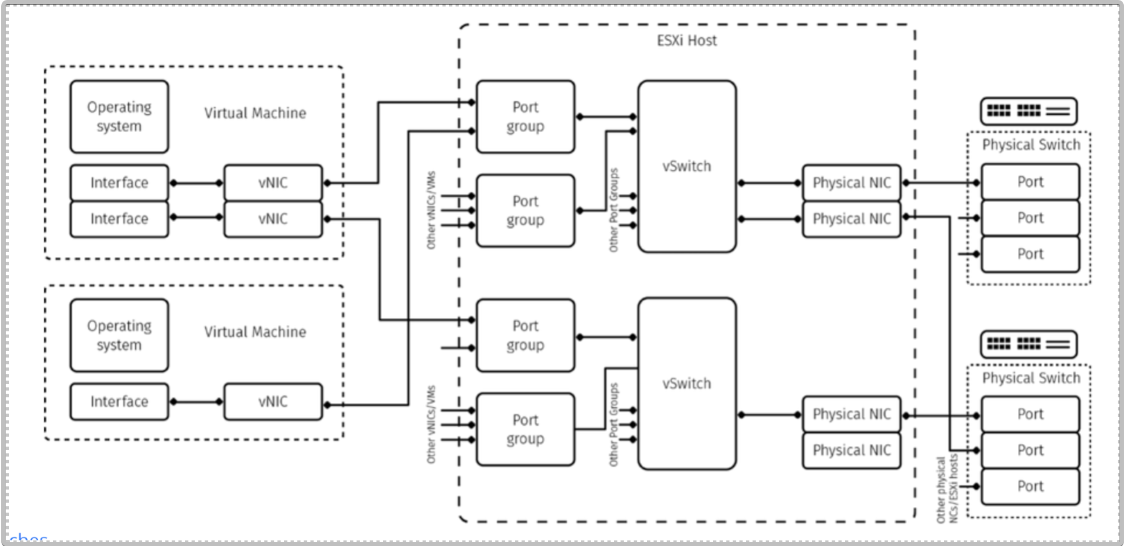
Within ESXi, a Distributed vSwitch is a virtual switch, which is a logical construct that provides a link between uplinks and port groups. A vSwitch can use multiple uplinks and manage multiple port groups.
If a Distributed vSwitch uses two or more uplinks, a vNIC can only use one uplink at a time. For example, if you have two 1000 Gbps uplinks connected to the vSwitch and your VM connected to the port group connected to that vSwitch, the maximum theoretical bandwidth for that VM is 1000 Gbps, rather than 2000 Gbps.
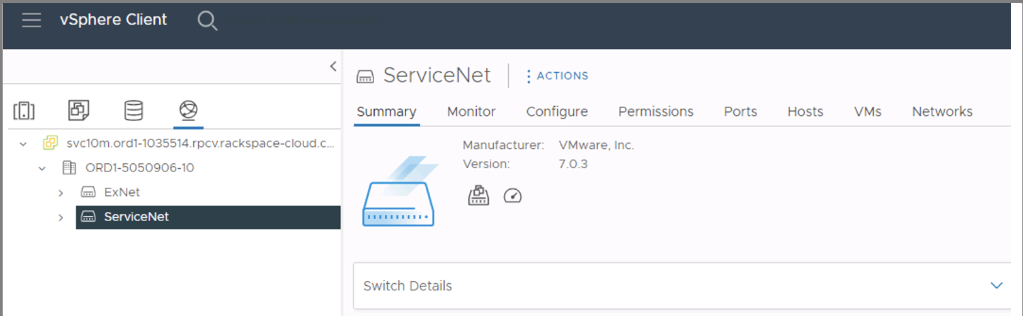
By default SDDC Business is configured with two Distributed Switches:
ExNet - Private, customer-specific network segments usually representing VLANs hosted behind single tenant firewalls or load balancers.
ServiceNet- Backend network that most servers attach to with Rackspace-assigned 10.128.0.0/17 IPs used to reach internal services such as backup.
The following diagram illustrates virtual and physical networking components and their relationships to each other:
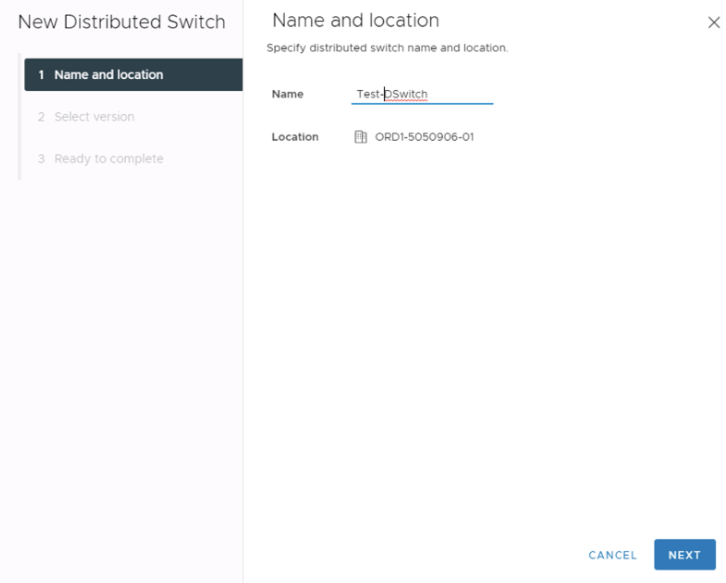
Adding a New Distributed vSwitch
-
Open the VMware vSphere Client or the VMware vSphere Web Client, and connect to the vCenter Server.
-
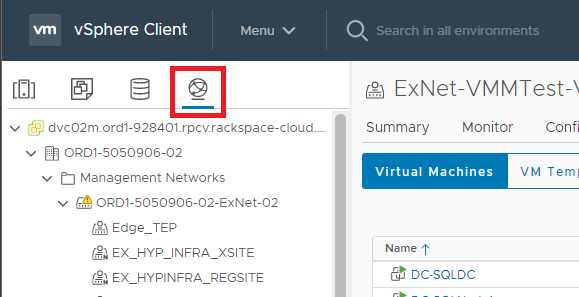
In the inventory panel, click on Networking.
-
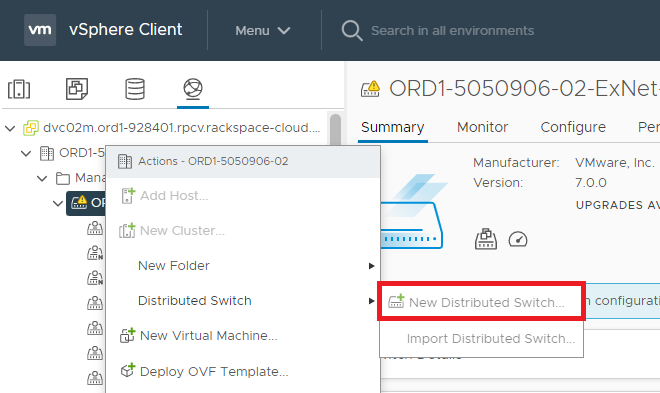
Select the datacentre where you want to create the dvSwitch. Right-click on the datacenter and select New Distributed Switch from the context menu. This will open the New Distributed Switch wizard.
-
Name your DvSwitch, click Next.
-
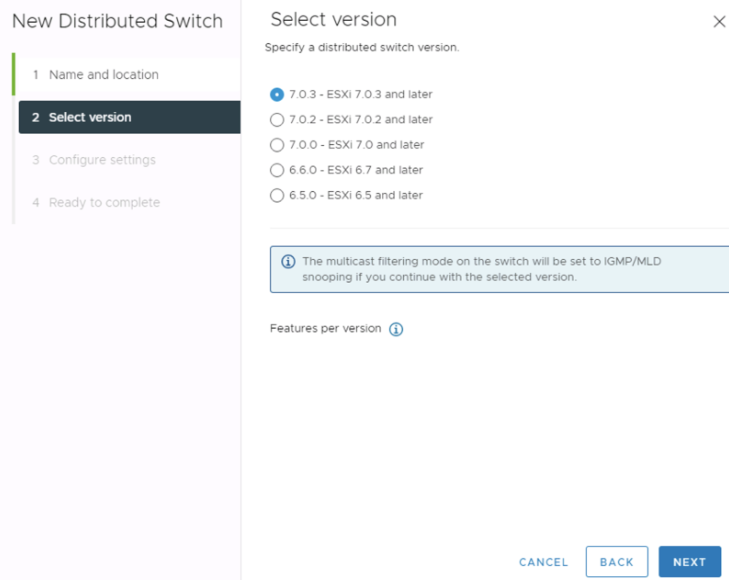
Select the version, we recommend the latest. Click Next.
-
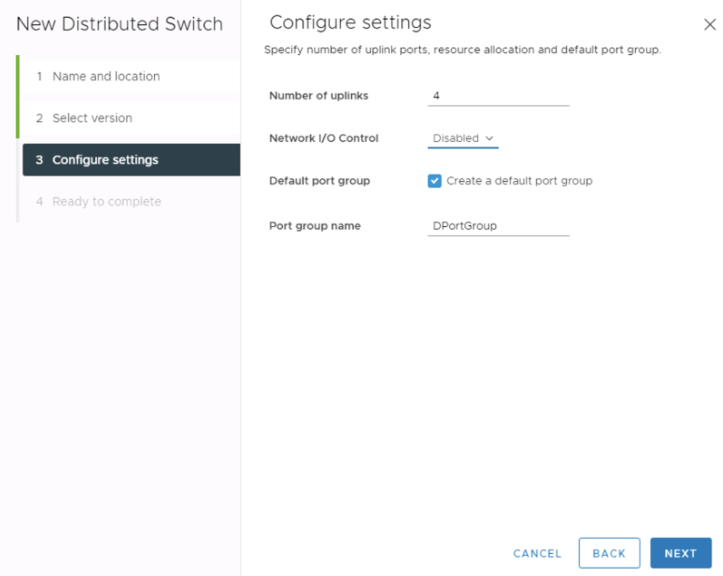
Configure the settings based on your requirements, click Next.
-
Review your setting, click Finish to start the DvSwitch creation.
Understanding Uplinks
An uplink is the physical interface between the hypervisor and the physical switch. An uplink is assigned to only one Distributed vSwitch. You can refer to an uplink as VMnicX, with X being a sequential number of a physical network ports on the hypervisor.
Understanding Port Groups
A port group is a logical construct on the Distributed vSwitch to which vNICs can connect. A port group typically has a name and a VLAN ID. One port group can serve multiple vNICs.
Understanding vNICs
A vNIC, or virtual network interface card, is a piece of the VM’s virtual hardware. A vNIC provides an interface for the OS and connects to a port group.There are multiple types of vNICs, such as E1000 or E1000E. We recommend using VMNXET3 for all VMs.
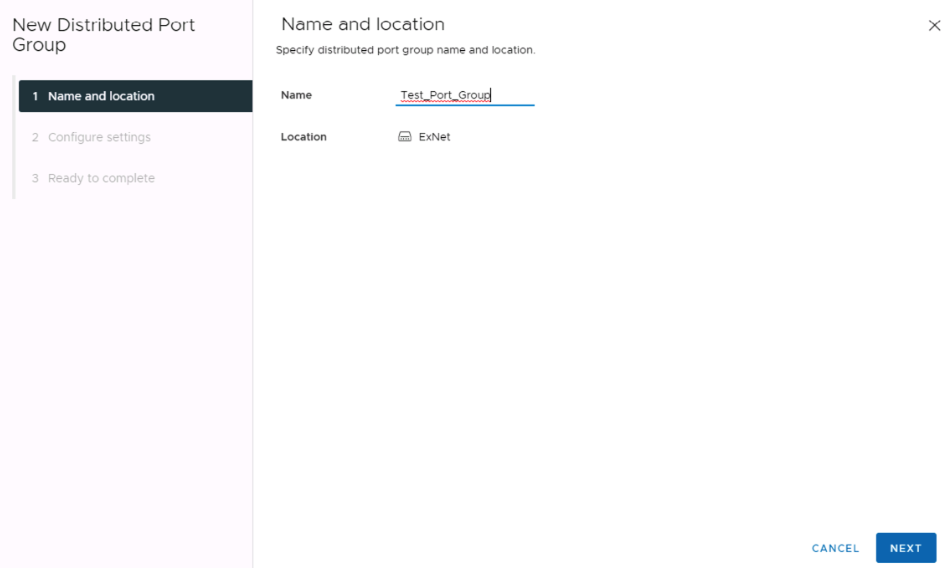
Adding a New Port Group
- Open the VMware vSphere Client or the VMware vSphere Web Client, and connect to the vCenter Server that manages the dvSwitch you want to add the port group to.
- In the inventory panel, click on Networking.

- Select the dvSwitch you want to add the portgroup to.
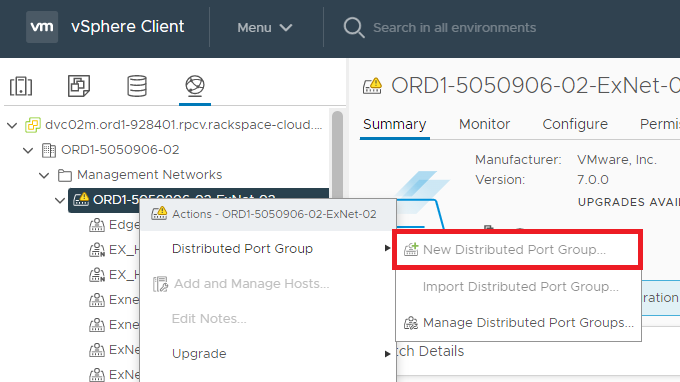
- Right-click on the dvSwitch and select Distributed Port Group then New Distributed Port Groups from the context menu. This will open the New Distributed Port Group wizard.
- Enter the name for the port, click Next
- Choose the VLAN type for the port group. You can choose VLAN to specify a specific VLAN ID, or None to create an untagged port group.
- If you chose VLAN in the previous step, enter the VLAN ID for the port group.
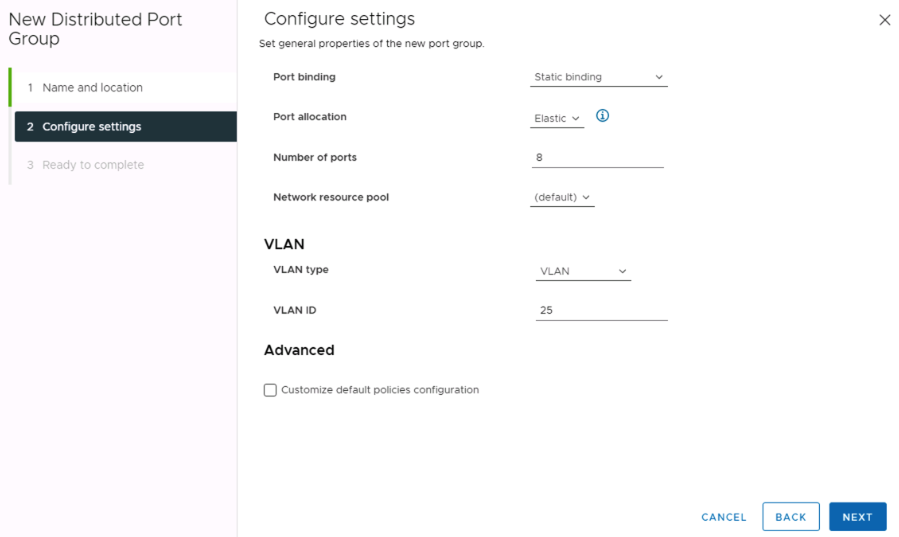
- Keep the rest of the settings as default, Click Next
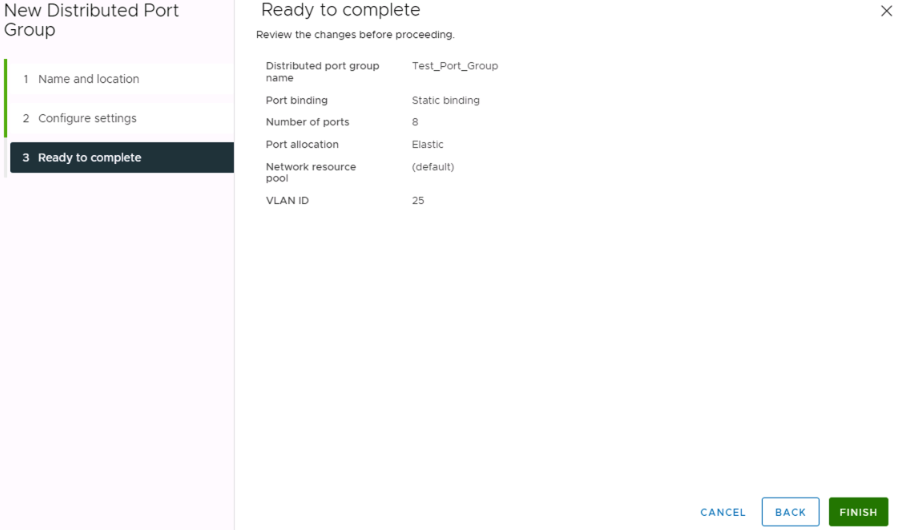
- Confirm the settings, click Finish to start the port group creation.
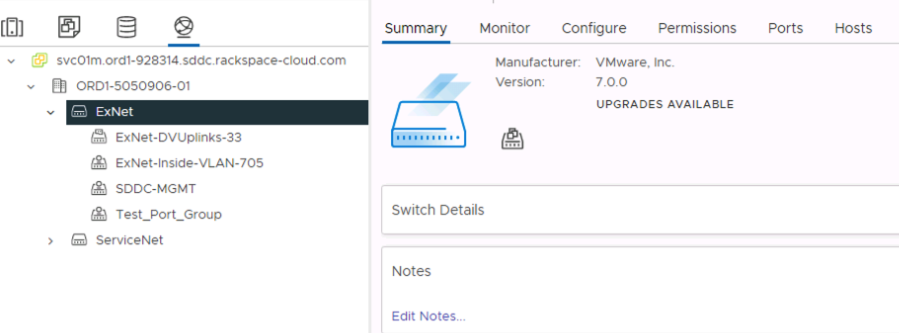
- Once the port group has been created, it will be listed under the dvSwitch in the inventory panel.
- To add virtual machines to the port group, select the virtual machine you want to add to the port group, go to its Network Adapter settings, and select the port group from the drop-down menu.
Updated 8 months ago