
How to configure HTTP/Password Authentication for Apache in Linux servers
HTTP Basic Authentication provides a straightforward method to restrict access to web resources using username and password credentials. This guide walks through implementing authentication on Apache web servers running on Linux systems.
Prerequisites
Before starting, ensure you have:
- Apache web server is installed and running
- Root or sudo access to the server
- Basic understanding of Apache configuration
- Terminal access to your server
Understanding HTTP Basic Authentication
HTTP Basic Authentication works by requiring users to provide credentials before accessing protected resources. The server validates these credentials against an encrypted password file. While simple to implement, credentials are transmitted base64-encoded (not encrypted), so HTTPS is strongly recommended for production environments.
Basic authentication sends credentials on every request. Always use HTTPS (TLS) in production.
Install Required Apache Utilities:
The htpasswd utility creates and manages password files for Apache authentication.
On RHEL/CentOS/Rocky/AlmaLinux:
$ sudo yum install httpd-tools
$ sudo httpd -M | grep auth
auth_basic_module (shared)
authn_file_module (shared)
authz_user_module (shared)
If modules are missing, check /etc/httpd/conf.modules.d/ and ensure the appropriate LoadModule directives are present.
On Debian/Ubuntu:
$ sudo apt-get update
$ sudo apt-get install apache2-utils

## Enable Required Apache Modules

$ sudo a2enmod auth_basic
$ sudo a2enmod authn_file
$ sudo a2enmod authz_user
$ sudo apachectl configtest
$ sudo systemctl reload apache2
Create Password File and Users:
Create the password file with the first user:
Note I used the /etc/httpd/ directory as an example because it exists on RHEL. If you use /etc/apache2/ on RHEL or /etc/httpd/ on Ubuntu, and the directory does not exist, htpasswd will fail with an error like:
el ~]$ sudo htpasswd -c /etc/apache2/.htpasswd username
htpasswd: cannot create file /etc/apache2/.htpasswd
To avoid this, either create the directory or use the correct path for the specific OS.
$ sudo htpasswd -c /etc/httpd/.htpasswd username
New password:
Re-type new password:
Adding password for user username
Important: The -c flag creates a new file. Use it only for the first user, as it will overwrite any existing file.
You'll be prompted to enter and confirm a password.
Add additional users (without -c):
$ sudo htpasswd /etc/apache2/.htpasswd another_userVerify the password file:
$ cat /etc/apache2/.htpasswdYou should see entries like:
$ sudo cat /etc/httpd/.htpasswd
username:$apr1$HJ9R41hq$n17.......
Set Proper File Permissions:
Protect the password file from unauthorized access:
$ sudo chmod 640 /etc/apache2/.htpasswd
$ sudo chown root:www-data /etc/apache2/.htpasswd  # Debian/Ubuntu

# OR

$ sudo chown root:apache /etc/httpd/.htpasswd    # RHEL/CentOS
Configure Apache Authentication
You can configure authentication in two ways: using .htaccess files or directly in virtual host configuration.
Option A: Directory Configuration (.htaccess):
First, ensure .htaccess files are enabled in your Apache configuration.
Edit your virtual host or main configuration file:
RHEL/CentOS: /etc/httpd/conf/httpd.conf or /etc/httpd/conf.d/your-site.conf
Debian/Ubuntu: /etc/apache2/sites-available/your-site.conf
<Directory /var/www/html/protected>
    AllowOverride AuthConfig
</Directory>
Create .htaccess in the protected directory:
$ sudo vim /var/www/html/protected/.htaccessAdd the following content:
AuthType Basic
AuthName "Restricted Access"
AuthUserFile /etc/apache2/.htpasswd
Require valid-user
Option A: Virtual Host Configuration (Recommended):
Edit your site's configuration file(example below):
<VirtualHost *:80>
    ServerName example.com
    DocumentRoot /var/www/html

    <Directory /var/www/html/protected>
        AuthType Basic
        AuthName "Restricted Access - Enter Credentials"
        AuthUserFile /etc/apache2/.htpasswd
        Require valid-user
    </Directory>

    # Optional: Protect specific file
    <Files "admin.php">
        AuthType Basic
        AuthName "Admin Access Only"
        AuthUserFile /etc/apache2/.htpasswd
        Require valid-user
    </Files>
</VirtualHost>
Test and Restart Apache:
Always test your configuration before restarting:
$ sudo apachectl configtestYou should see Syntax OK. If there are errors, fix them before proceeding.
Apply the configuration changes by restarting Apache:
RHEL/CentOS/Rocky/AlmaLinux:
$ sudo systemctl restart httpd
$ sudo systemctl status httpd
Debian/Ubuntu:
$ sudo systemctl restart apache2
$ sudo systemctl status apache2
Confirm the Password Authentication:
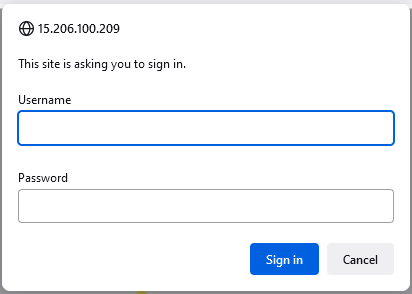
Try to access your restricted content in a web browser to confirm if it is protected: -
You should see a pop-up like below: -
Once you enter the correct credentials, you will be allowed to access the content.
If you enter the wrong credentials or hit “Cancel”, you will see the “Unauthorized” error page:

Advanced Configuration Options
Restrict Access to Specific Users
Instead of Require valid-user, specify individual users:
<Directory /var/www/html/admin>
    AuthType Basic
    AuthName "Admin Panel"
    AuthUserFile /etc/apache2/.htpasswd
    Require user admin superuser
</Directory>
Using Groups:
Create a group file /etc/apache2/.htgroups:
admins: alice bob
developers: charlie dave
Configure Apache to use groups:
<Directory /var/www/html/restricted>
    AuthType Basic
    AuthName "Team Access"
    AuthUserFile /etc/apache2/.htpasswd
    AuthGroupFile /etc/apache2/.htgroups
    Require group admins
</Directory>
Combining with IP Restrictions:
Require both authentication and specific IP addresses:
<Directory /var/www/html/secure>
    AuthType Basic
    AuthName "Secure Area"
    AuthUserFile /etc/apache2/.htpasswd

    <RequireAll>
        Require valid-user
        Require ip 192.168.1.0/24
    </RequireAll>
</Directory>
Location-Based Protection:
Protect specific URL paths regardless of filesystem location:
<Location /api/admin>
    AuthType Basic
    AuthName "API Admin Access"
    AuthUserFile /etc/apache2/.htpasswd
    Require valid-user
</Location>
Note: AllowOverride is not valid in <Location> blocks.
Troubleshooting:
The authentication prompt doesn't appear
- Verify Apache configuration syntax: sudo apachectl configtest.
- Check file paths in AuthUserFile directive are absolute and correct
- Ensure AllowOverride AuthConfig is set if using .htaccess
- Check if authentication modules are loaded
500 Internal Server Error
- Review error logs:
/var/log/apache2/error.logor/var/log/httpd/error_log. - Check the .htaccess file syntax.
- Verify file permissions on the password file (Apache must be able to read it).
- Check for typos in directives.
Authentication fails with correct credentials
- Verify the password file exists and is readable by the Apache user.
- Check user exists in password file: grep username
/etc/apache2/.htpasswd. - Ensure no extra whitespace in configuration.
- Verify correct password file is referenced in AuthUserFile.
Common error messages
"Require not allowed here"
- Add AllowOverride AuthConfig to the
<Directory>block
"AuthUserFile not allowed here"
- You're likely using AllowOverride in an invalid context (like
<Location>) - Use direct configuration instead of .htaccess for
<Location>blocks
"File does not exist or is empty"
- Verify the path to .htpasswd file.
- Ensure the file has content: cat
/etc/apache2/.htpasswd
Testing without restarting:
$ sudo apachectl configtestIf syntax is OK, you can gracefully reload the configuration:
$ sudo apachectl gracefulManaging Users:
Change a user's password:
$ sudo htpasswd /etc/apache2/.htpasswd usernameDelete a user:
$ sudo htpasswd -D /etc/apache2/.htpasswd usernameView all users:
$ cut -d: -f1 /etc/apache2/.htpasswdExample: Securing a WordPress Admin:
<VirtualHost *:443>
    ServerName blog.example.com
    DocumentRoot /var/www/wordpress

    SSLEngine on
    SSLCertificateFile /etc/ssl/certs/example.crt
    SSLCertificateKeyFile /etc/ssl/private/example.key

    <LocationMatch "^/wp-(admin|login\.php)">
        AuthType Basic
        AuthName "WordPress Admin Access"
        AuthUserFile /etc/apache2/.htpasswd-wp
        Require valid-user
    </LocationMatch>
</VirtualHost>
This configuration adds an extra authentication layer before WordPress's own login, providing defense in depth against brute force attacks.
Example: Development Environment:
<VirtualHost *:80>
    ServerName dev.example.com
    DocumentRoot /var/www/dev

    <Directory /var/www/dev>
        Options Indexes FollowSymLinks
        AllowOverride None

        AuthType Basic
        AuthName "Development Environment"
        AuthUserFile /etc/apache2/.htpasswd-dev
        Require valid-user
    </Directory>

    ErrorLog ${APACHE_LOG_DIR}/dev-error.log
    CustomLog ${APACHE_LOG_DIR}/dev-access.log combined
</VirtualHost>
Performance Considerations:
- .htaccess files are parsed on every request, causing performance overhead.
For production environments, use direct virtual host configuration instead - Password file lookups are fast, but group file lookups are slower
- Consider caching mechanisms for high-traffic sites
$ sudo apt-get update
$ sudo apt-get install apache2-utils
Quick Reference Commands:
# Install tools
$ sudo apt-get install apache2-utils     # Debian/Ubuntu
$ sudo yum install httpd-tools           # RHEL/CentOS

# Create password file
$ sudo htpasswd -c /etc/apache2/.htpasswd username

# Add users
$ sudo htpasswd /etc/apache2/.htpasswd username2

# Test configuration
$ sudo apachectl configtest

# Restart Apache
$ sudo systemctl restart apache2          # Debian/Ubuntu
$ sudo systemctl restart httpd            # RHEL/CentOS

# View logs
$ sudo tail -f /var/log/apache2/error.log # Debian/Ubuntu
$ sudo tail -f /var/log/httpd/error_log   # RHEL/CentOS
Best Practices:
- Always use HTTPS: Basic authentication sends credentials base64-encoded, which is easily decoded. Implement SSL/TLS certificates.
- Strong passwords: Enforce strong password policies when creating user accounts.
- Regular updates: Keep Apache and the operating system updated with security patches.
- Limit authentication scope: Only protect directories that truly need protection.
- Monitor access logs: Regularly review /var/log/apache2/access.log or /var/log/httpd/access_log for suspicious activity.
- File permissions: Ensure password files have restrictive permissions (640 or 600).
- Store password files outside web root: Never place .htpasswd files where they can be accessed via browser.
Updated 6 months ago