Manage Cloud Databases HA Instance Groups in the Cloud Control Panel
A high availability (HA) instance group is a Cloud Databases option that provides better performance and reliability, and reduces downtime by providing automatic failover to a replica instance.
This article describes how to create and manage HA instance groups by using the Cloud Control Panel.
HA instance groups are supported only on MySQL 5.6, Percona 5.6, and MariaDB 10, and later versions.
Create a New HA Instance group
Use the following steps to create a new HA instance group:
-
Log in to the Cloud Control Panel.
-
In the top navigation bar, click Select a Product > Rackspace Cloud.
-
From the Databases menu, select MySQL Instance under CREATE RESOURCES.
-
In the Identity section, provide a name for the instance and specify the region in which you want to launch the HA instances that you create.
The name that you specify and an index (-01, -02, and so on) is used to create all the instance names, starting with the primary instance. You can see the instance names in the Build section after you select the High-Availability Group option. -
In the Engine section, select a datastore and version that support HA instances: MySQL 5.6 or later, MariaDB 10 or later, or Percona 5.6 or later.
-
In the Build section, select the amount of RAM and disk space that you want each instance of your HA group to have. The primary instance and each replica instance are created with this same amount of RAM and
disk space. -
Also, in the Build section, select the High-Availability Group for Instance Type. New options display.
-
In the HA Instances list, which shows the primary and replica instances, remove replicas by clicking the circle next to the last replica, or add a replica by selecting + Add another replica beneath the list. Currently, HA groups support only one or two replicas.
-
For Networks, select the networks to which the HA group can connect.
-
If you select ServiceNet, the group is accessible only on ServiceNet, like standard Cloud Databases instances.
-
If you select ServiceNet and Public, the HA group is given two hostnames after creation: one accessible on ServiceNet and another accessible on the public Internet.
You can specify networks only when you are creating the HA group. You can't enable public network access after the HA group is created. -
-
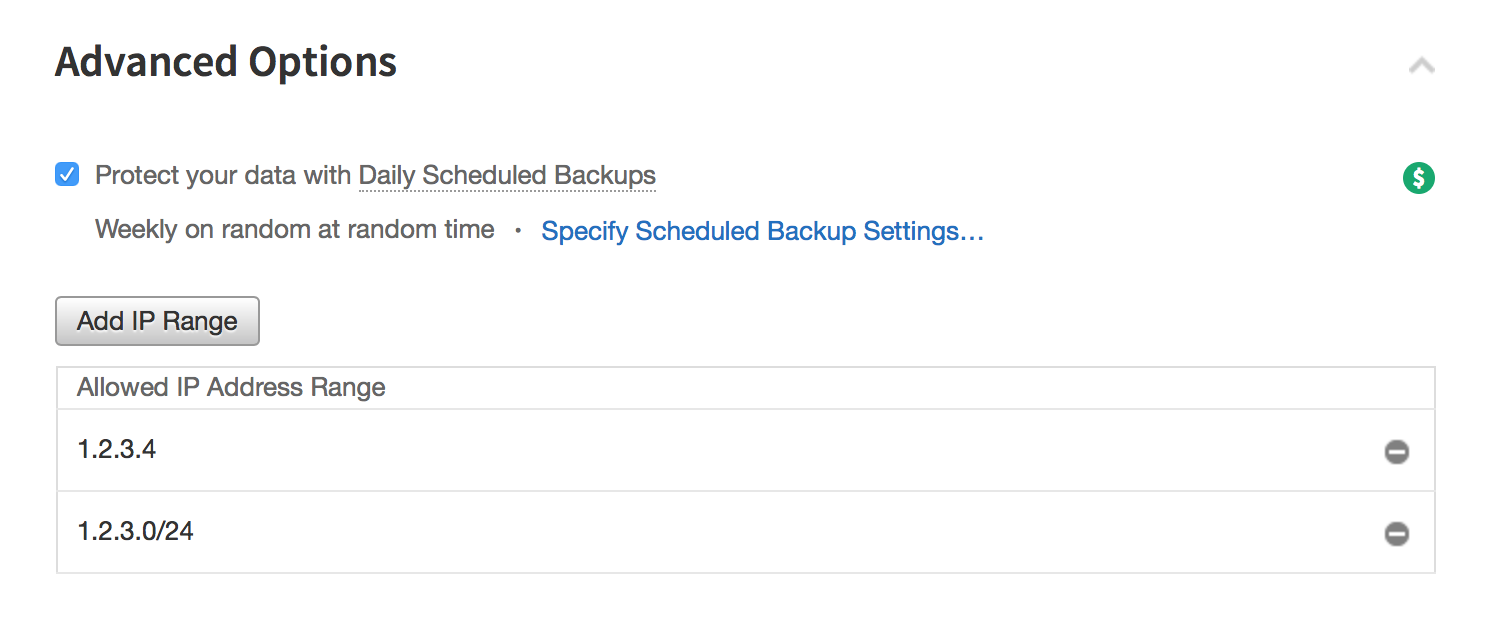
In the Advanced Options section, specify settings for scheduled backups.
We recommend that you schedule regular backups by selecting the Protect your data with Daily Scheduled Backups check box and then clicking Specify Scheduled Backup Settings to specify the schedule. You can enter a day of the week for a full backup and the time of day when that backup and daily incremental backups will occur. Alternatively, you can select Random for one or both options, and a random time or day will be selected during creation that will then be used for all subsequent backups.
-
In the Advanced Options section, click Add IP Range to specify the IP addresses or ranges that are allowed to connect to your HA instance group.
You can't connect to your HA instance group without first setting up the allowed IP addresses or ranges. HA groups sit behind a load balancer with a firewall, and that firewall blocks all connections by default. Both single IP addresses and IP address ranges in CIDR format are allowed.

You can't connect to your HA instance group without first setting up the allowed IP addresses or ranges here. You can also add or remove addresses and ranges after you have created the HA group.
When all selections are complete, the total cost of the HA group is displayed to the right of the Create HA Group button at the bottom of the page.
- Click Create HA Group.
View the Build Status and Connections to the New HA Group
After you click the Create HA Group button, the browser redirects to the HA Group Details page, which lists the following important information about the HA instance group:
| Field | Information |
|---|---|
| HA Group Status | Displays the status of the overall HA group. |
| Type | Displays the datastore used for the instances in the group. |
| HA Group ID | The UUID of the HA group. You use this ID for many actions on the group, such as resizes, backups, and attaching configurations. |
| Region | The Rackspace region where your group is deployed. |
| RAM | The amount of RAM provisioned on each instance of the group. |
| Disk | The size of the storage volume for each instance of the group. |
| Backups | The number of backups for this group and the option to create an on-demand backup. |
| Scheduled Backups | Lists the scheduled backup settings if enabled |
While the group is building, the HA Group Status is shown as Building and a Loading animation is shown in the HA Group Networks table.
While the HA group is in theBuildingstate, the Scheduled Backups row might say "No Backup Scheduled" even if you enabled scheduled backups. When the group transitions to therunningstate, this information is updated to reflect the actual schedule settings.
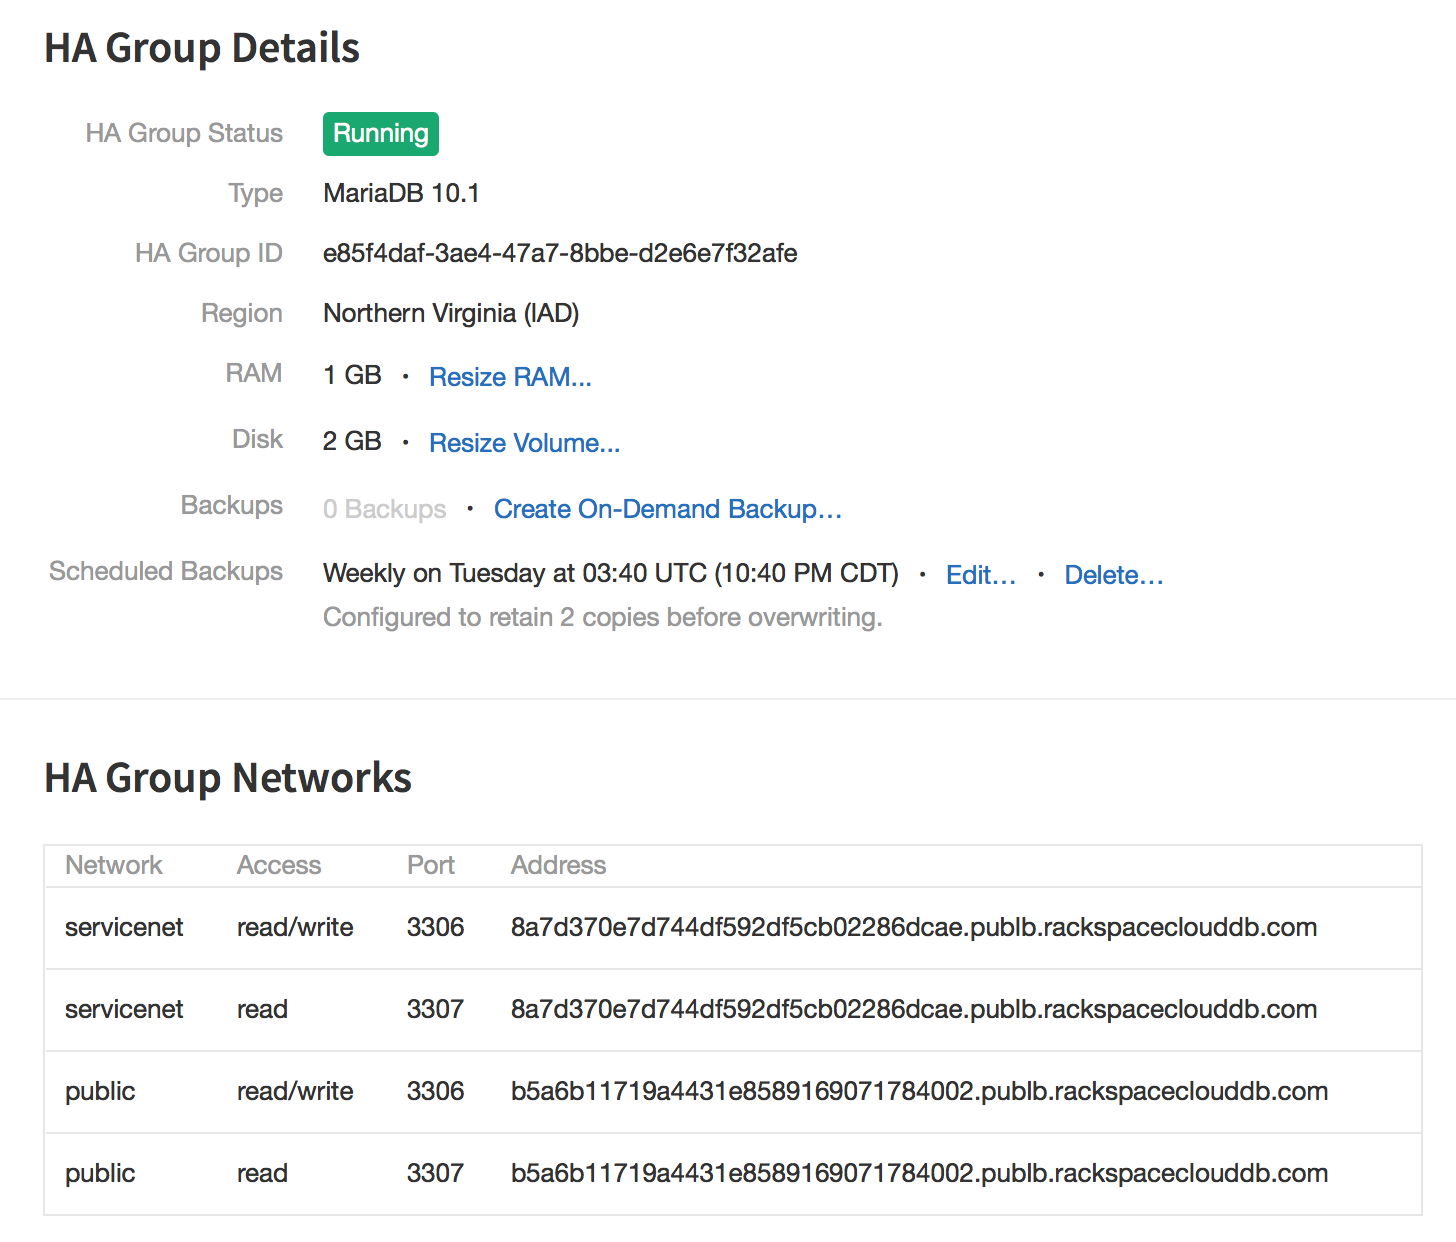
When the group has completed building, the HA Group Status value changes to Running and the HA Group Networks section shows the hostnames and ports that you can use to connect to the instance group. These hostnames stay the same regardless of failovers and which instance is the primary. The following is an example of a completed build.
- The Network column indicates whether a hostname is ServiceNet accessible or a publicly accessible.
- The Access column indicates whether the address and port can be used for only reads or for reads and writes.
- The Port column indicates which port can be used with the associated hostname.
- The Address column indicates the hostname that can be used to connect to MySQL.
The hostnames stay the same regardless of failovers and which instance is the primary.
The following image shows an example of a completed build:

Farther down the details page, more information about the HA group primary instance is displayed. This information is similar to what's shown on the Instance Details page for a single instance or replica set. The Increase Volume, Resize RAM, and other instance modification options are dimmed because modifications to an HA group must be made to the group rather than to individual instances.
Modify an HA Instance Group
Use the following steps to modify an HA instance group:
-
Log in to the Cloud Control Panel.
-
In the top navigation bar, click Select a Product > Rackspace Cloud.
-
Select Databases > MySQL.
-
From the list of databases, select one of the HA database instances by clicking its name.
The gear icon on the list page does not yet provide options for performing backups, resizing, or restarting HA instance groups. This functionality will be added in an upcoming release. -
To resize RAM, resize volume, create on-demand backups, or create or modify backup schedules, click the link in the detail list that matches that function.
All actions that you perform on the HA group apply to all instances in the group. Resizes occur on all instances. Backups are performed against a replica of the HA group.

You can also perform these actions by using the Actions menu in the upper-right corner of the details page. From this menu, you can also choose to delete the HA group.
Updated 3 months ago