Modify Address Group
- Login to the firewall.

- Once logged in, navigate to the objects section by clicking on the Objects tab located at the top of the page.
- Now that you are on the Objects page, select Address Group from the list of options located in the navigation pane on the left side of the page.
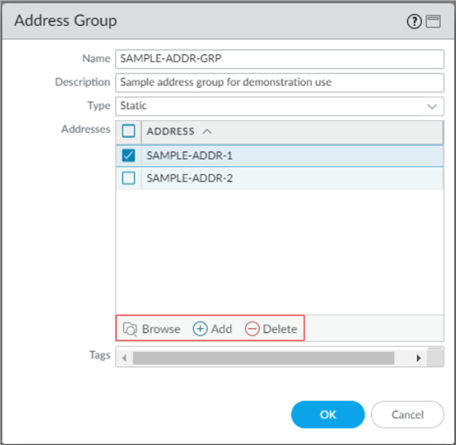
- Next, within the Address Group page click on the address group you want to modify. An address group configuration window will popup, similar to the example below.

- In the Name field, the name of the address group can be modified.
- In the Description field, the description of the address group can be modified.
- Modifying the address group Type is not covered in this guide.
- In the Addresses section you can use the Browse, +Add or Delete options to add or remove address objects or groups from the address group you are modifying.
- To learn more about creating address objects see Create address object doc.
- To learn more about creating address groups see Create address group doc.
- Click OK.
- Commit your change. To learn more about the commit operation see Commit doc
Updated 3 months ago