
How To Manage Virtual Machines and Settings
How To Manage Virtual Machines and Settings
Changing a Virtual Network Interface Card Segment
-
Open the VMware vSphere Client or the VMware vSphere Web Client, and connect to the vCenter Server.
-
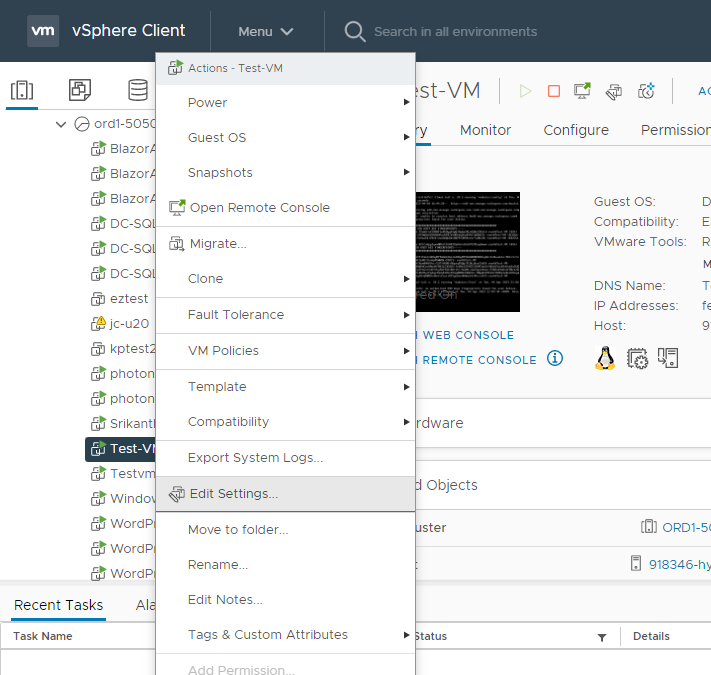
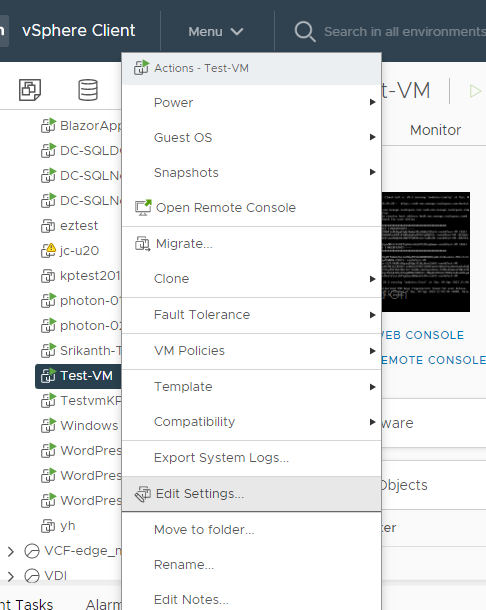
Right click on the Virtual Machine, click Edit Settings

-
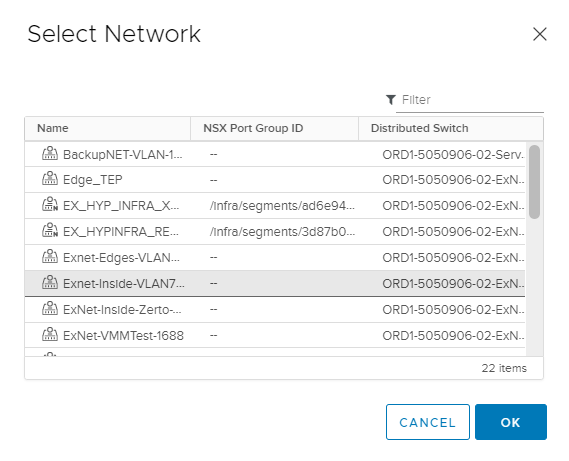
Click on Browse to list all available portgroups

-
Choose the portgroup, click OK
-
Click OK to save change.

Adding a Virtual Network Interface Card
-
Open the VMware vSphere Client or the VMware vSphere Web Client, and connect to the vCenter Server.
-
Right click the virtual machine, choose Edit Settings

-
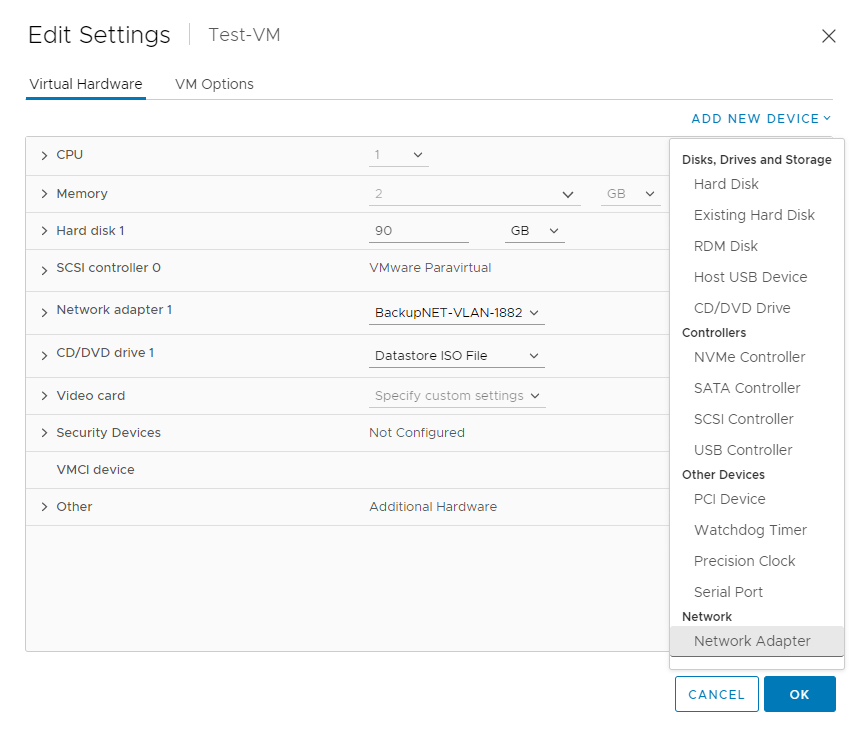
Click ADD NEW DEVICE, choose Network Adapter
-
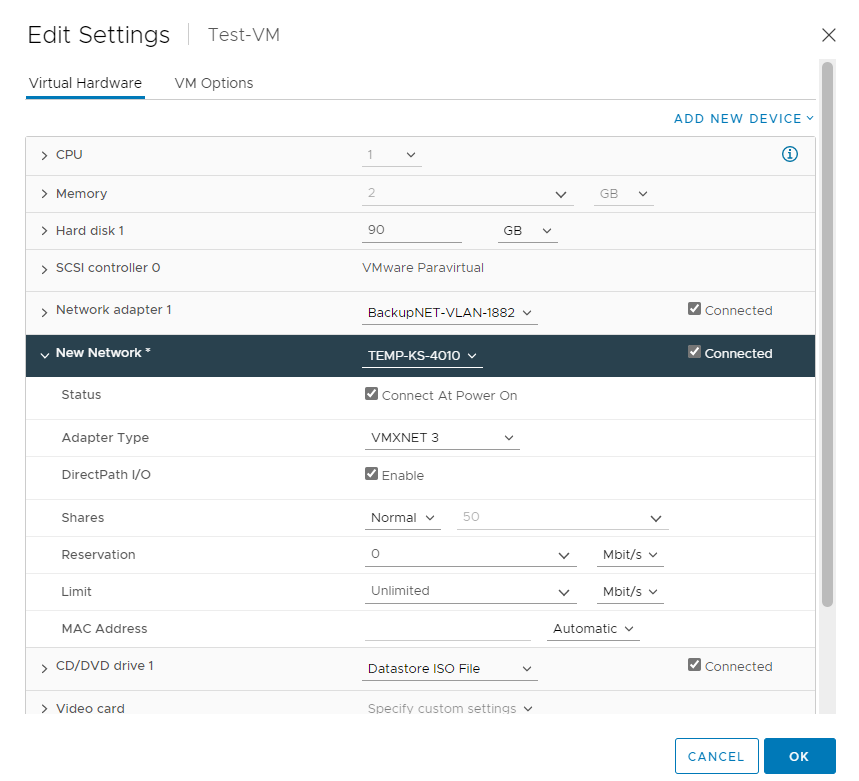
Choose the portgroup that you would like the vNIC to connect to, ensure Connect At Power On is selected and the adapter type is VMXNET3.
-
Click OK to save configuration.
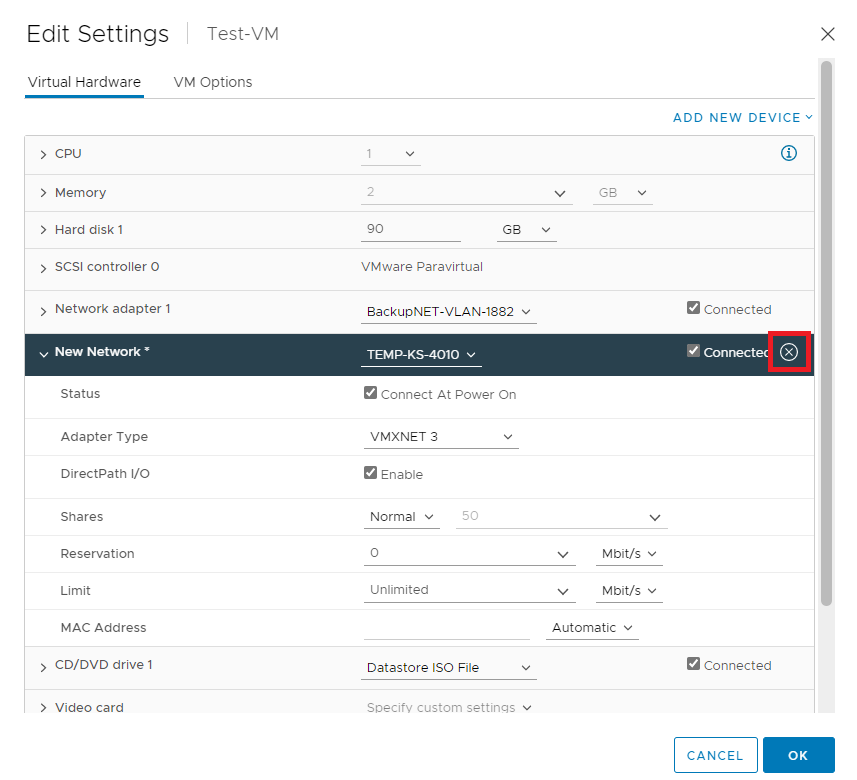
Removing a Virtual Network Interface Card
-
Open the VMware vSphere Client or the VMware vSphere Web Client, and connect to the vCenter Server.
-
Right click on the Virtual Machine, click Edit Settings
-
Highlight the vNIC, click the X to the right of the vNIC
-
Click OK to save the new configuration.
Please Note:
-
You cannot remove NICs from an active virtual machine on which no operating system is installed.
-
The vSphere Client might report that the NIC has been removed, but you continue to see it attached to the virtual machine.
Removing NICs from an Active Virtual Machine with a Guest Operating System Installed
-
You can remove a NIC from an active virtual machine, but it might not be reported to the vSphere Client for some time. If you click Edit Settings for the virtual machine, you might see the removed NIC listed even after the task is complete. The Edit Settings dialog box for the virtual machine does not immediately display the removed NIC.
-
You might also see the NIC attached to the virtual machine if the guest operating system of the virtual machine does not support hot removal of NICs.
-
To work around this, Power off the VM, if possible, before removing the vNIC.
Modifying Virtual CPU and Memory Settings
-
Open the VMware vSphere Client or the VMware vSphere Web Client, and connect to the vCenter Server.
-
Assess overall availability of requested resources by highlighting the Resource Pool and referencing the CPU and Memory stats on the Summary tab.

-
Right click the virtual machine, click Edit Settings

Please note that the VM will need to be shutdown if CPU Hot Add and Memory Hot Plug are not enabled
-
Amend CPU and/or Memory based on requirements, click OK to confirm the change.
-
If the VM was powered off, start the VM and ensure that it boots successfully.
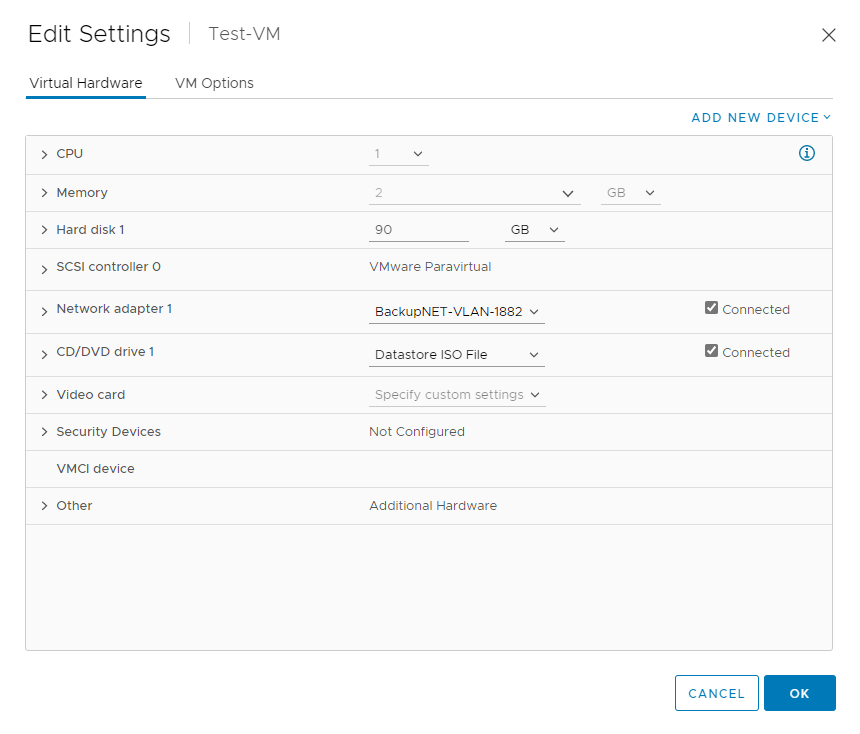
Adding a Virtual Disk
-
Open the VMware vSphere Client or the VMware vSphere Web Client, and connect to the vCenter Server that manages the virtual machine you want to add the vdisk to.
-
In the inventory panel, select the virtual machine you want to add the vdisk to.
-
Right-click on the virtual machine and select Edit Settings from the context menu. This will open the virtual machine's settings dialog box.

-
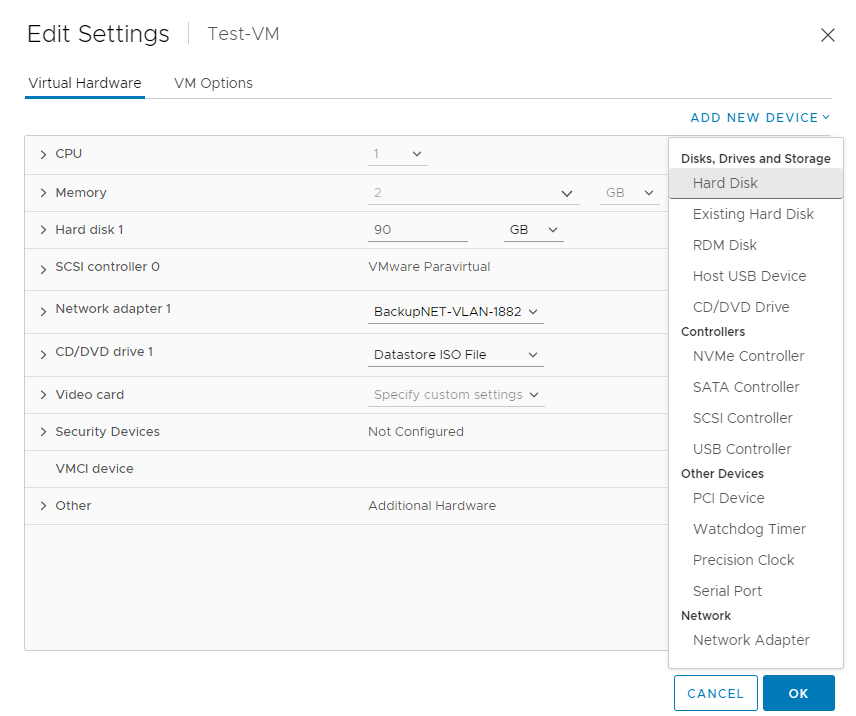
In the virtual machine's settings dialog box, click on the Add New Device button to add a new Hard Drive to the virtual machine.
-
Select Hard Disk and click OK to continue.
-
Specify the disk configuration. Unless otherwise specified, the Location will default to the same datastore that the Virtual Machine is currently using for its .vmx file. This can be confirmed on the VM Options tab - VM Working Location.
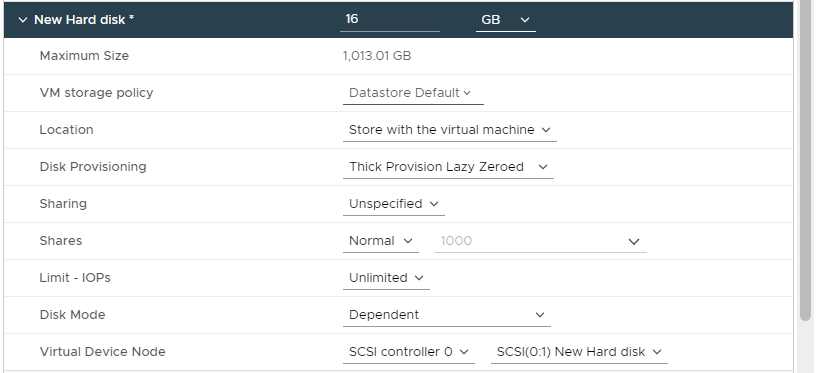
The additional settings will likely be default, depending on use case:
VM Storage Policy
Use the drop-down box to select a Storage Policy. VSAN Storage Policies are used to align storage with application demands of virtual machines. It provides a storage policy framework that serves as a single unified control panel across a broad range of data services and storage solutions. Policies should already exist in order to assign a disk to them.
If Storage Polices are not in use, leave the setting as Datastore Default.
Disk Provisioning
- Thin:
Virtual disks do not reserve space on the VMFS filesystem or on the back-end storage. They only consume blocks when data is written to disk from within the Guest OS. The amount of actual space consumed by the VMDK starts out small, but grows in size as the Guest OS commits more I/O to disk, up to a maximum size set at VMDK creation time.- Thick Lazy Zeroed:
Virtual disks reserve space on the VMFS filesystem but disk blocks are only used on the back-end array when they get written to inside in the Guest OS.- Thick Eager Zeroed:
Virtual disks have all space allocated and wiped clean of any previous contents on the physical media at creation time. May take longer during creation compared to other formats. The entire disk space is reserved and unavailable for use by other virtual machines.
Review the vdisk settings and click OK to save the virtual machine's settings. Ensure that the change has been applied successfully.
-
Power on the virtual machine, if it's not already powered on.
-
In the guest operating system of the virtual machine, use disk management tools to partition and format the new vdisk as needed.
Expanding a Virtual Disk
-
Open the VMware vSphere Client or the VMware vSphere Web Client, and connect to the vCenter Server that manages the virtual machine you want to add the vdisk to.
-
Available disk space can be checked in vCenter.
-
Highlight virtual Data Center, click on Datastore Icon
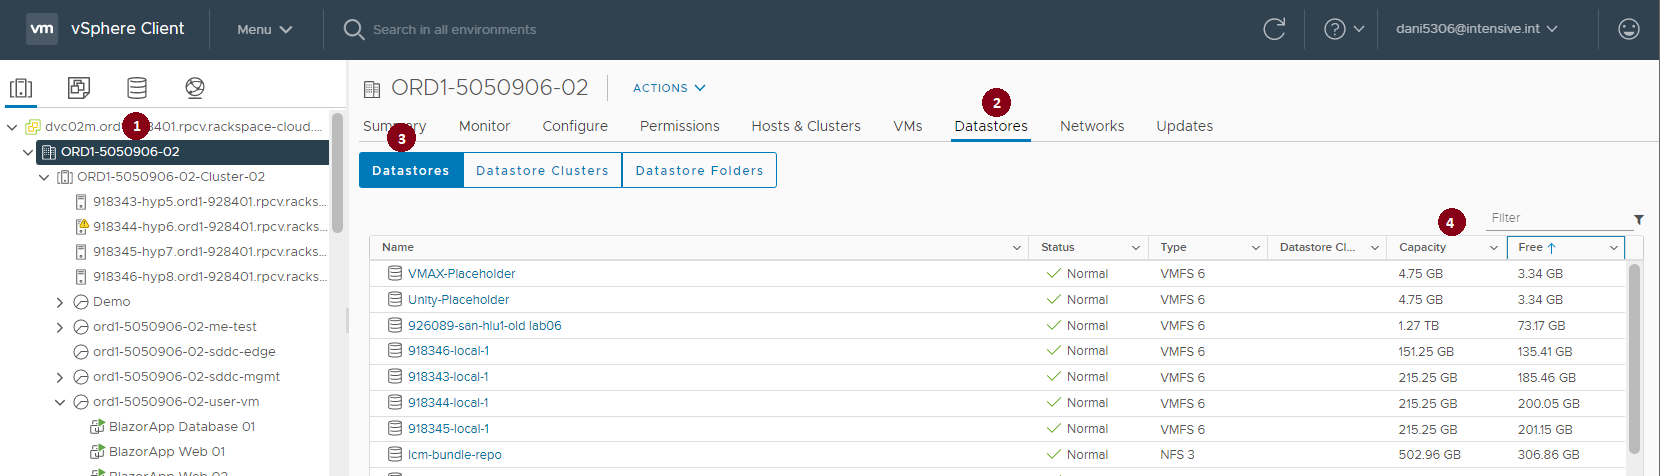
-
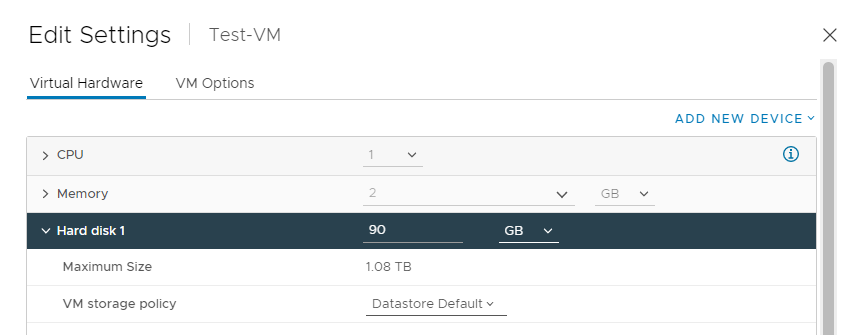
Current Maximum available space on the selected datastore is also shown in the Edit Settings dialogue for a VM.
-
In the inventory panel, select the virtual machine you want to reconfigure.
-
Right-click on the virtual machine and select Edit Settings from the context menu. This will open the virtual machine's settings dialog box.
-
Identify the vDisk for expansion with the Hard disk #, such as Hard disk 1. You can use the Virtual Device Node values to help identify the correct vDisk with the OS if needed.

-
Select the vDisk that needs to be expanded. Please ensure that the datastore has free capacity. The raw remaining space on the current datastore is shown as Maximum Size. It is recommended to keep 15% reserve space on all VM datastores for VMware functions.
-
Amend the disk size based on requirements, press OK to save the new settings.

-
Ensure that the change has been applied successfully.
Deleting a Virtual Disk
-
Open the VMware vSphere Client or the VMware vSphere Web Client, and connect to the vCenter Server that manages the virtual machine you want to remove the vdisk from.
-
In the inventory panel, select the virtual machine you want to remove the vdisk from.
-
Right-click on the virtual machine and select Edit Settings from the context menu. This will open the virtual machine's settings dialog box.

-
In the virtual machine's settings dialog box, An X icon will appear on the right side of the selected line. Click on the X icon to remove disk. Please note that you can also select the Delete Files from datastore if desired.

-
Click OK to save new configuration.
-
Ensure that the change has been applied successfully.
Performing a vMotion
vMotion is a VMware feature that provides the ability to migrate virtual machines between hosts without interrupting the service provided by the virtual machine.
-
Open the VMware vSphere Client or the VMware vSphere Web Client, and connect to the vCenter Server.
-
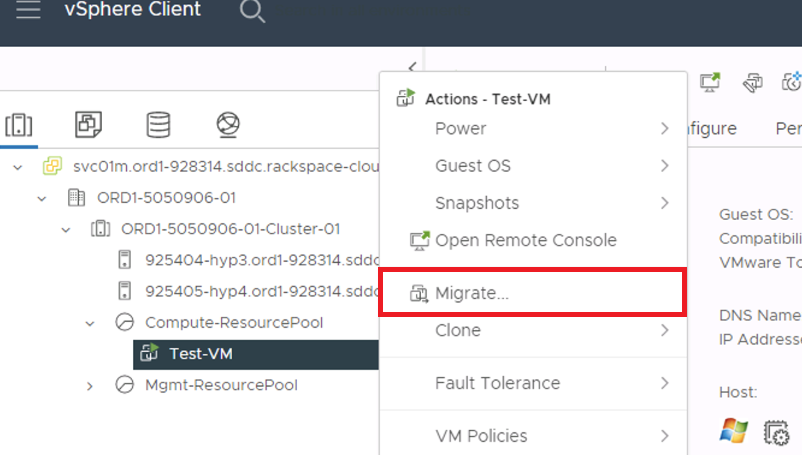
Right click the virtual machine, click Migrate.
-
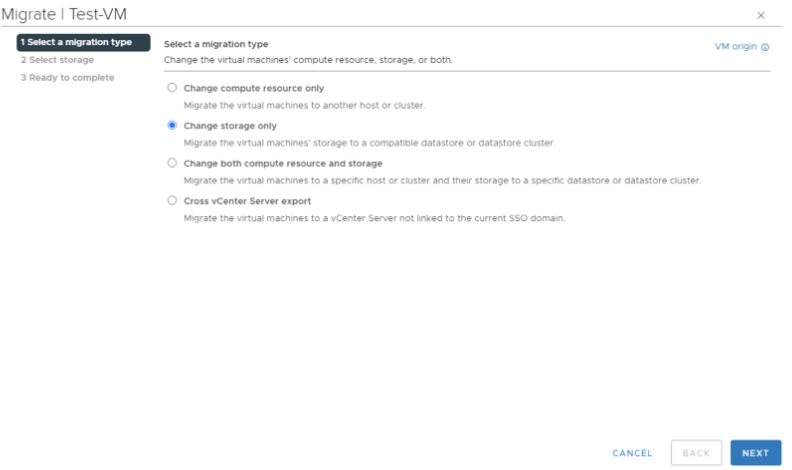
Below is a brief overview of the options presented:
- Change compute resource only:
Moving a virtual machine, but not its storage, to another compute resource, such as a host, cluster, resource pool. You can move the virtual machine to another compute resource by using cold or hot migration. If you change the compute resource of a powered on virtual machine, you use vSphere vMotion. - Change storage only:
Moving a virtual machine and its storage, including virtual disks, configuration files, or a combination of these, to a new datastore on the same host. You can change the datastore of a virtual machine by using cold or hot migration. If you move a powered on virtual machine and its storage to a new datastore, you use Storage vMotion. - Change both compute resource and storage:
Moving a virtual machine to another host and at the same time moving its disk or virtual machine folder to another datastore. You can change the host and datastore simultaneously by using cold or hot migration. - Cross vCenter Server Export:
The ability to move virtual machines to a vCenter server outside of the current SSO domain.
-
Choose option one to change the compute only for the test virtual machine.

-
Click Next, choose the hypervisor you would like to move the virtual machine to.
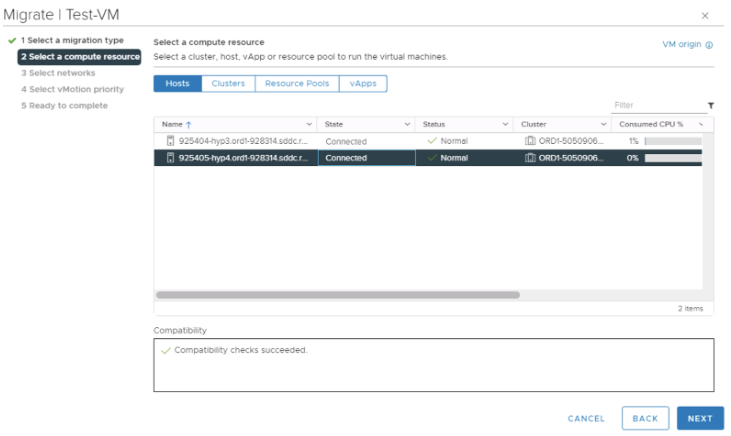
-
Choose the network for the virtual machine, click Next.
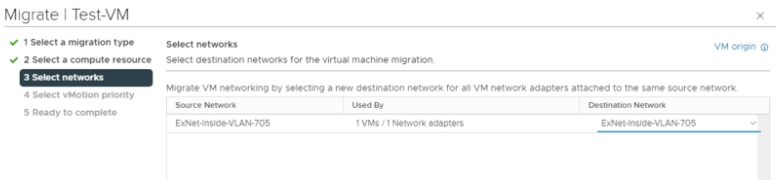
-
Keep the default option, click Next.
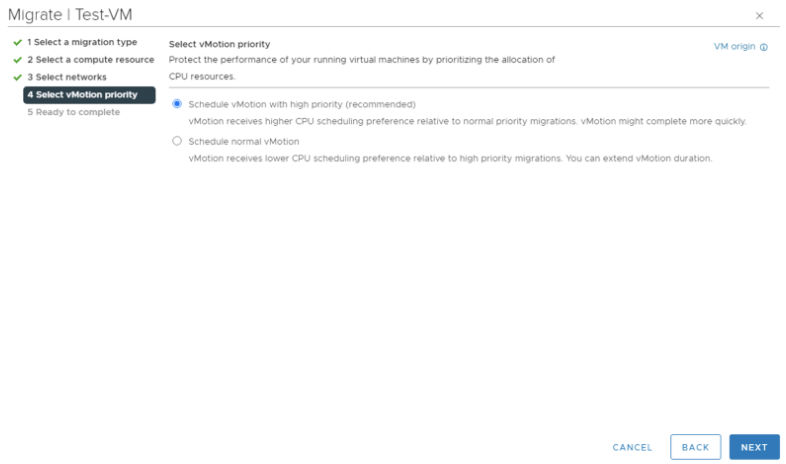
-
Review your settings, click Finish to start the vMotion.
-
Ensure that the vMotion has successfully completed.

Performing a Storage vMotion
Storage vMotion is Storage vMotion is a component of VMware vSphere that allows the live migration of a running virtual machine's (VM) file system from one storage system to another, with no downtime for the VM or service disruption for end users.
-
Open the VMware vSphere Client or the VMware vSphere Web Client, and connect to the vCenter Server.
-
Right click the virtual machine, click Migrate.

-
Below are a brief overview of the options presented:
- Change compute resource only:
Moving a virtual machine, but not its storage, to another compute resource, such as a host, cluster, resource pool. You can move the virtual machine to another compute resource by using cold or hot migration. If you change the compute resource of a powered on virtual machine, you use vSphere vMotion. - Change storage only:
Moving a virtual machine and its storage, including virtual disks, configuration files, or a combination of these, to a new datastore on the same host. You can change the datastore of a virtual machine by using cold or hot migration. If you move a powered on virtual machine and its storage to a new datastore, you use Storage vMotion. - Change both compute resource and storage:
Moving a virtual machine to another host and at the same time moving its disk or virtual machine folder to another datastore. You can change the host and datastore simultaneously by using cold or hot migration. - Cross vCenter Server Export:
The ability to move virtual machines to a vCenter server outside of the current SSO domain.
-
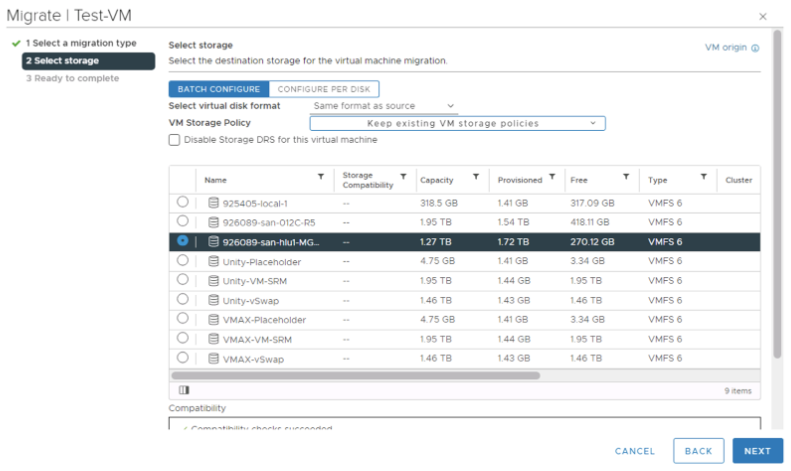
Select Change storage only, click Next
-
Select the target datastore, click Next
-
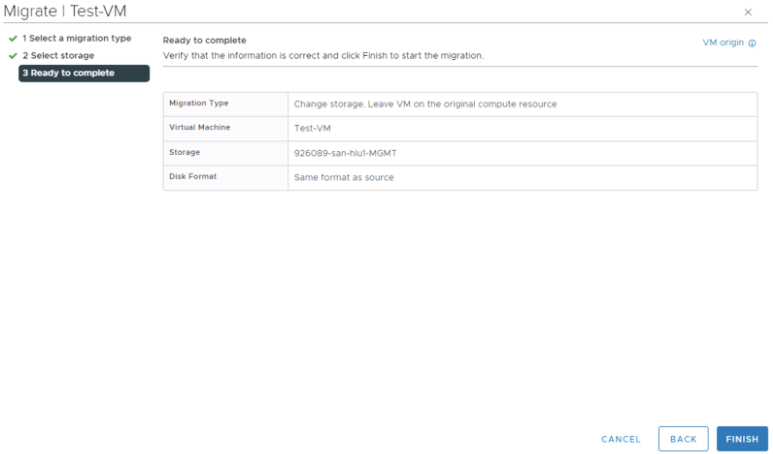
Review the settings, click Next to start the storage vmotion
-
Ensure that the storage vmotion has successfully completed

Creating a Snapshot
-
Open the VMware vSphere Client or the VMware vSphere Web Client, and connect to the vCenter Server.
-
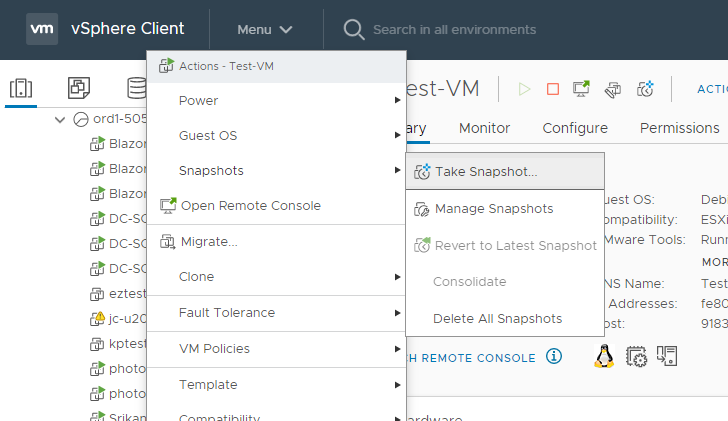
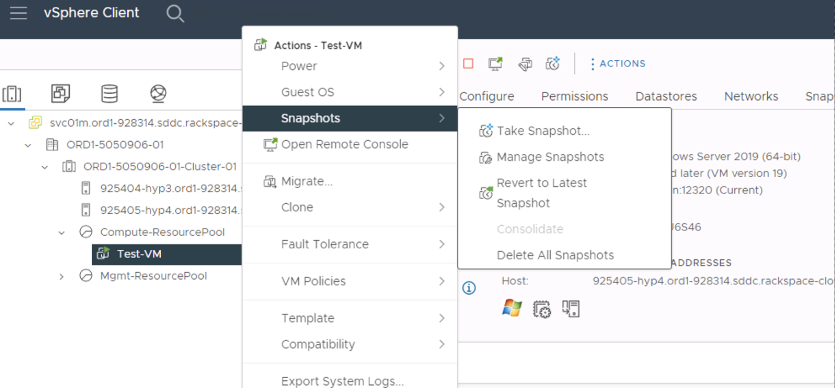
Right-click the virtual machine, select Snapshots, click Take Snapshot
-
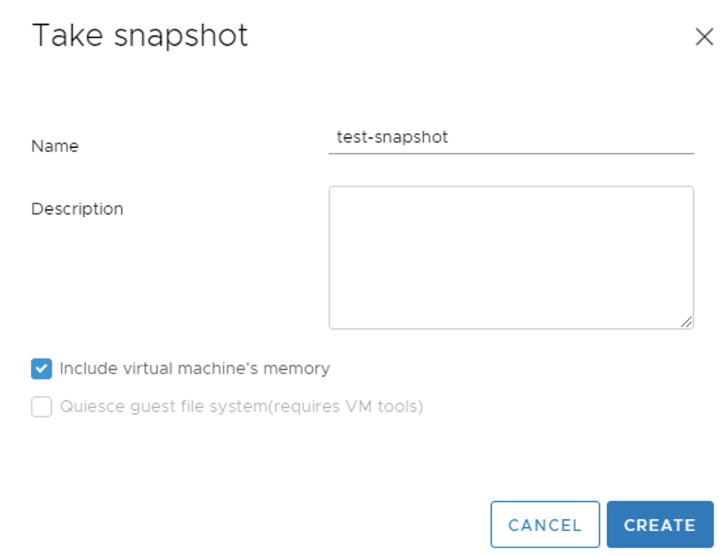
Name your snapshot. Choose if you would like to include the virtual machine memory or Quiesce guest file system(requires VM tools).
-
Click Create.
-
Monitor the snapshot creation.

Managing and Deleting Snapshots
-
Open the VMware vSphere Client or the VMware vSphere Web Client, and connect to the vCenter Server.
-
Right-click the virtual machine, select Snapshots, click Manage Snapshots
-
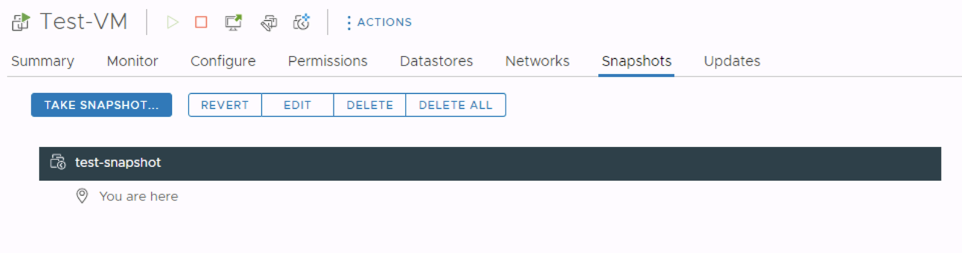
You can revert, edit, and delete snapshots.
-
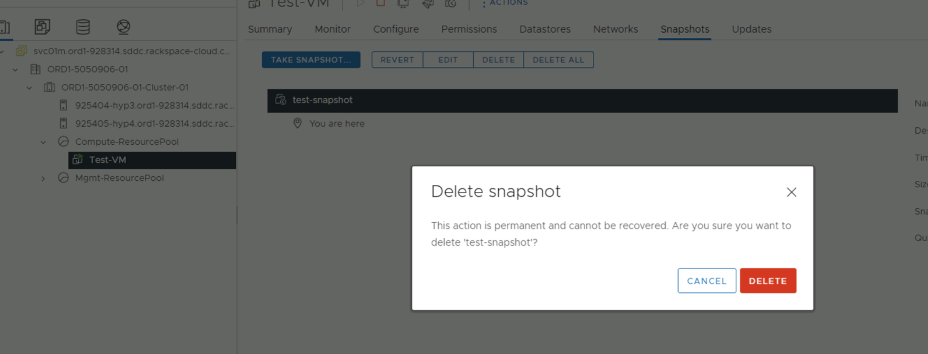
To delete a snapshot, highlight the snapshot, click Delete
-
To revert to a snapshot, highlight the snapshot, click Revert.
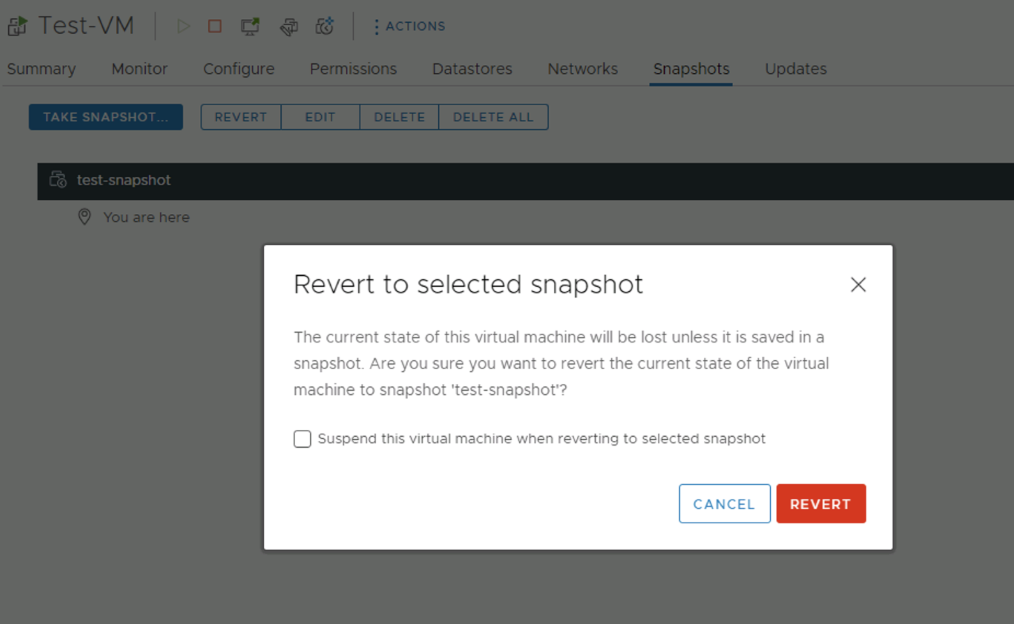
Please note that you can suspend the virtual machine when reverting to an existing snapshot.
Shutting Down a Virtual Machine
-
Open the VMware vSphere Client or the VMware vSphere Web Client, and connect to the vCenter Server.
-
Right click the virtual machine, click on Power and Shutdown Guest OS
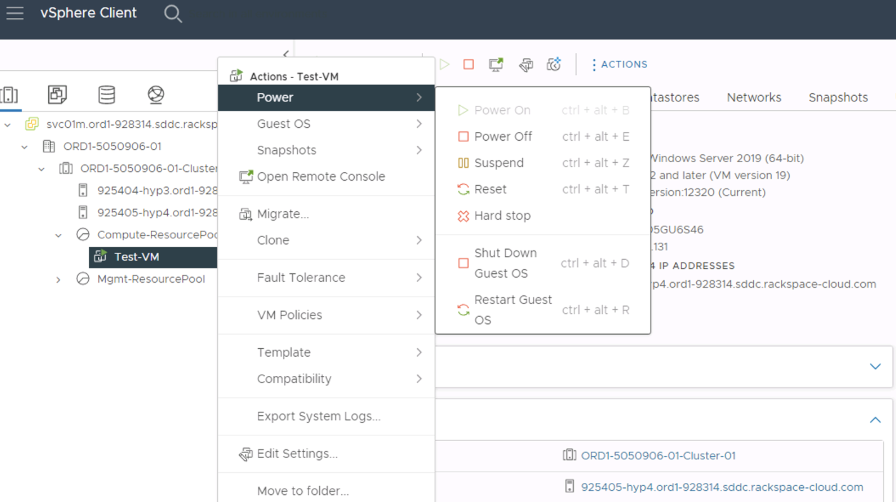
Rebooting a Virtual Machine
-
Open the VMware vSphere Client or the VMware vSphere Web Client, and connect to the vCenter Server.
-
Right click the virtual machine, click Power then Restart Guest OS

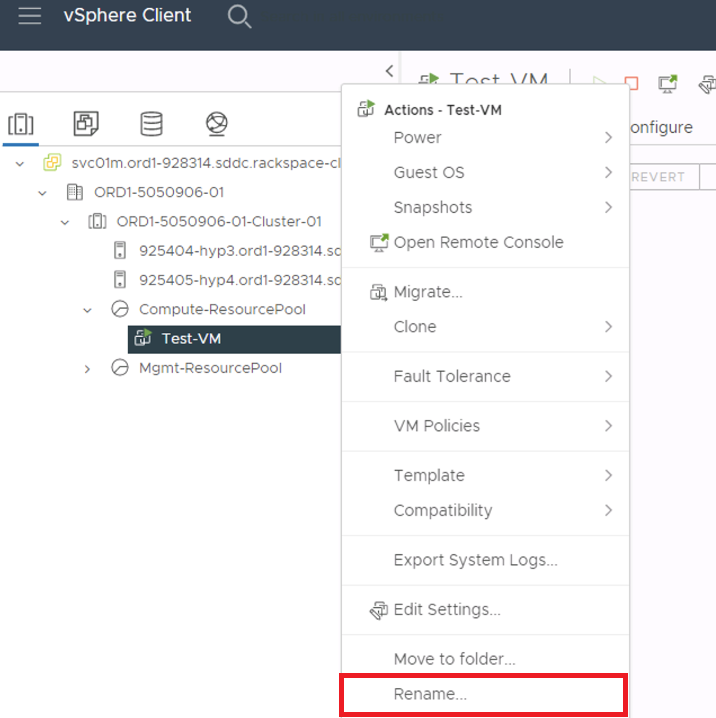
Renaming a Virtual Machine
-
Open the VMware vSphere Client or the VMware vSphere Web Client, and connect to the vCenter Server.
-
Right-click the virtual machine you wish to rename, click Rename
-
Enter the new name in to the box. Click OK to save the new configuration.
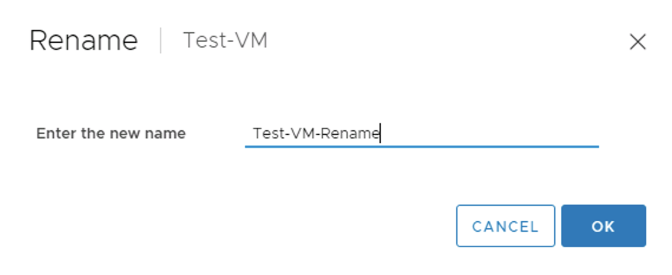
-
Change the hostname within the OS as necessary. Renaming the VM in vcenter does not change the hostname within the OS.
Updated 8 months ago