
Creating a Virtual Machine
This article covers creating a virtual machine on the Rackspace Cloud with the Skyline UI
NOTE: This article assumes you've already got a network created within your Rackspace Cloud account. If not, see this article
If you want to use Affinity/Anti-Affinity related policies for VM placement, check out our documentation regarding Server Groups
Creating a Virtual Machine
Once we've got the necessary network foundations in place, a virtual machine can be launched on the Rackspace Cloud platform. When using the Skyline UI to create a virtual machine, it will walk us through the four step process of selecting and creating our VM.
1: Base Config
- Click Compute from the side toolbar.
- Click Instances from the drop-down menu.
- Click the Create Instance button from the viewing pane.
- You'll now be placed in Step 1 of the VM creation pane. Here you'll make your selections for availability zone, flavor, boot source, and operating system image. What those mean can be found below.
- Availability Zone: A logical grouping of compute resources within an OpenStack cloud, often mapped to different data centers or server racks. Users can select an availability zone to ensure redundancy or optimize performance.
- Operating System Image: A pre-packaged OS template (e.g., Ubuntu, CentOS, Windows) stored in OpenStack’s Image service (Glance). Users select an image to install an operating system when creating a VM.
- Boot Source: Specifies how the VM is initialized, such as from an existing image, a volume, or an instance snapshot. This determines where the OS and data originate from.
NOTE: If you choose to create a new bootable volume, be sure you determine whether the volume should deleted too when the VM is deleted. There is a tick box next to the volume options where you can choose Yes or No for this.
IMPORTANT: If you are building a VM with a bootable volume based on a Custom Image or Instance Snapshot, add an additional 1GB of disk to the volume above what the minimum disk (min_disk) requirement is to allow for overhead from cloud-init.
- Flavor: Defines the hardware specifications of a VM, including CPU, RAM, and disk size. It acts as a template for resource allocation when launching an instance. If you're unsure what the flavor names mean or need more info, see this article.
- After making your selections, click the Next: Network Config button to move to Step 2.
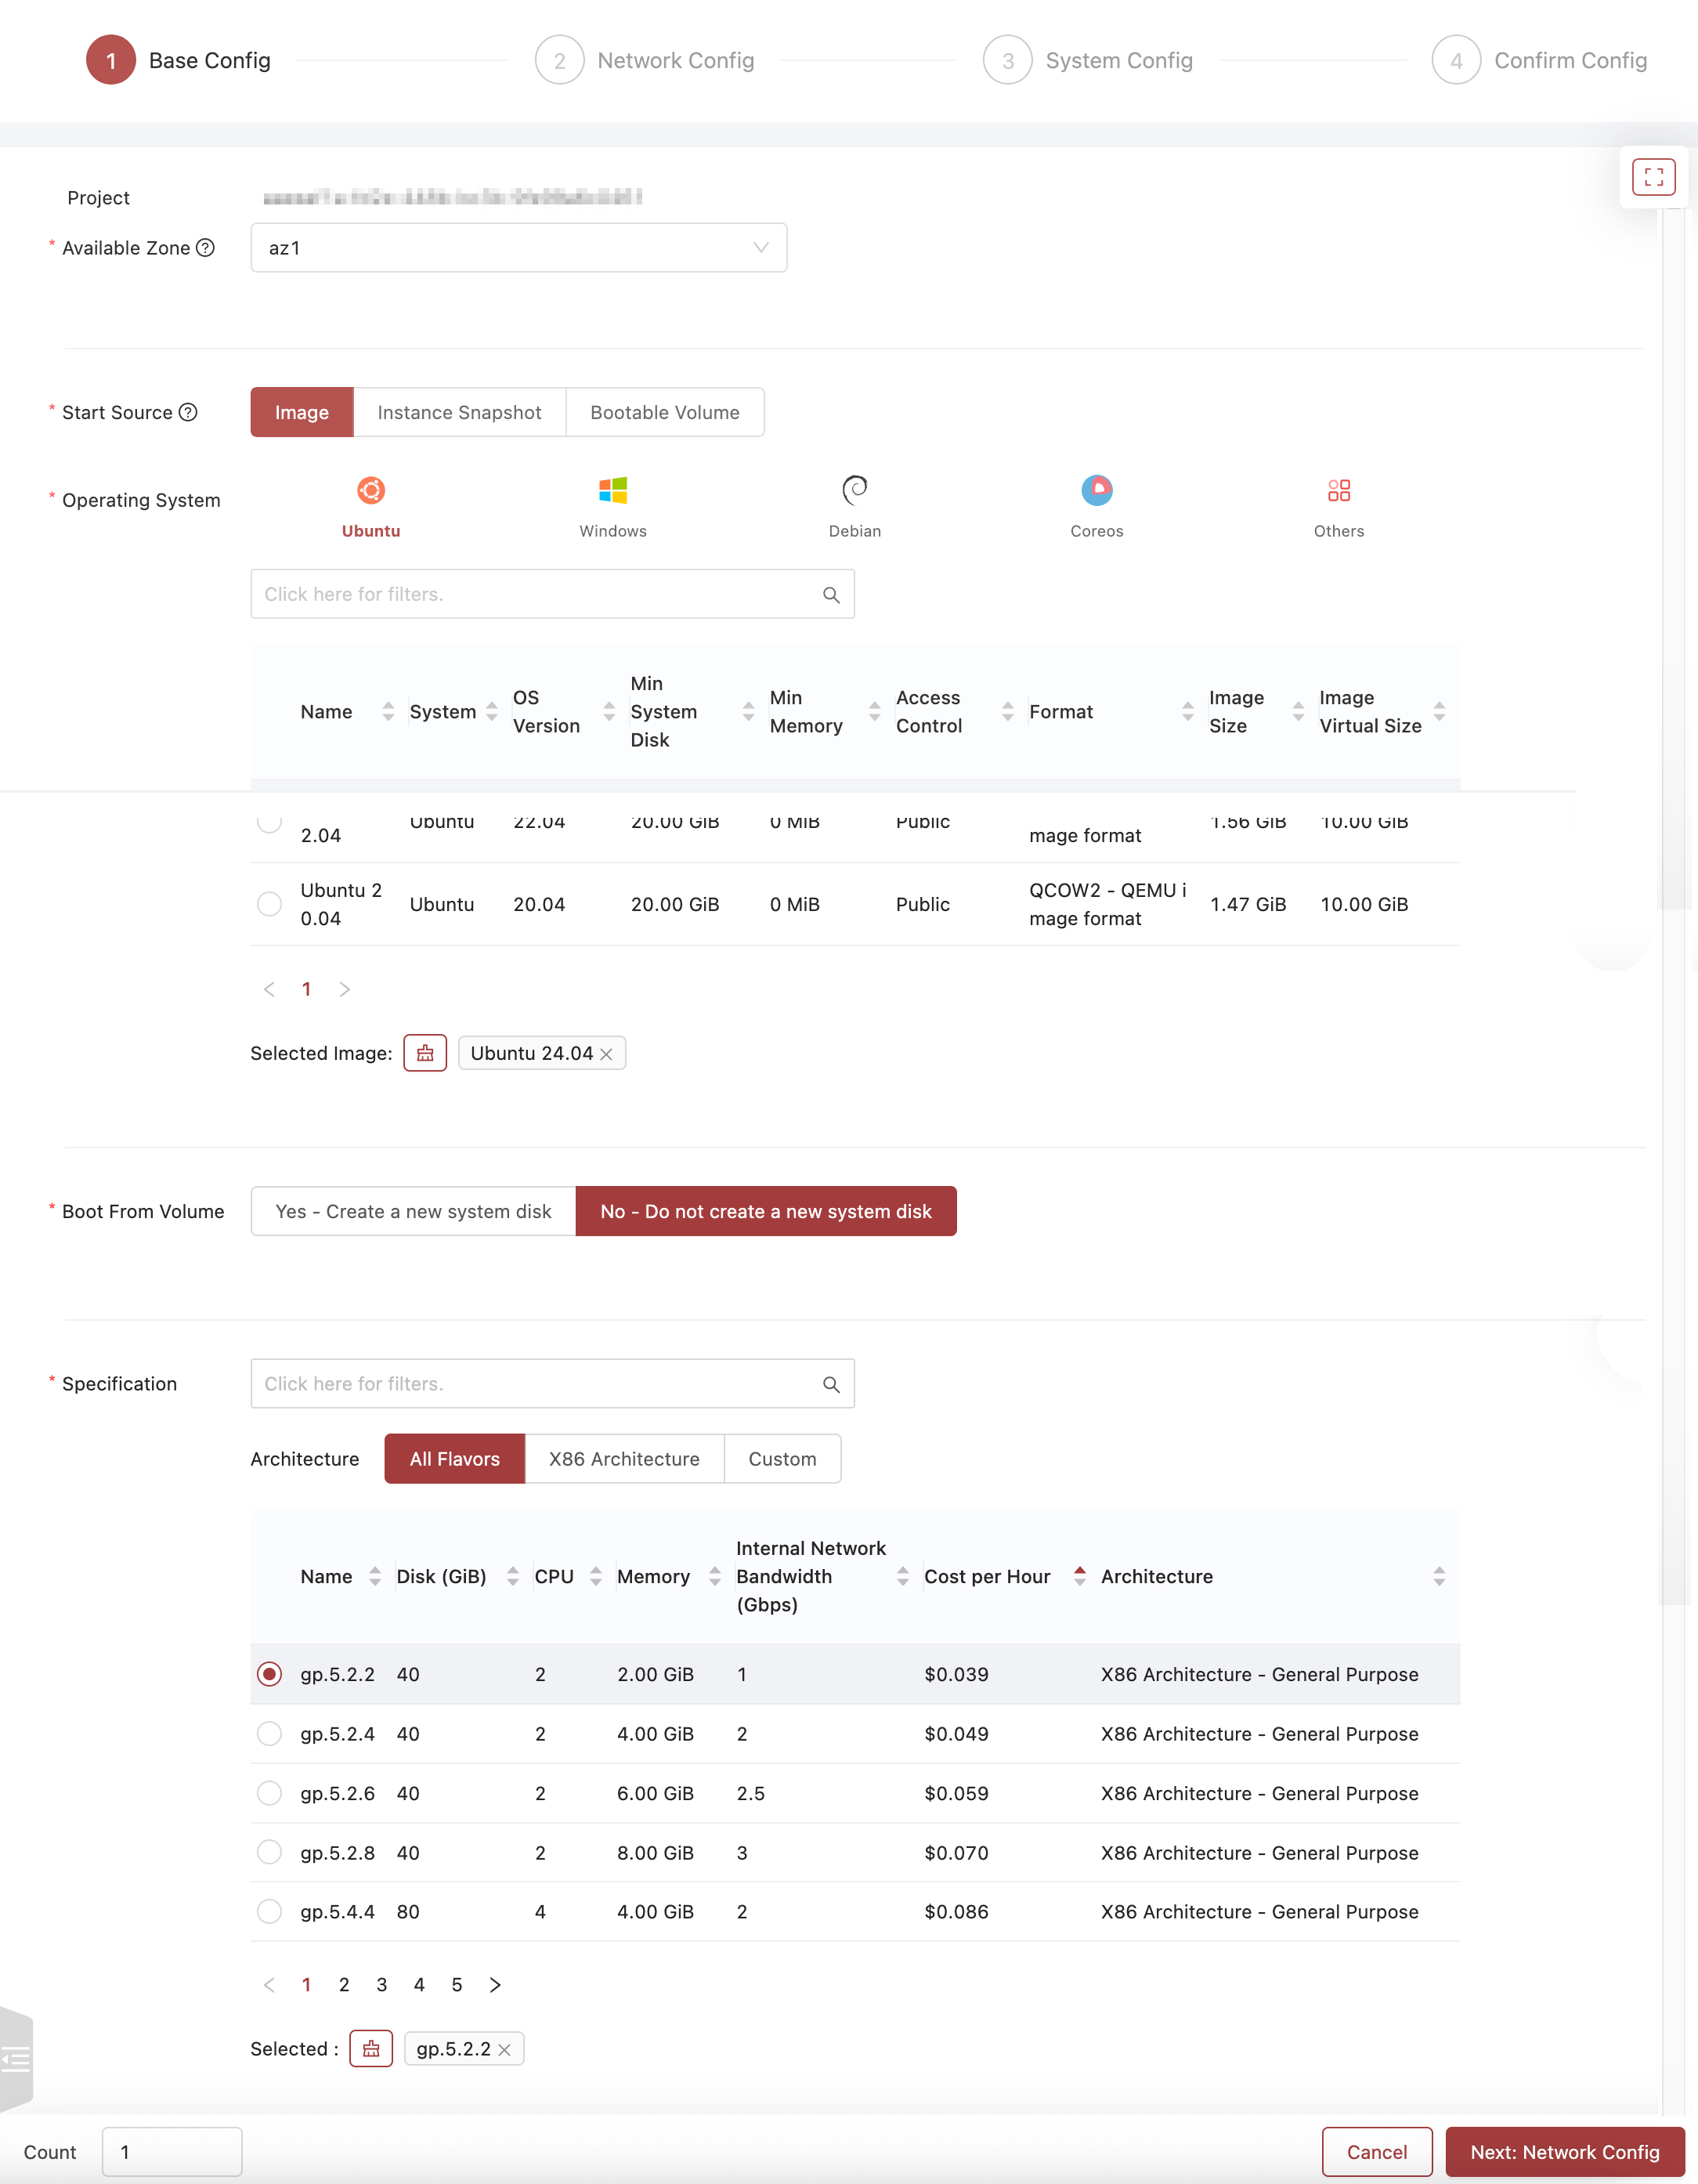
An example of Step 1 filled out.
2: Network Config
Now that we've got our base configuration for our VM, we can make our network selections. In order for us to get a VM launched, we at least need to select a Network and a Security Group. The VLAN and Port will be handled automatically when we create our VM. Once you've made your selections click the Next: System Config button to advance. In the screenshot below you can see how we've filled out Step 2:
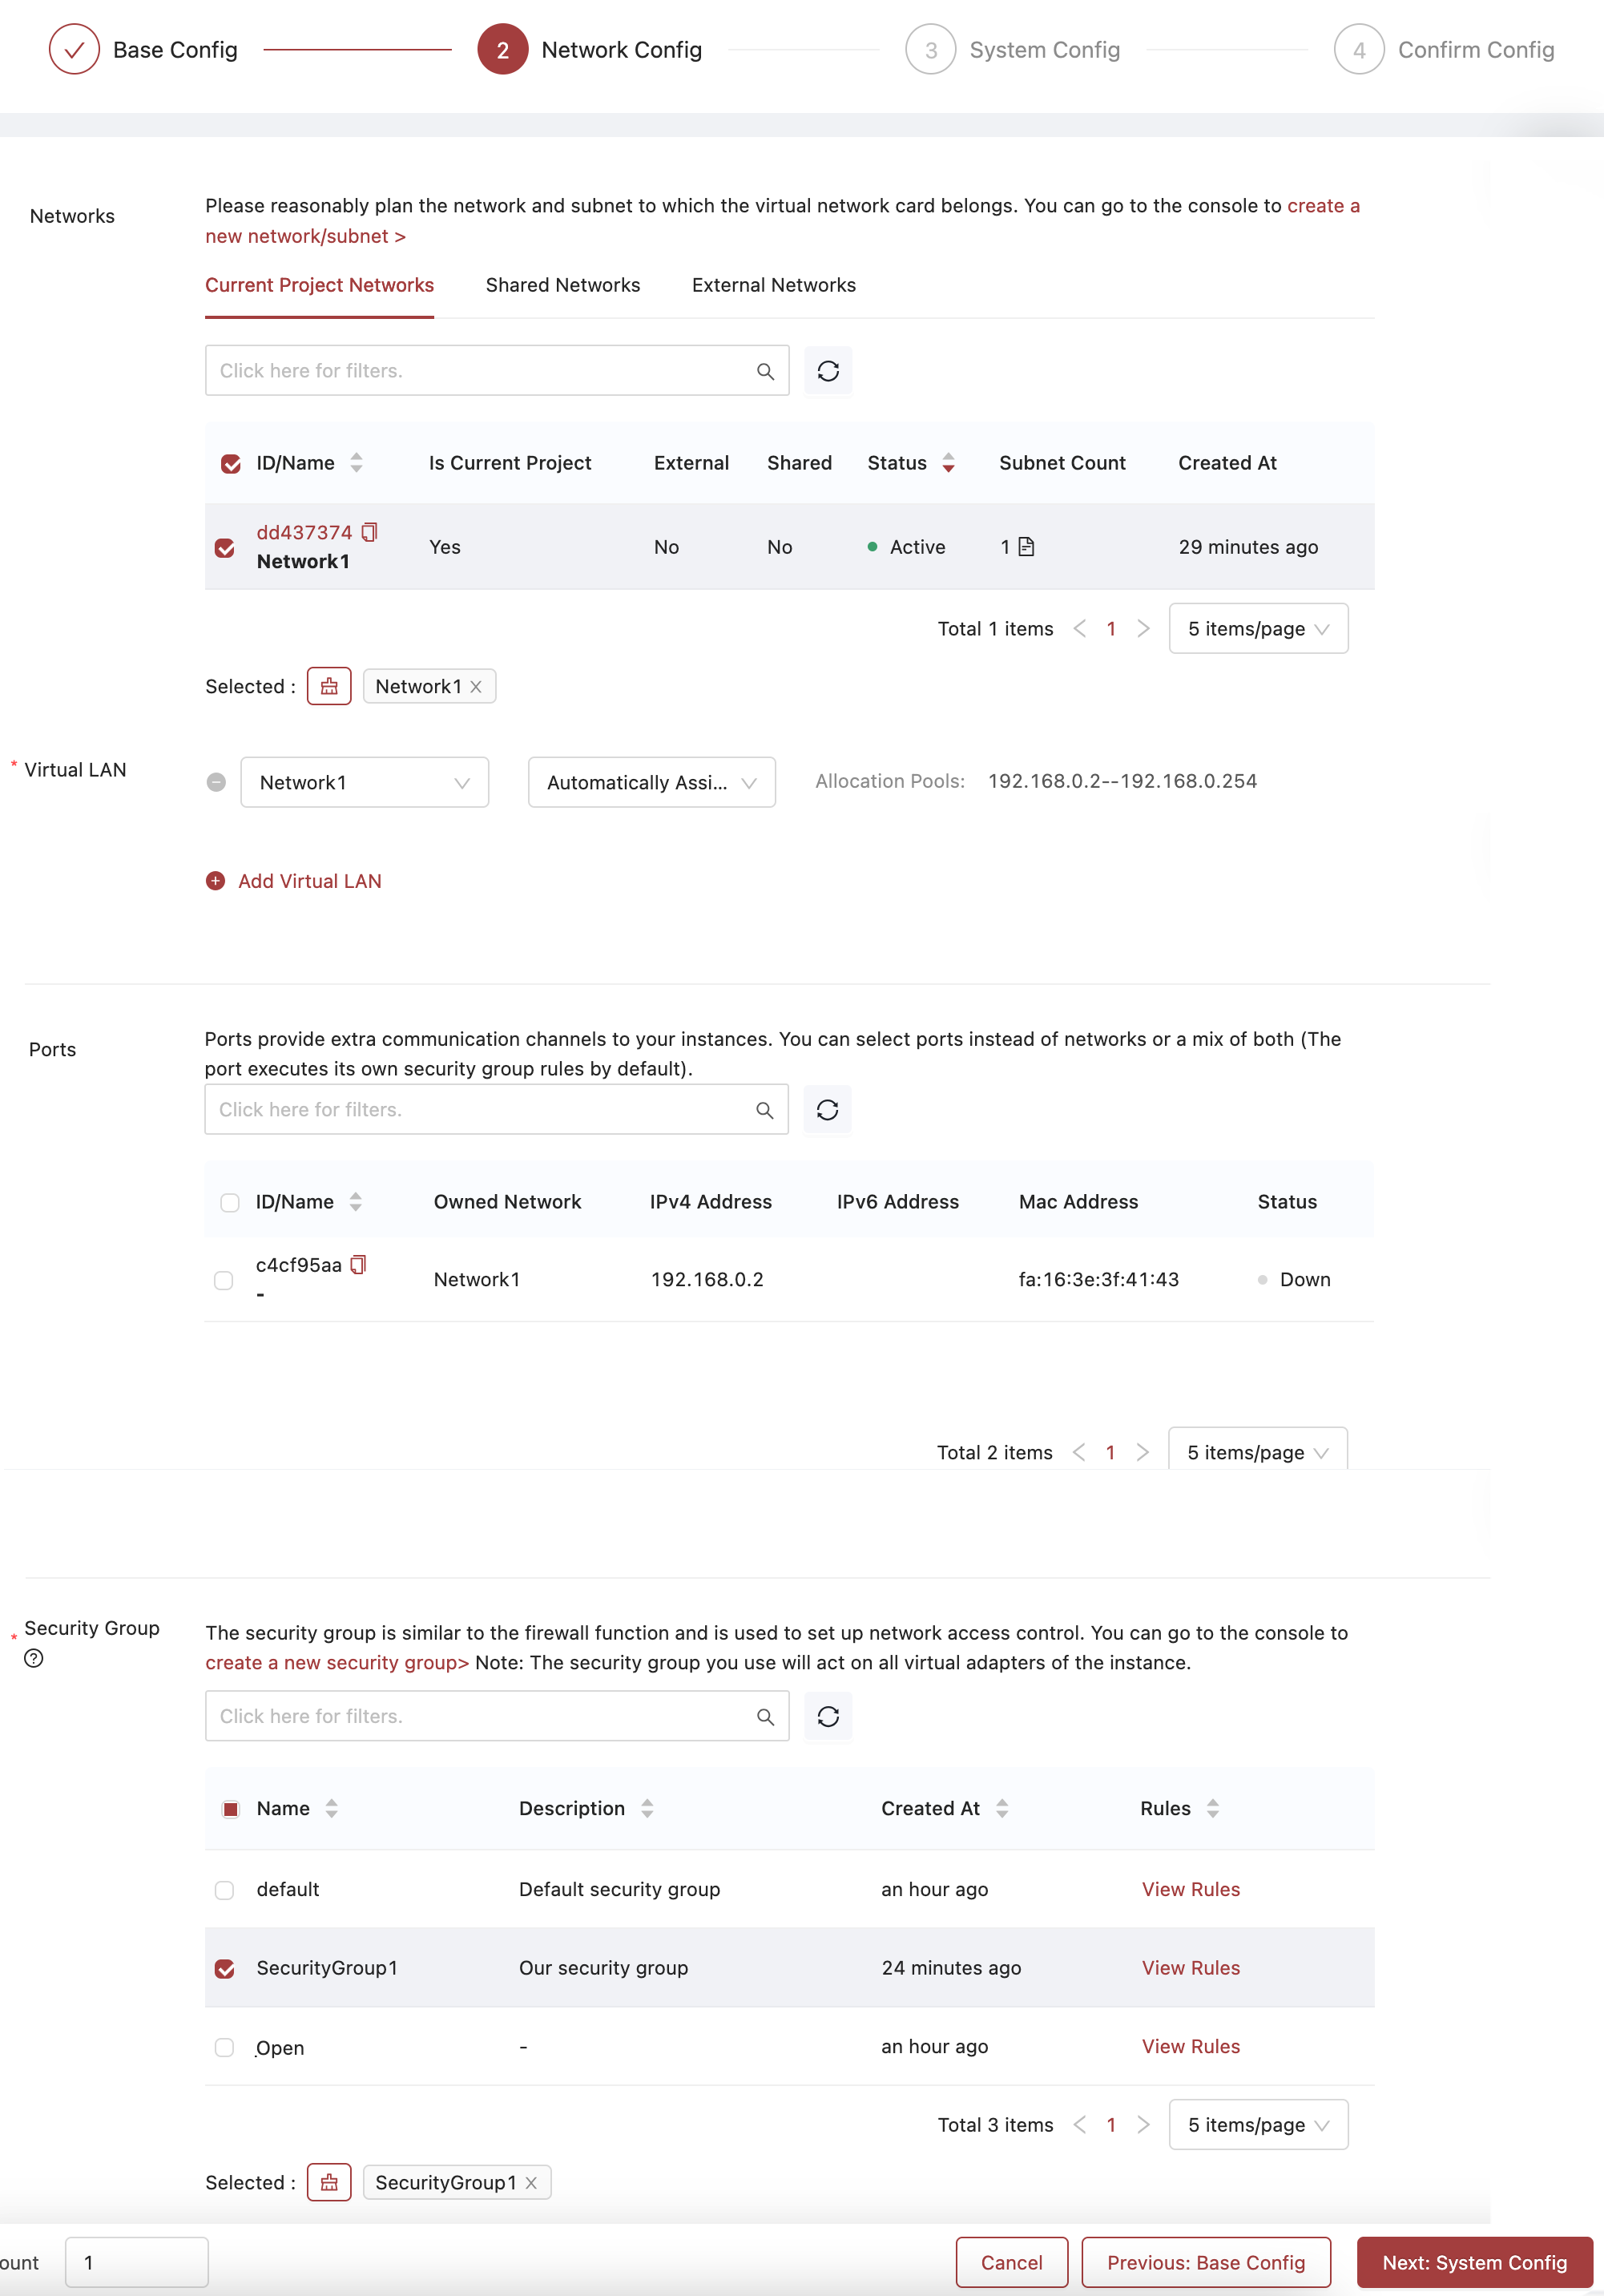
An example of Step 2 filled out for VM creation.
3: System Config
In Step 3 we're setting some important information for our VM. We're configuring the following:
- Name: The name of our VM
- Login Type: This determines if we use SSH Keypairs or Password authentication to log into the VM
- If using Password auth you'll be shown the Login Name which is the username you'll log into the VM with, and be asked to supply the desired password.
- If using Keypair auth you'll have the option to select an existing SSH Keypair, or create a new one. If you create a new Keypair it will appear in the list and the keyfile will be automatically downloaded to your local machine. Be aware that any keys created will be tied to the user who created them - and not visible to other users. For more info on SSH Keypairs, see this document.
NOTE: The 'Login Type' setting will overwrite whatever configuration you have in-place on a Saved Snapshot. So if your Snapshot used SSH Keys for Authentication of the primary user originally and you build a new VM with 'Password' it will now use Password instead.
When you're ready to advance, click the button labeled Next: Confirm Config
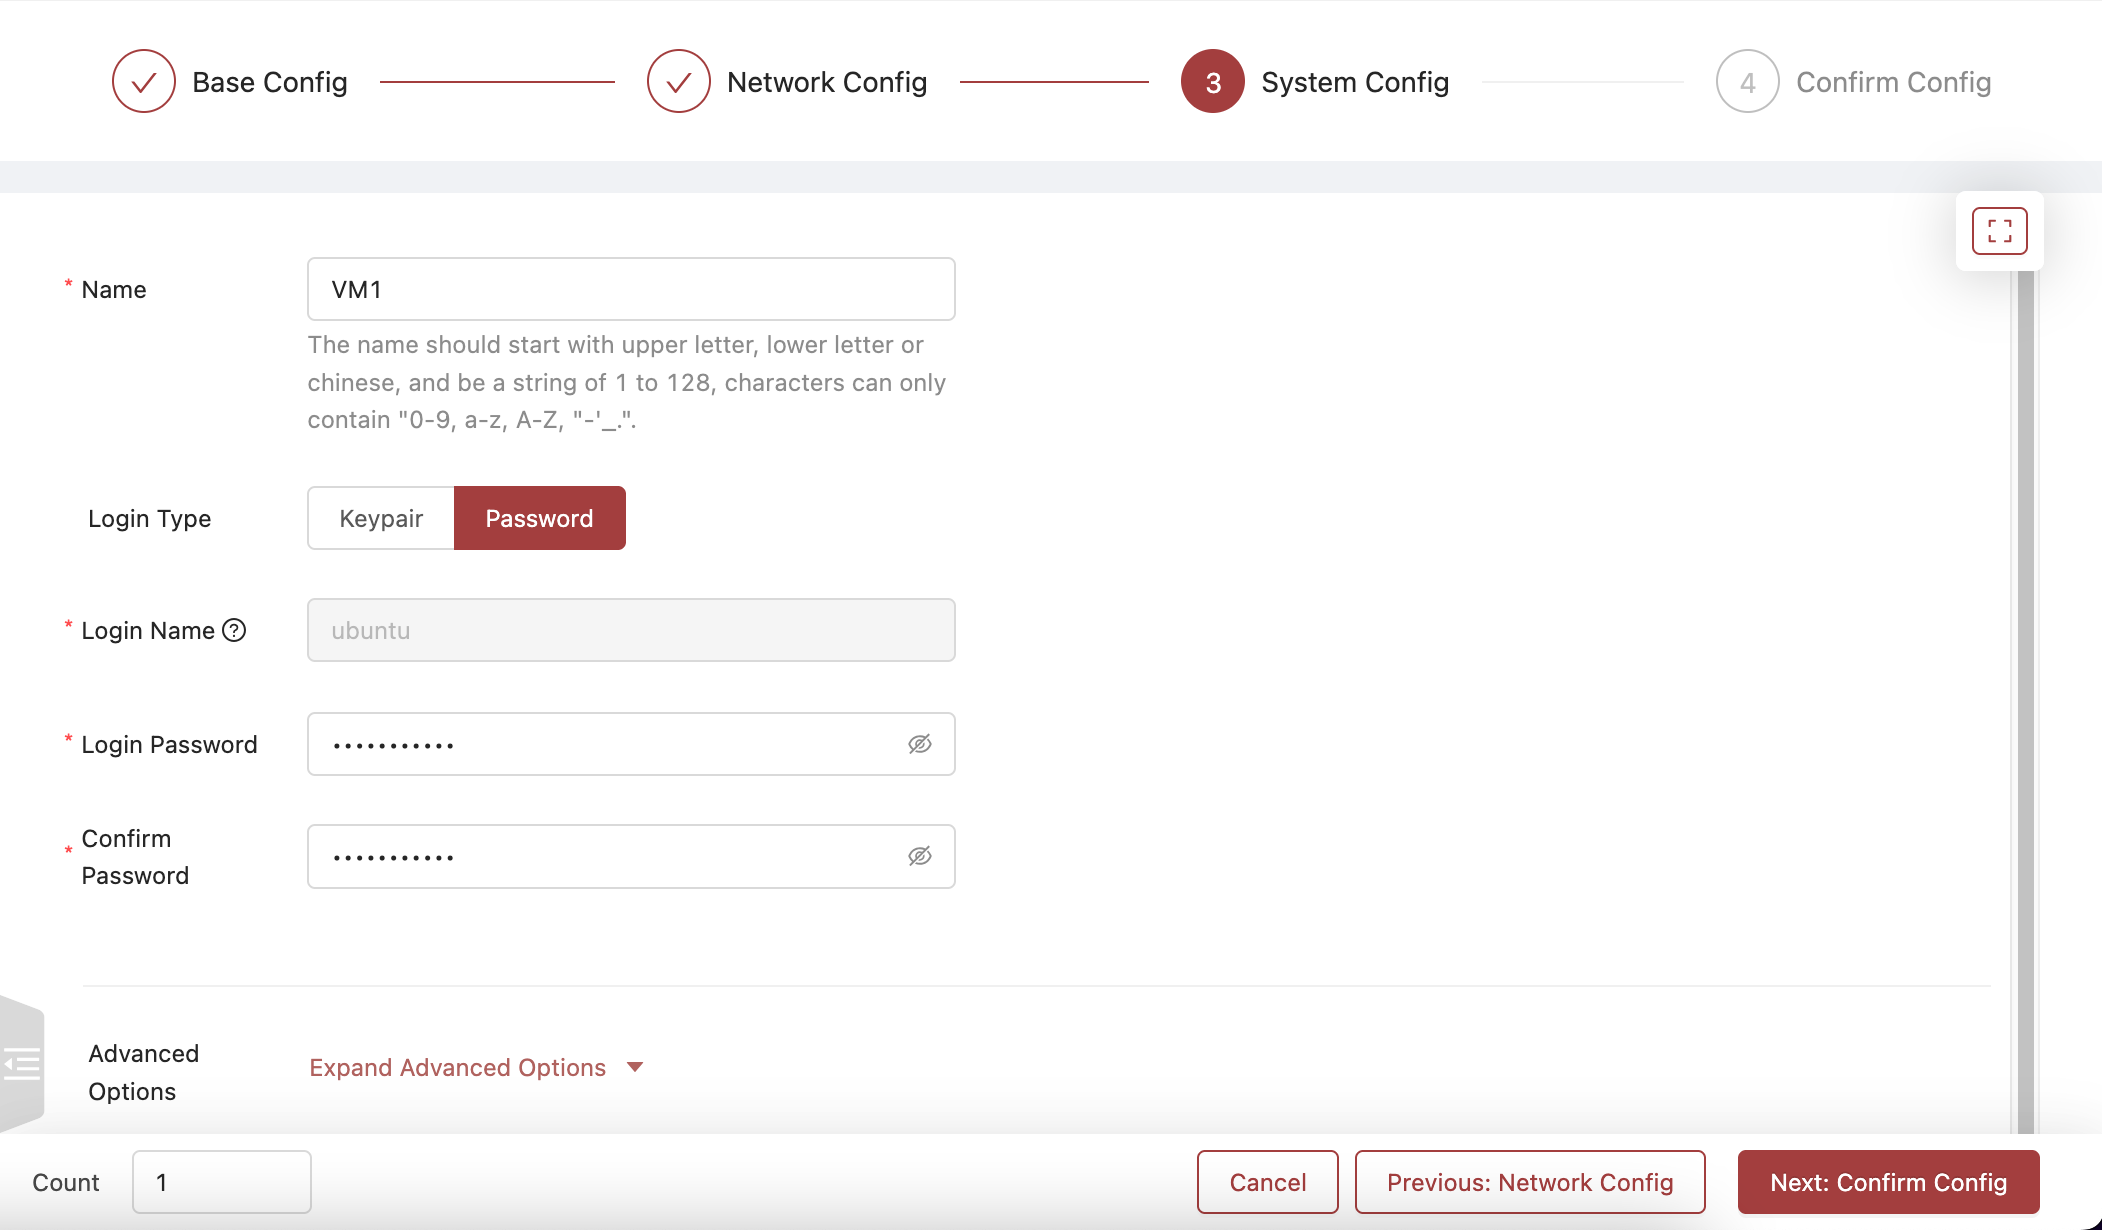
An example of Step 3 filled out, with the password authentication chosen.
IMPORTANT: While Keypair authentication can require more technical understanding, it is advised to use this method for enhanced security.
4: Confirm Config
In the final step, you'll simply be reviewing your selections before clicking Confirm to initiate the creation of your VM.
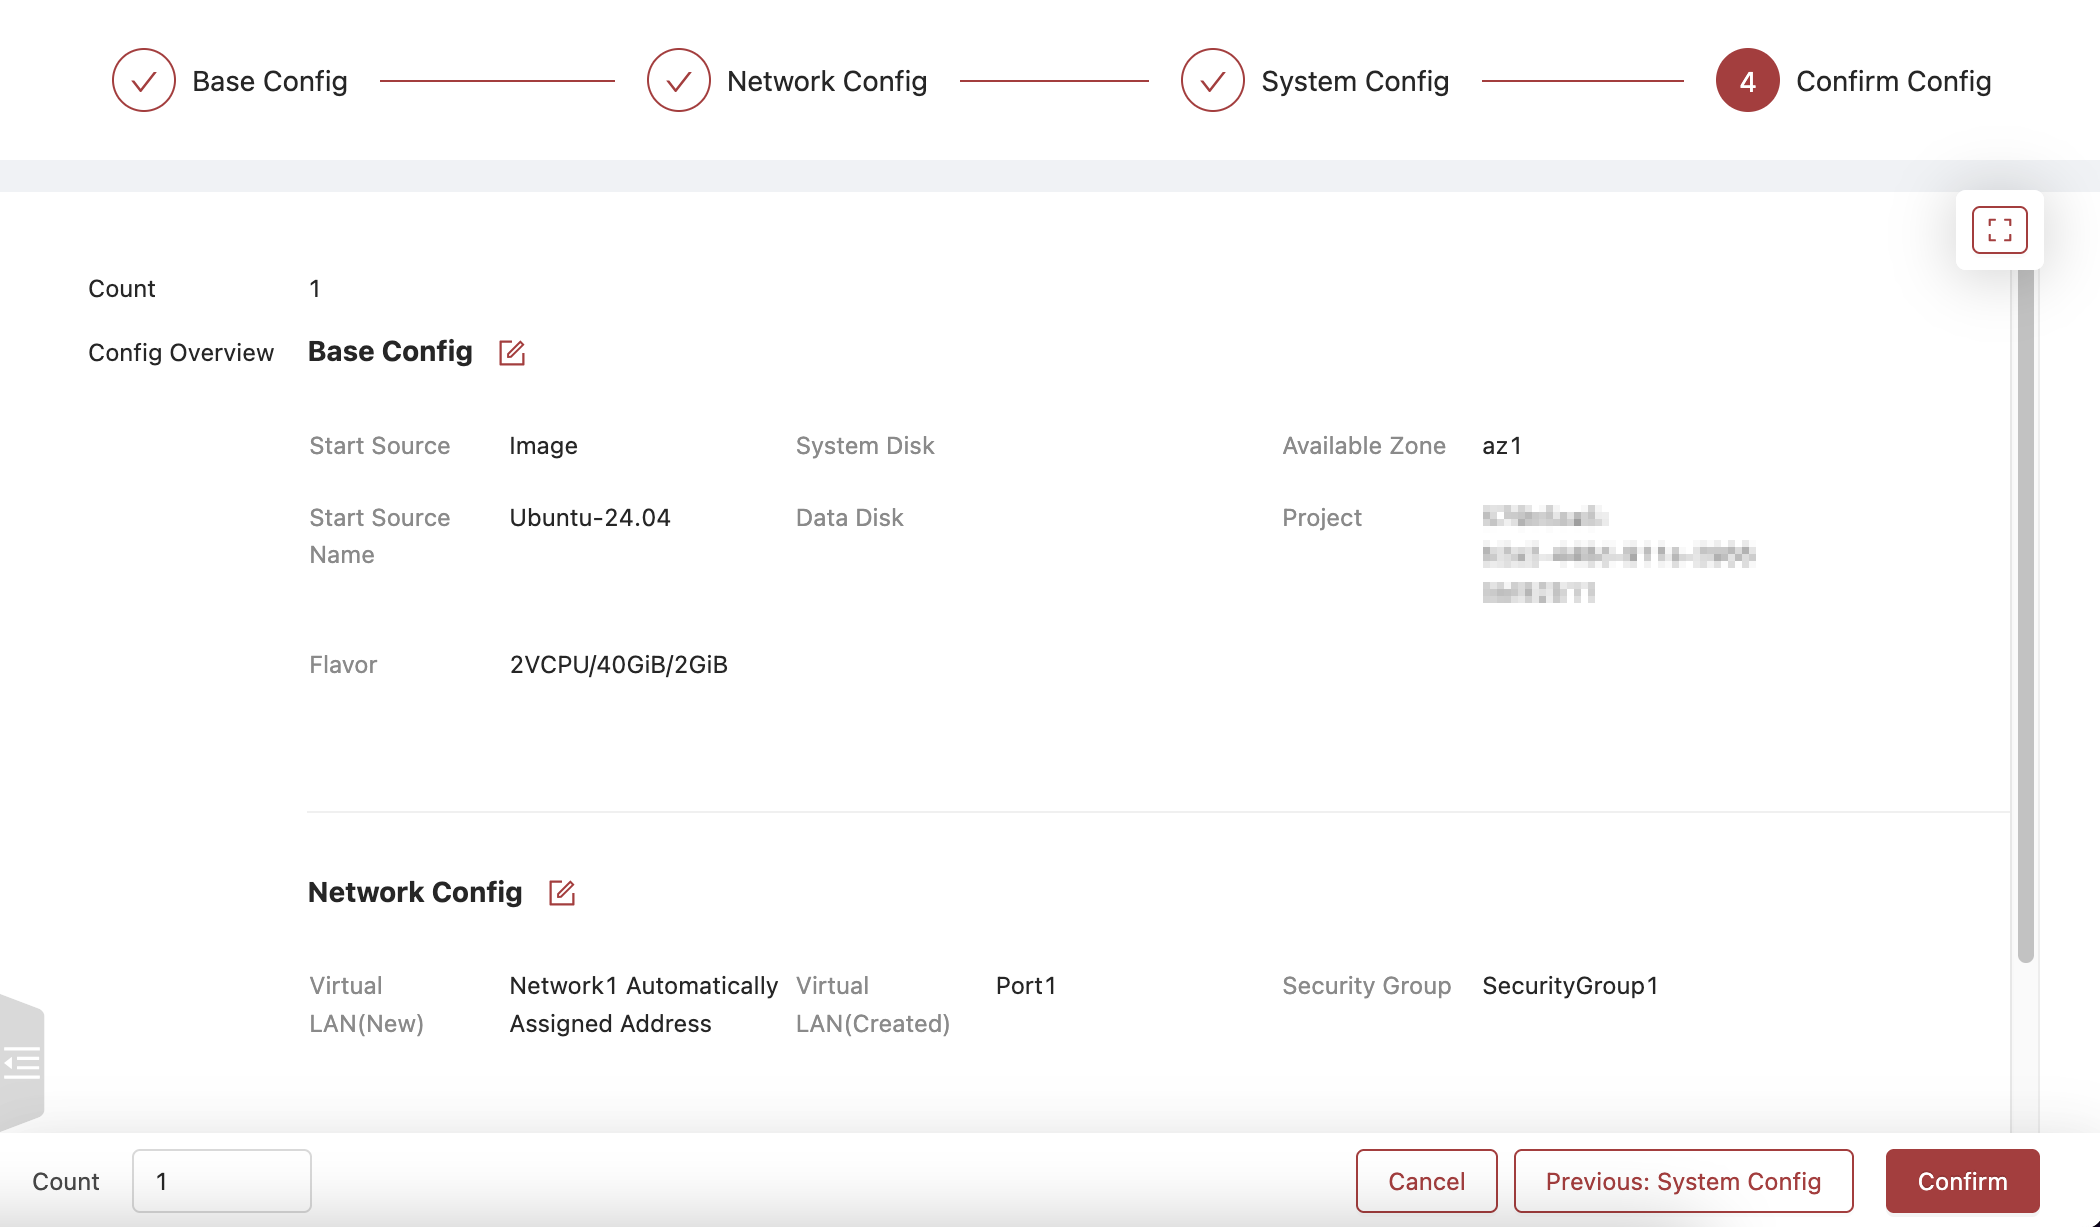
An example of Step 4, ready to be built.
Finished! After creating your VM, you'll find it in the Compute > Instances list on your UI. There you'll be able to see the status of the VM.
Creating a Floating IP
Once the instance is ACTIVE you still will not be able to connect to it remotely. This is because the instance's internal network IP is not reachable from the Internet yet. To allow our VM to be available from outside of our private network we need to Create and Associate a Floating IP.
A floating IP is allocated from an external provider network and loosely coupled to a VM via its network port rather than the VM itself. Remember that a floating IP can only be mapped to one port at a time. It gets the designation of 'floating' by having the ability to disassociate from one port and re-associate with another port without the need to make any upstream network changes. Thus, the IP can "float" between VMs.
To create and associate our Floating IP, follow the below steps:
- From the side toolbar click Network
- From the drop-down options select Floating IPs
- Click Allocate IP from the view pane.
- You'll be presented with a new window where you are required to at least enter the network as 'PUBLICNET', the other options are optional or will be handled automatically. It is advised to provide a description as this will help you identify this floating IP more easily. Below is a screenshot of a Floating IP being created:
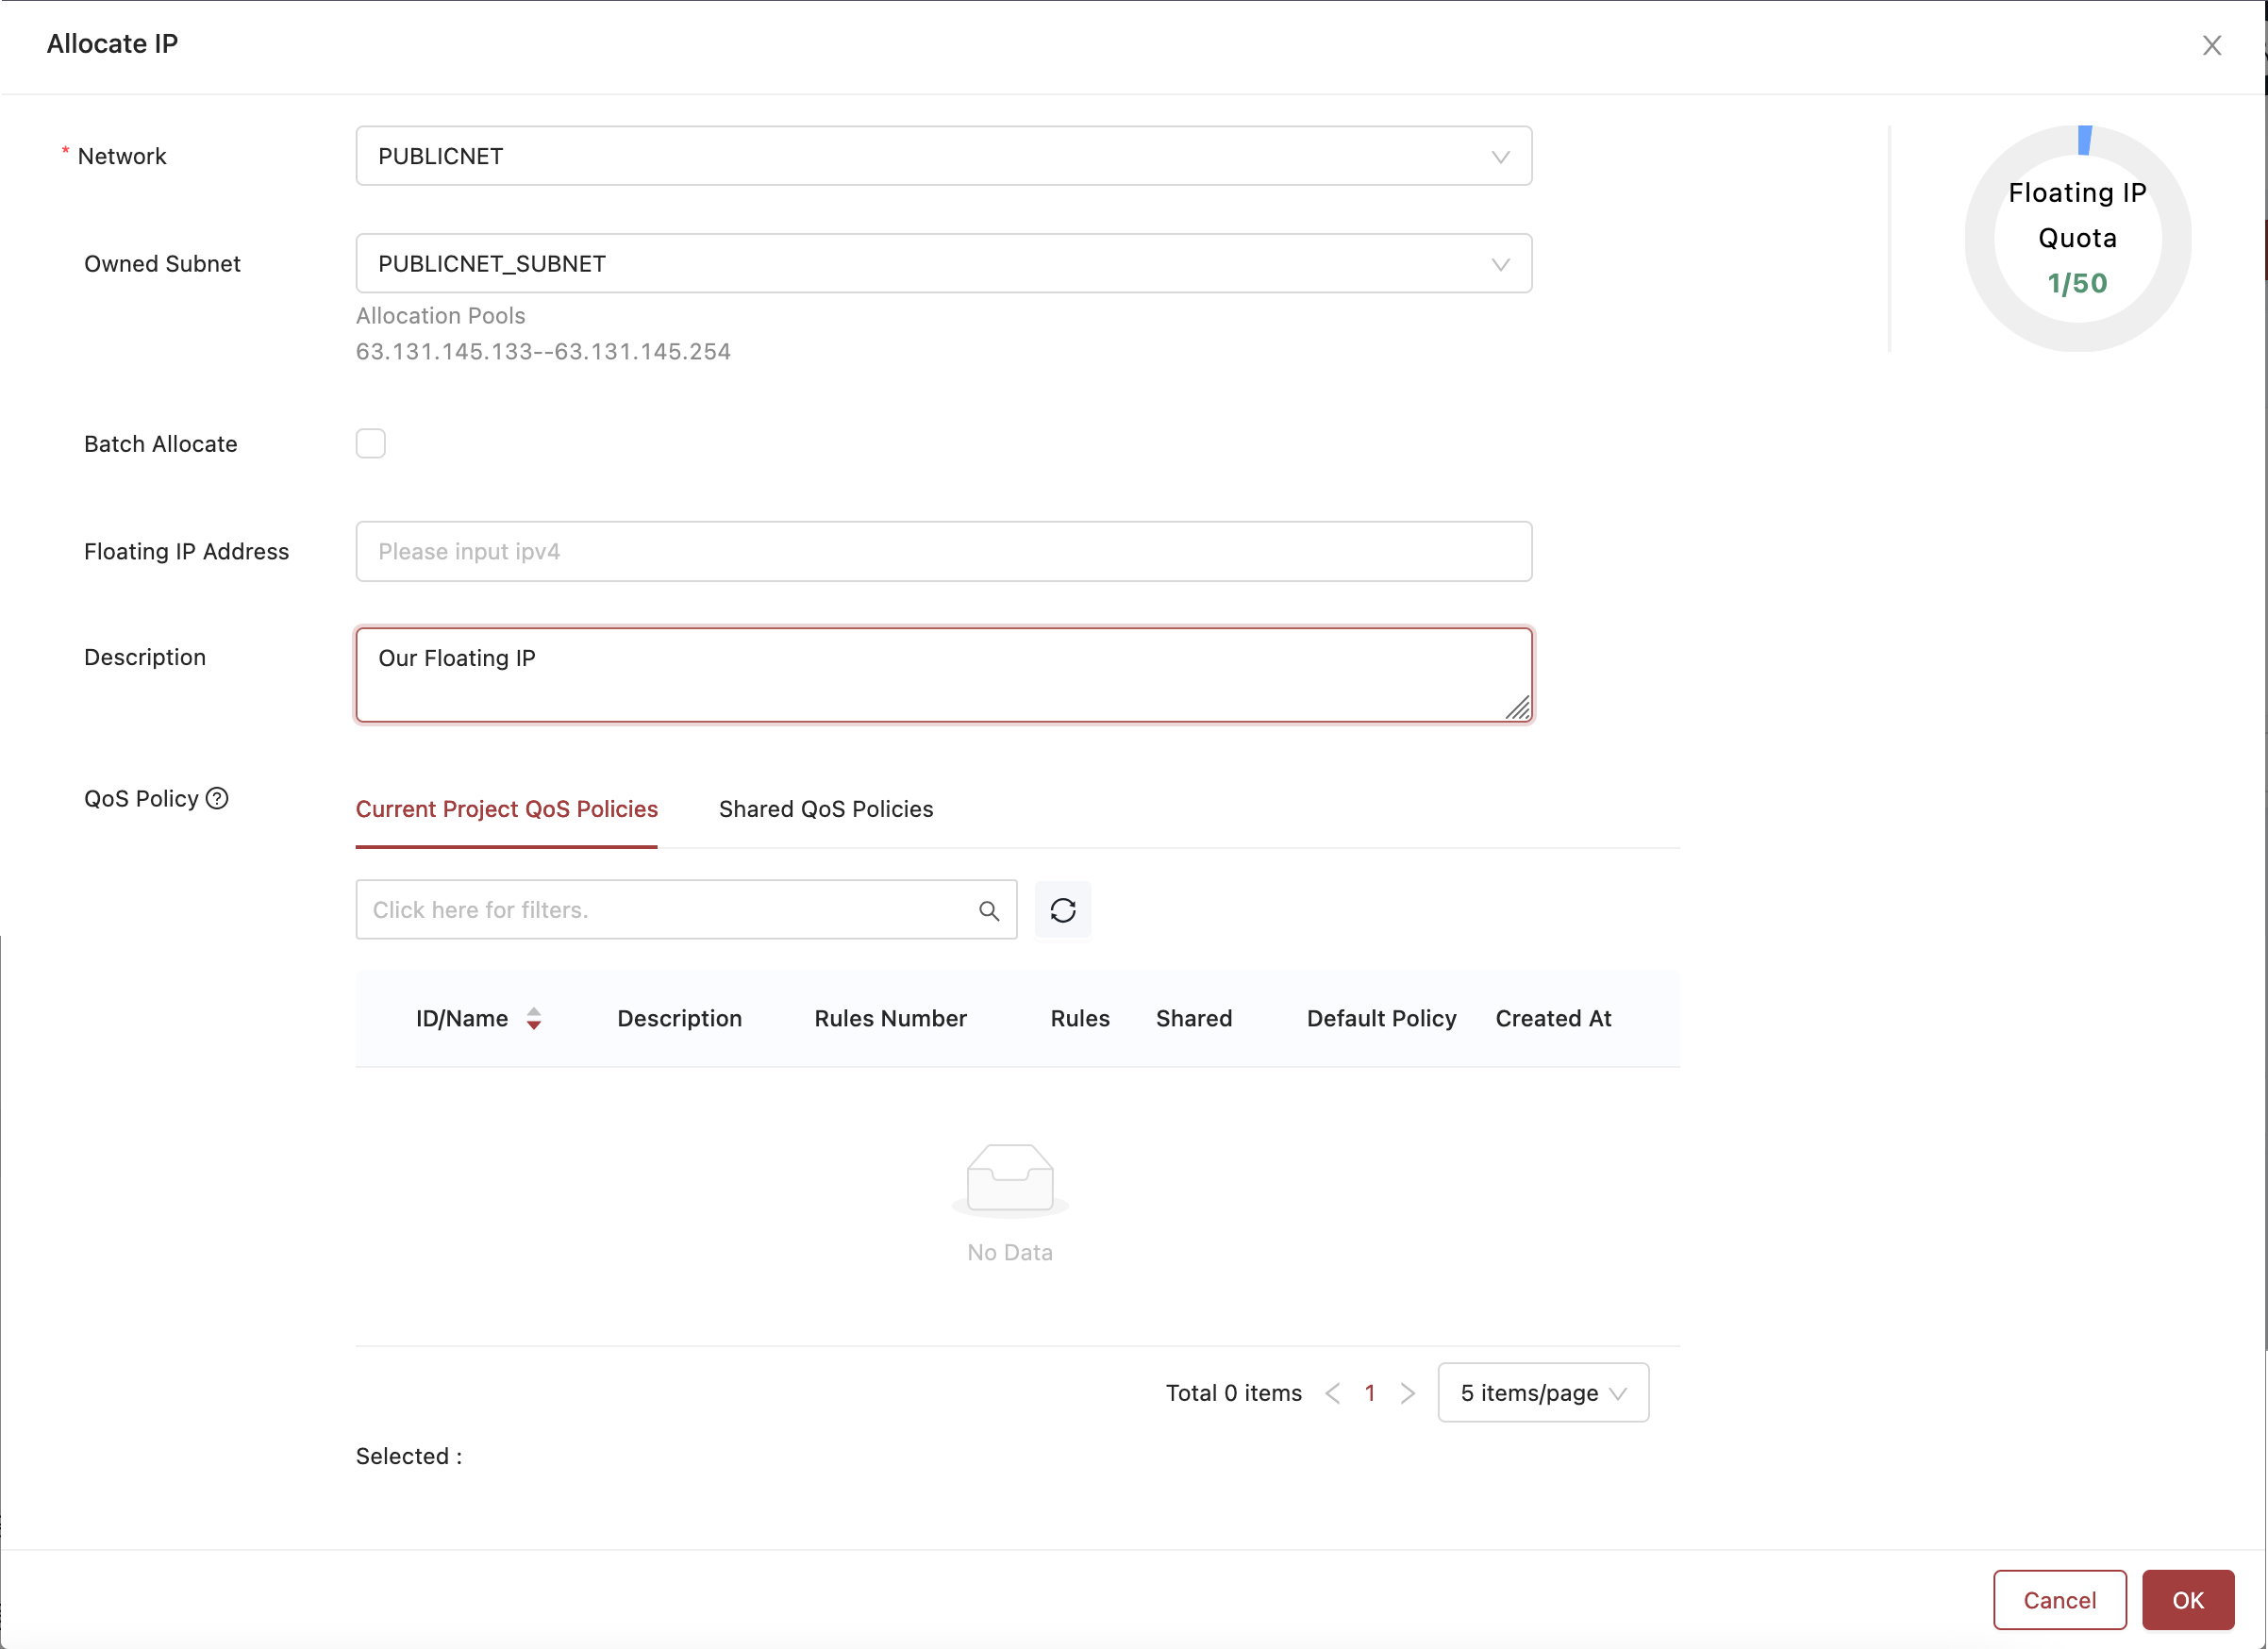
A floating IP ready for creation.
Associating the Floating IP to a VM
Now that we've created the Floating IP we just need to assign it to the port our VM uses. Remember, Floating IPs are NOT actually assigned to VMs, but to ports. So as long as we assign the Floating IP to the port our VM uses, we've ensured connection to the right device. Here are the steps to accomplish this:
- From side toolbar navigate to Network > Floating IPs
- Identify the Floating IP we want to assign and click More to the right of its listing.
- Click Associate from the drop-down menu.
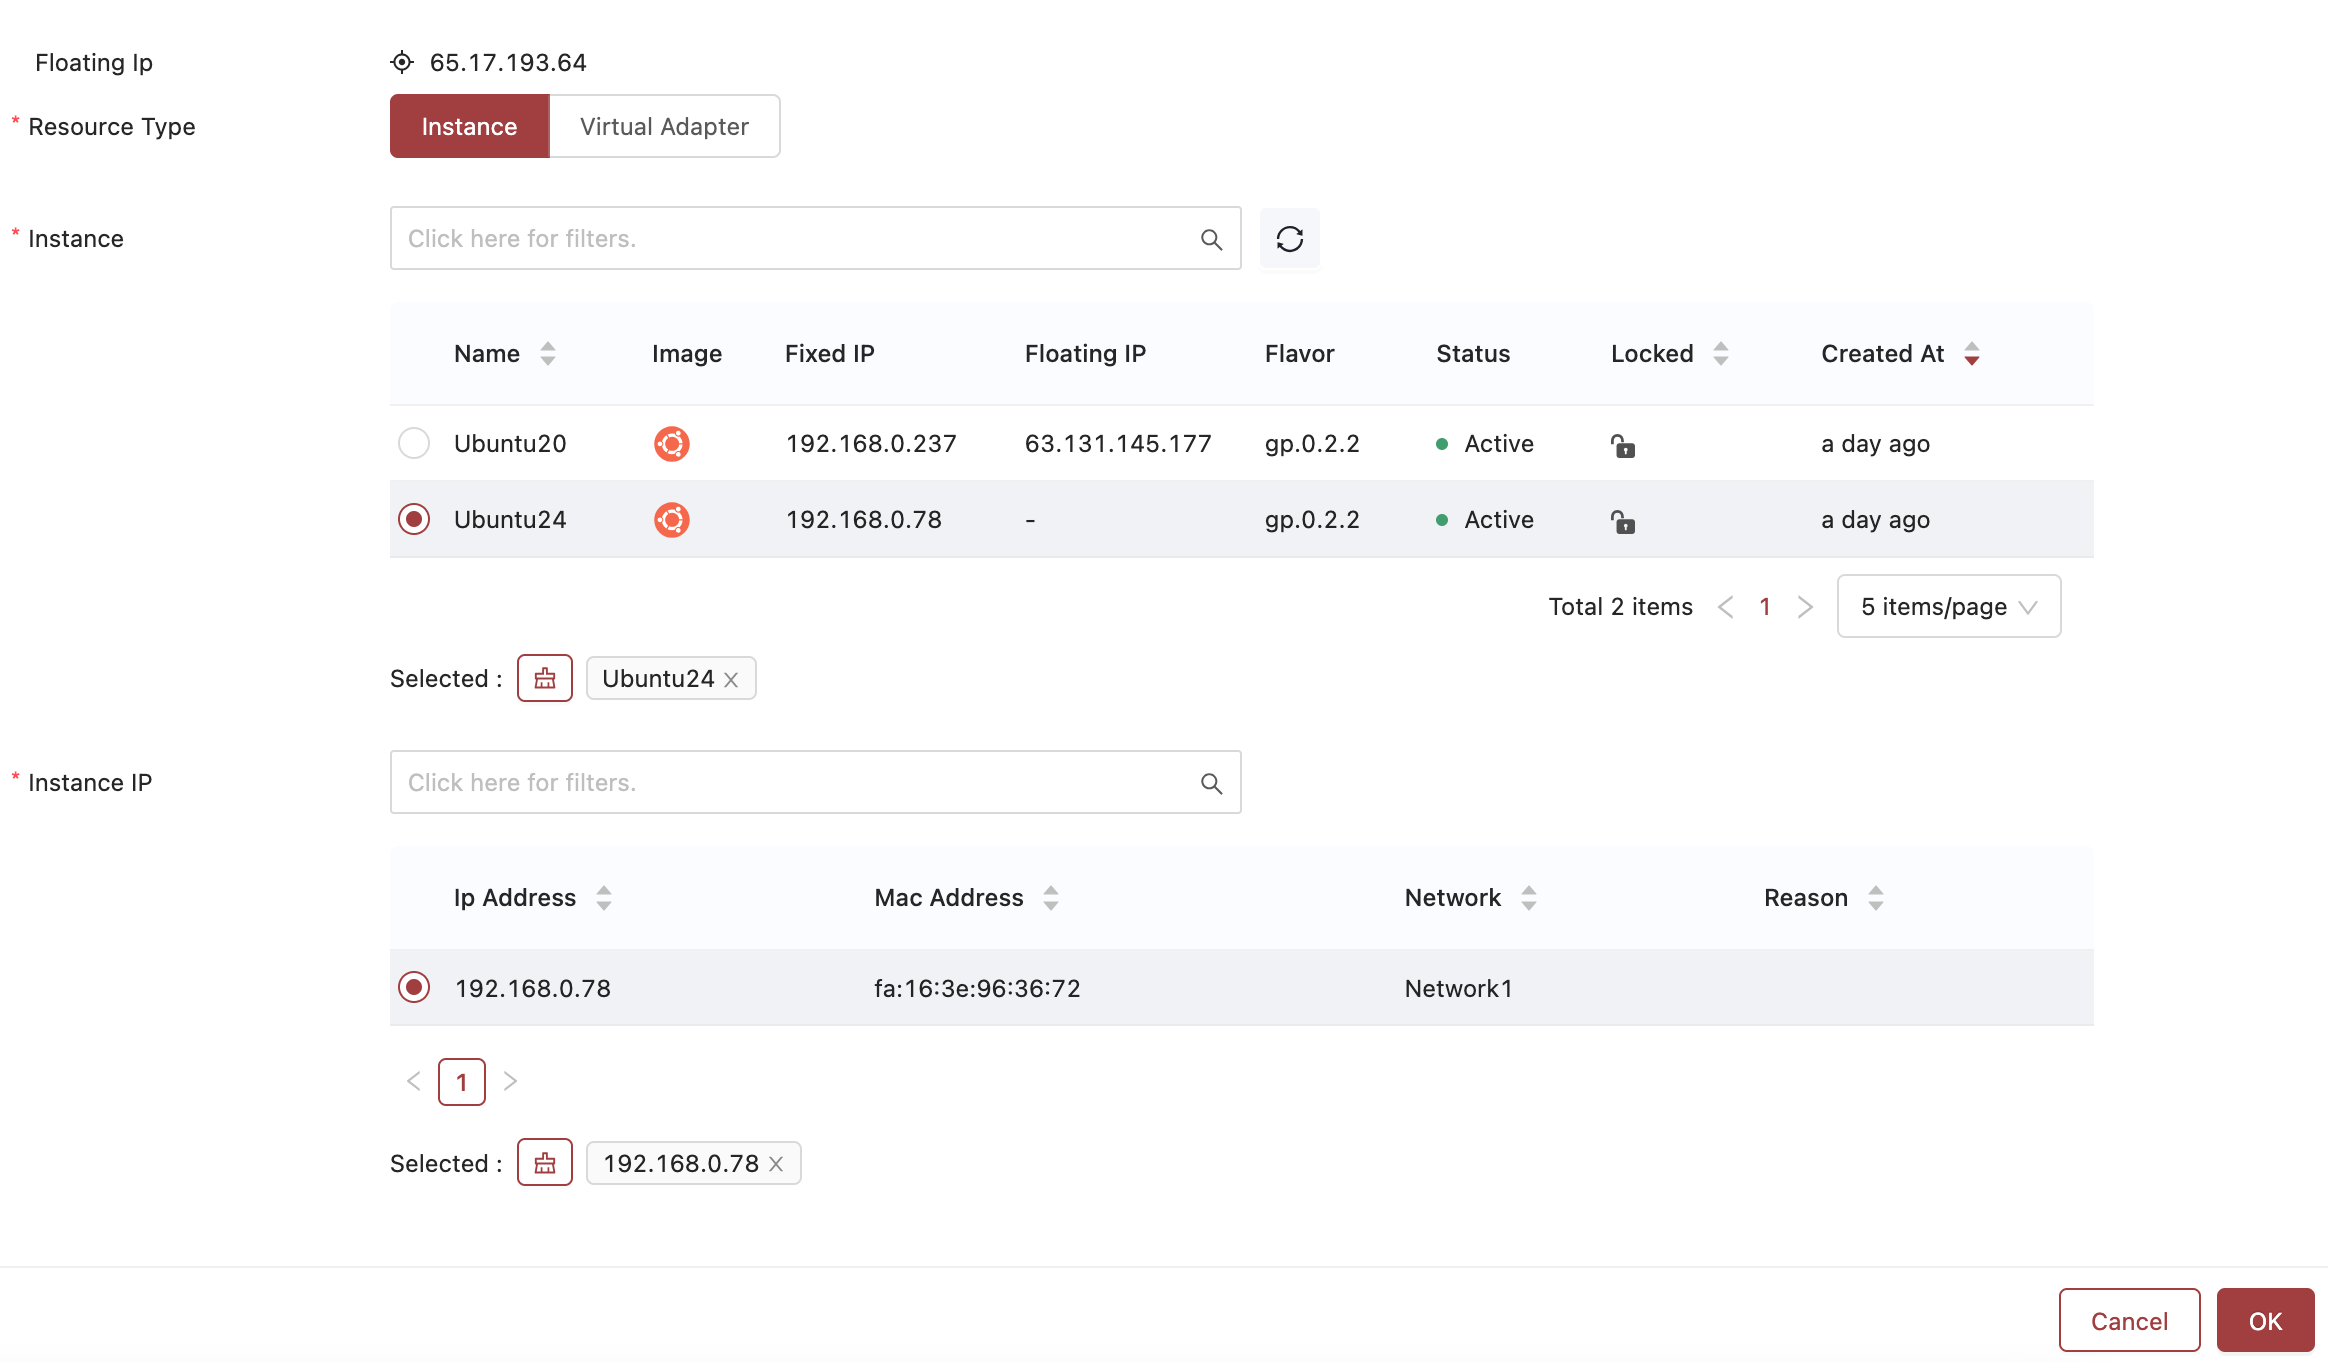
- In the new window, select the desired VM and it's internal IP address.
- Click OK to associate the floating IP to our VM.
- If successful the Floating IP will now be listed as 'Active'.
Accessing the VM
Now that we have applied the Floating IP to our VM, we can attempt to remotely log into the VM using the appropriate default protocol and port such as SSH or RDP.
Updated 16 days ago
What’s Next
Now that you can access your VM you can begin installing and configuring the devices as you need! If you want a cPanel like experience, visit the link below for how to install aaPanel.