
VMM on The Rackspace Cloud
VMM on the Rackspace Cloud on OpenStack Flex
NOTE: For customers familiar with Managed Operations SLA on our Legacy Rackspace Cloud, VMM for Rackspace Cloud on OpenStack Flex replaces the role of that Managed Operations Service Level and allows account owners to be selective about what they want to pay a managed service fee for - and can easily unenroll devices at-will.
Be aware that having Managed Operations SLA on your Legacy Rackspace Cloud does not automatically enroll you in VMM as VMM enrollment is managed per device by the user.
What is VMM?
Virtual machine management (VMM) is a Rackspace service to help organizations optimize resource use, improve operational efficiency, and increase awareness on VM workloads. Rackspace VM Management (Rackspace VMM) is an easy-to-use self-service platform that puts you in control of the management of your services. Customers are billed monthly on the aggregate total of daily metering. If a server is enrolled then it will be billed for that day.
What Services Does VMM Offer?
VMM delivers additional optional value at the OS layer with a suite of services that customers can choose to enroll individual VMs in. These options include:
- Patching: Provides a managed OS patching service for supported operating systems. The patching schedule is set by the Customer and Rackspace Technology configures the guest OS to use Rackspace Technology-provided patching sources so that only approved patches are delivered and installed on customer machines.
- OS Admin: This service enables a customer to initiate a request that would trigger a Rackspace System Administrator to log in to the guest OS of a virtual machine. Rackspace support engineers will utilize secure, time-limited, and audited access to the environment to provide troubleshooting services for supported systems. The OS Administration spheres of support can be found here:
- Observability: Rackspace Technology installs, configures, and responds to monitoring alerts from an installed OS agent for OS and application alerts and conditions on VMs. It enables monitoring of guest OS service availability on a network, internal OS system resources, OS services operational status, and error conditions with advanced observability powered by Datadog®.
- Host Protection: Installs an OS antivirus agent on the selected VMs to provide customers with Host Protection services.
How Do I Enroll a VM in VMM?
Before you'll be able to see and enroll Rackspace Cloud VMs in VMM, you'll need to have already accessed the Rackspace Cloud portal and created the VM(s).
Prerequisites:
Enrolling in VMM
-
Log in to https://login.rackspace.com with the username and password for your Rackspace Cloud account.
-
From the toolbar along the top, click 'Select a Product' and choose 'My Resources'
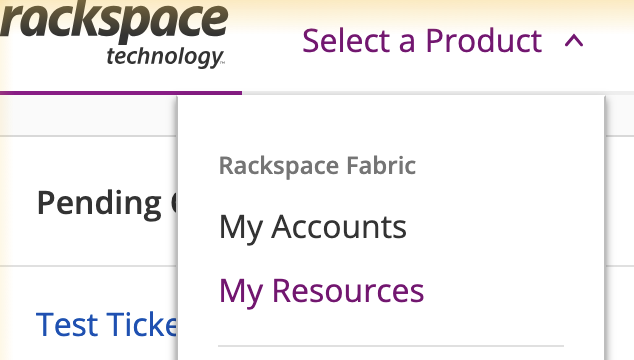
Choose 'My Resources'
-
You'll now see a list of resources in your accounts similar to the example shown below.
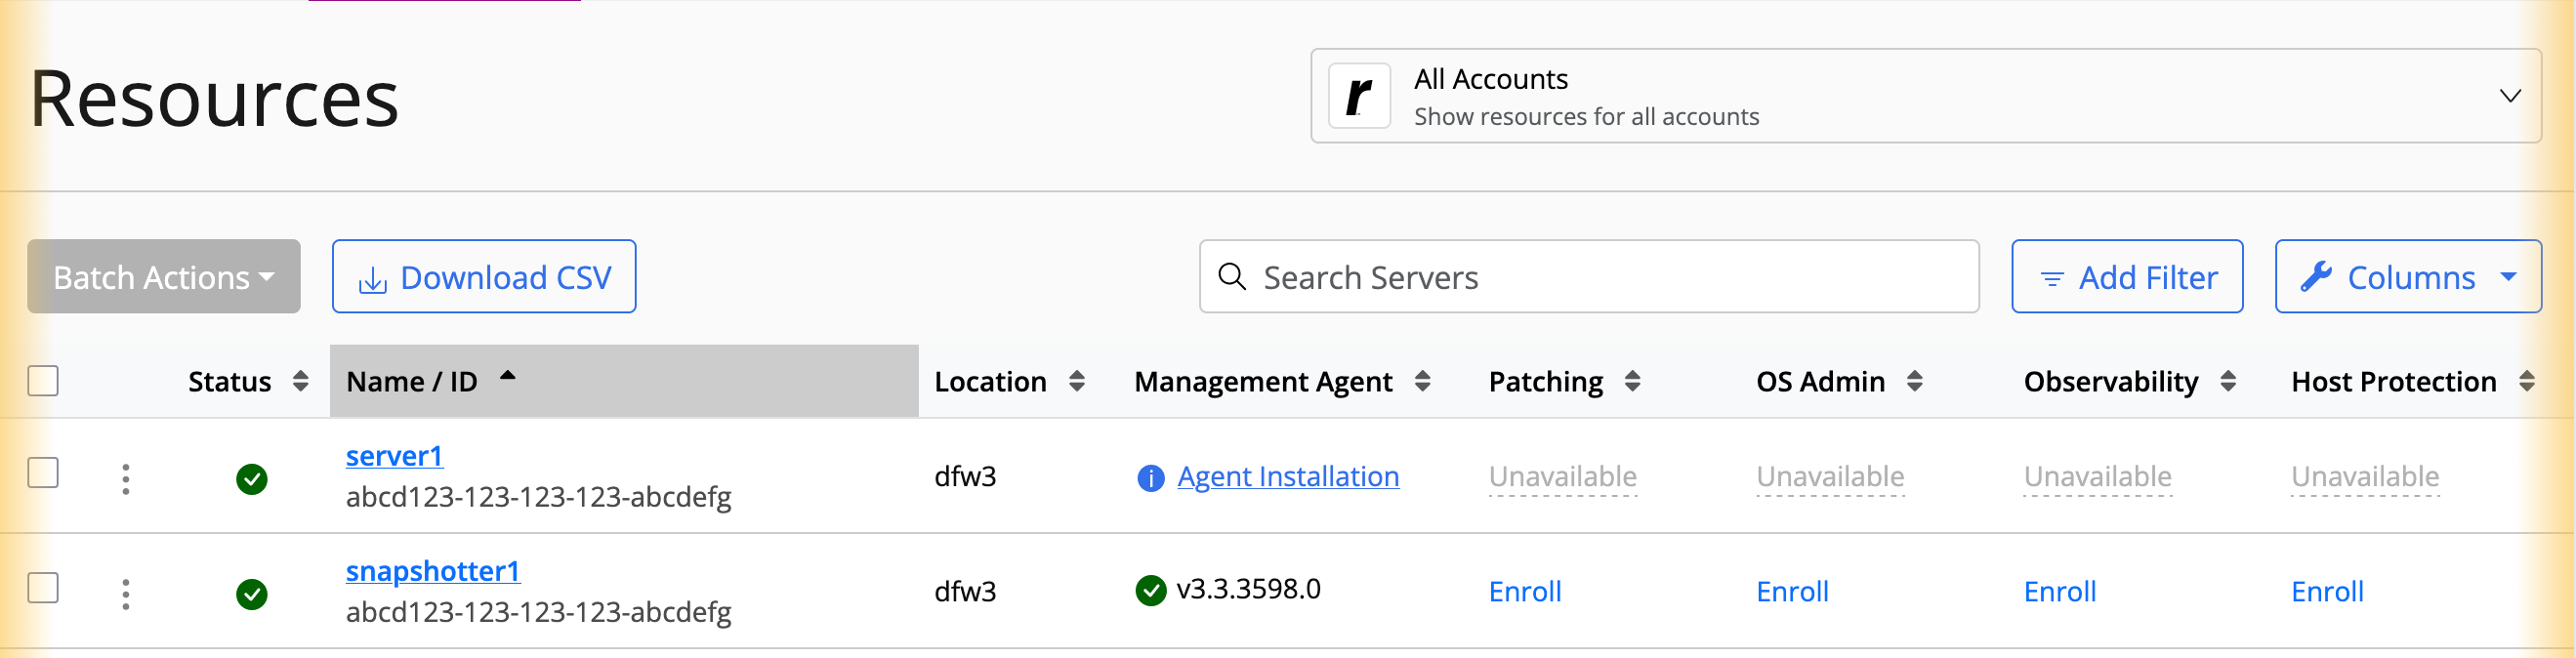
Example View of My Resources
-
VMs that already have the VMM Agent installed will show a green checkmark under the 'Management Agent' column with options to 'Enroll' to the right. In this case you simply click the 'Enroll' link to enroll this particular VM into the services. You'll be prompted to confirm and show the price prior to actually enrolling. The enrollment process will take 3-10 minutes to complete.
-
Congratulations! Your VM has been successfully enrolled into VMM and Rackspace OS Admins can assist you with any supported tasks.
If your VM shows 'Agent Installation' in the 'Management Agent' column and the services are showing 'Unavailable' then your VM does not have an installed or operational VMM agent yet. This can be resolved easily by using the steps shown in the following section.
Troubleshooting: If the Enroll option is unavailable
Installing the VMM Agent
NOTE: Most Base Images come with the VMM Agent already installed. However, if the agent is removed or needs to be added, you can follow the steps shown below.
If your VM does not show that the VMM agent is installed yet, and instead shows Unavailable where you expect Enroll to be - then you simply need to install the agent. The process to get it installed is very simple:
Linux
- SSH into your VM as the primary user.
- Download Python Script to install the agent using the following command:
wget https://add-ons.manage.rackspace.com/scripts/v2/agent/ssm_bootstrap.py- Install the Agent with the following command:
python3 ssm_bootstrap.py install -p openstack --installer-download-region $REGION- Be sure to replace $REGION with the region your VMM exists in (dfw, iad, sjc, etc)
- Now allow 5-10 minutes for your VM to appear with the agent installed on your My Resources panel.
Windows
- RDP into your VM as the Administrator.
- Download the PowerShell script from the URL below:
https://add-ons.manage.rackspace.com/scripts/v2/agent/bootstrap.ps1
- Run the PowerShell script using your preferred method to complete the install of the VMM Agent.
- Now allow 5-10 minutes for your VM to appear with the agent installed on your My Resources panel.
Updated 3 months ago
What’s Next
Learn more about VMM and what you can do with it here