Migrate from a POP server to Rackspace Email POP using Outlook 2010
POP email is typically stored locally on a computer and removed from the
mail server after being downloaded by the client. In many cases, this
data cannot be migrated with our migration tool when it does not exist
on your source mail server. The steps in this article walk you
through performing a manual migration of POP data via Outlook to a
Rackspace Email setup via POP.
You accomplish this task by changing the POP settings on your account.
The change enables you to use all of the locally stored email
with your new Rackspace Email account. After the new server is added,
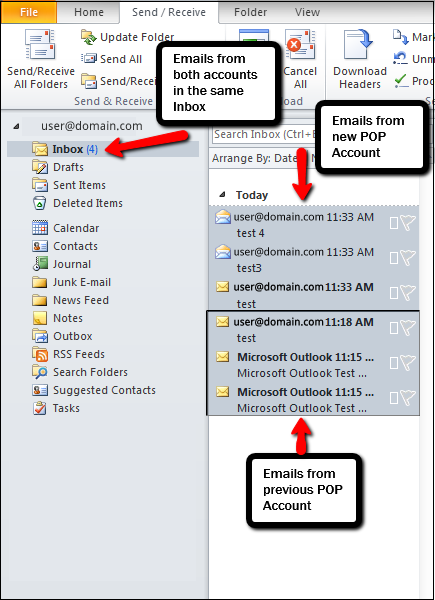
mail sent to Rackspace will start to arrive in the same Inbox.
To learn more about the differences between POP and
IMAP, see IMAP and POP mail protocol comparison.
Prerequisites
Before performing the steps below, make sure that mailboxes have already
been created on the Rackspace environment and that the MX records have
been updated so to that email is routing correctly to Rackspace.
Change settings
For increased security, we recommend that you use our secure (SSL)
servers. If your internal system configurations
require non-SSL ports, those settings are available in the article
referenced previously, IMAP and POP mail protocol comparison.
-
In Outlook 2010, select File > Account Settings.
-
If you're adding a new account, click New. If you're changing
your existing POP account, highlight the account and select
Change. -
Enter your name and email address, POP3 for the account type,
secure.emailsrvr.com for the incoming and outgoing mail servers,
and your user name and password.
Select the Remember Password check box if you don't want to type your
password each time you launch Outlook. -
Click the More Settings button.
-
Click the Outgoing Server tab.
-
Select the My Outgoing Server (SMTP) Requires Authentication check box.
-
Leave the default setting, Use Same Settings as My Incoming Mail
Server. -
Select the Advanced Tab.
-
Set the incoming server port to 995 and the outgoing server port to
465, and enable SSL encryption.
-
If you want to leave copies of email messages on the
server, select the Leave a copy of messages on server check box.
To avoid exceeding your account's storage limits, indicate whether
the server should delete messages after a certain number of days,
delete messages when you manually delete them from the
Deleted Items folder, or both. -
After the settings have been updated, navigate to your Inbox and click
the Send/Receive button. New emails that have been sent to your
Rackspace account should now start appearing in your Inbox.
NOTE: This process does not store your old emails on our servers.
It will only allow you to consolidate those emails with your new emails
while using the same Inbox in Outlook.
After the change, your email will look very similar to your previous
setup.

Updated 3 months ago