Rescue Mode
Using Rescue Mode with Rackspace Cloud VMs
If your operating system (OS) has become non-bootable or is suffering from critical system errors, you can use Rescue Mode to recover your system data. These problems might be caused by file system corruption, boot file corruption, or configuration errors. If your system encounters a problem during the boot process, you typically boot into a maintenance mode environment called single user mode (on Linux® or macOS®) or safe mode (on Windows®) that enables you to log in with your root password and check for any errors.
However, Single User Mode has the following drawbacks:
- Your system is read-only, and you cannot make corrective changes.
- Most services (such as networking) are disabled. This situation prevents you from copying your data to another server.
- You have to access your server by using the console, which is slower than using a traditional Secure Shell (SSH) login.
Safe Mode also has its share of problems:
- Most services, such as networking, are disabled. As a result, you can't copy your data to another server.
- You have to access your server by using the Console, which is slower than using a traditional Remote Desktop Protocol (RDP) login.
You can avoid working with single user mode or safe mode by bringing your server up in Rescue Mode through the Rackspace Cloud ControlPanel .
What is Rescue Mode?
Rescue Mode grants the root user full access to your non-bootable server's file system. You can use Rescue Mode to modify problems in configuration files or to copy data from your Cloud Server to a remote location. Using Rescue Mode through the Cloud Control Panel is similar to booting into single user mode or safe mode with networking enabled.
The following sections provide instructions for using rescue mode:
Start Your Server in Rescue Mode
Use the following steps to start your Linux or Windows server in Rescue Mode:
-
Log in to the Cloud Control Panel.
-
In the top navigation bar, click Select a Product > Rackspace Cloud.
-
Select Servers > Cloud Servers.
-
From the list of your servers, click the gear icon next to the server that you want to bring up in Rescue Mode and select Enter Rescue Mode from the drop-down menu.
-
Read the text in the Rescue Mode pop-over, and then click Enter Rescue Mode.
-
The temporary password displays. Copy the password to a safe location. It does not display again after you close this message.
-
After you copy the temporary password, click Dismiss Password.
The server begins to enter rescue mode and displays an orange Status field next to the server name. The initial status is Preparing Rescue.
When the Rescue Mode build is complete, the status turns red and displays Rescue.
Note: The Rescue Mode environment is limited to 24 hours. You have one day to correct the problems on your server before it automatically reverts to its original state.
Connect to Your Server in Rescue Mode
You can connect to your server in Rescue Mode in the following ways:
-
Linux: Use an SSH client to connect to your Linux server by using the public Internet Protocol (IP) address and the temporary root password to log in to rescue mode.
-
Windows: Use an RDP client to connect to your Windows server by using the public IP address and the temporary administrator password.
Troubleshoot a Linux Server in Rescue Mode
Before you can access the files on your Linux server, you need to mount the server's file system. To accomplish this task, you need to look at your partitions to determine your file system's device.
Note: If you plan on using fsck on this file system, do not mount the file system.
After you log in to your server in rescue mode, run the following command:
fdisk -lYour output should look similar to the following example:

Several disks appear in the output. A disk entry looks similar to the following example:
Disk /dev/sdb1: 2147 MBThe portion after Disk that looks like a file path is the device.
In the example output in the screenshot, the device for the server's file system is /dev/sda1.
The device can be different depending on the distribution image that was used to build your server. The example output in the screenshot shows the device and the size of the disk. It contains the following blocks:
- First block (about 2 GB): The rescue mode file system.
- Second block (10.2 GB): The server's file system. The size of this
block depends on the size of your server. - Third block: The swap space.
Identify the block for your server's file system and find the device name.
After you know your file system's device, you can assign it to a directory and mount it for access.
Run the following command, replacing /dev/diskdevice with your file system device:
mount /dev/diskdevice /mntFor example, if your file system device is /dev/sda1, the command is:
mount /dev/sda1 /mntAfter you complete this step, you can access your files through the /mnt directory.
Note: You must precede file paths with /mnt. For example, if you need to correct the /etc/fstab file, you access that file by using the following path:
/mnt/etc/fstabIf you edit this file in rescue mode, you change the fstab file for the Rescue Mode file system, rather your normal file system.
Troubleshoot a Windows Server in Rescue Mode
Before you can access the files on your Windows server, you need to mount the server's file system. To do that, you need to look at your partitions to determine your file system's device.
Note: If you plan to use chkdsk on this file system, do not mount the file system.
-
After you log in to your server in Rescue Mode, click Start and enter diskmgmt.msc in the search box.
-
Double-click diskmgmt to start the program.
When the program is running, the output should resemble the following image, which shows the device and the size of the disk:

The image shows the following disks:
- Disk 0: The rescue file system. It is currently being used as drive
C. - Disk 1: Your system disk.
- Disk 0: The rescue file system. It is currently being used as drive
-
Right-click Disk 1 and select Online.
Your system disk is set as drive D, and you can now access your data, as shown in the following image:

Revert a Windows Server from Rescue Mode
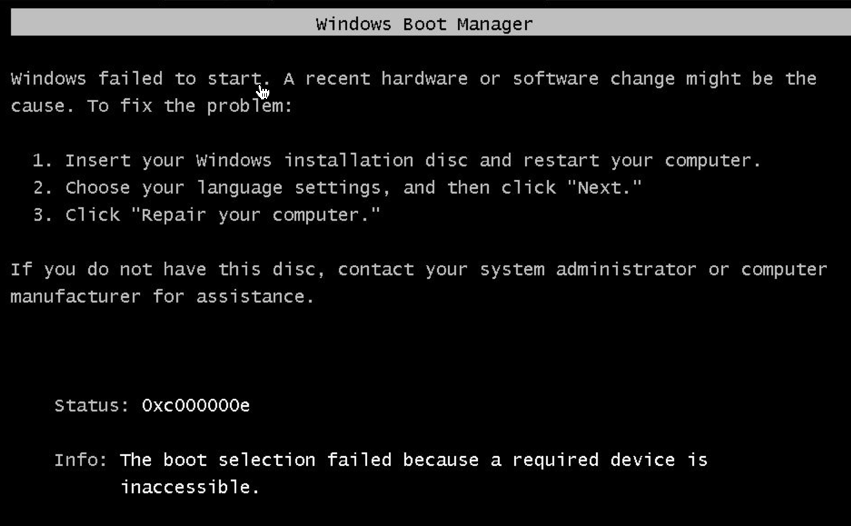
A known issue exists that might occur when a Windows cloud server is put into Rescue Mode. After the old system drive is brought online, you are no longer able to boot into Windows when reverting back from the rescue environment.
This issue is caused by a disk ID conflict. The original boot disk ID is rewritten and no longer matches what the server expects for the boot volume. Because the cloud server's rescue mode uses the image that was initially used to create the server, the disk ID of the server and the temporary image for the rescue OS are the same. This issue causes a name collision when the server disk is brought online. Due to this issue, the OS rewrites the ID of the disk. After this takes place the boot loader can no longer find the boot disk. This problem is what causes the server to crash.
Resolve the ID Conflict
Use the following steps to resolve the ID conflict on your Windows server.
Note: This process has been tested only on Cloud Servers.
-
With the server in Rescue Mode and the original system drive set toOnline, open Command Prompt.
Note: Do not use PowerShell for this process because the commands will not work.
-
Run the following command:
bcdedit /store d:\boot\bcd -
Review the output and ensure that drive C is the target for objects in the output.
The Boot Configuration Data (BCD) output should look like the following example:

-
If the objects do not point to drive C, run the following commands:
bcedit /store d:\boot\bcd /set {default} osdevice partition=c: bcdedit /store d:\boot\bcd /set {default} device partition=c: bcdedit /store d:\boot\bcd /set {bootmgr} device partition=c: bcdedit /store d:\boot\bcd /set {memdiag} device partition=c: bcdedit /store d:\boot\bcd /set {ntldr} device partition=c: -
Run the following command again to verify the output:
bcdedit /store d:\boot\bcdIf all of the objects point to drive C, you only need to make an adjustment to the drive ID of drive D.
-
Open the Disk Management window.
-
From the command line, run
DISKPART. -
In DISKPART, run the following command:
LIST DISK -
In the Disk Management window, match the disk number to the drive.
-
To find the disk ID of drive C, run the following command:
SELECT DISK (the disk number that was found in diskpart and Disk Manager) -
To get the drive ID, enter the following command:
UNIQUEID DISK -
Record the disk ID.
Note: You use this ID value (in hexadecimal format) to set up drive D.
-
If you forget this value, you can recover it by taking the server out of Rescue Mode and then placing it back into Rescue Mode. If you take this step, you must start over at the beginning of these instructions.
-
If the preceding step doesn't work, recover the value by mounting the BCE file into the registry of the rescue server. For instructions about how to perform this step, see Fixing Disk SignatureCollisions
Note: After you record this ID, you must change the ID to something else to resolve a name collision.
Change the Drive ID
Use the following steps to change the drive ID:
-
Run the following command to change the ID:
UNIQUEID DISK id=<any hex value of 8 characters> -
Run the following command to verify that the value changed:
UNIQUEID DISK -
Change drive D by running the following commands:
SELECT DISK (the disk number that our found in DISKPART and disk manager) UNIQUEID DISK id=(disk ID from C drive that was recorded, in the example this was 42D9DECD) -
Run the
UNIQUEID DISKcommand to verify that the ID matches what you
recorded.After this process is complete, you can take the server out of Rescue Mode. The server should now boot up normally.
Exit Rescue Mode
To exit rescue mode, go to the Server Details page in the Cloud Control Panel and click Exit Rescue Mode.
Updated about 2 months ago