
Manage User Permissions for Dedicated Hosting
This article describes user permissions for Rackspace Dedicated hosting and shows you how to manage these permissions.
To manage permissions in the MyRackspace portal select Account > Permissions.
To access the Permissions area in the MyRackspace Portal and modify another user’s permissions, you must have either Account Administrator permission or Admin permission. Account Administrator permission grants the user unlimited access to all sections of the MyRackspace Portal. Admin permission (on a device or service) grants the user the ability to access and manage the device or service.
If you can't find the information you need here, review the FAQ section on the left for answers to common user permission problems.
Categories of permissions
Two types of permissions are available for Rackspace Dedicated hosting accounts:
-
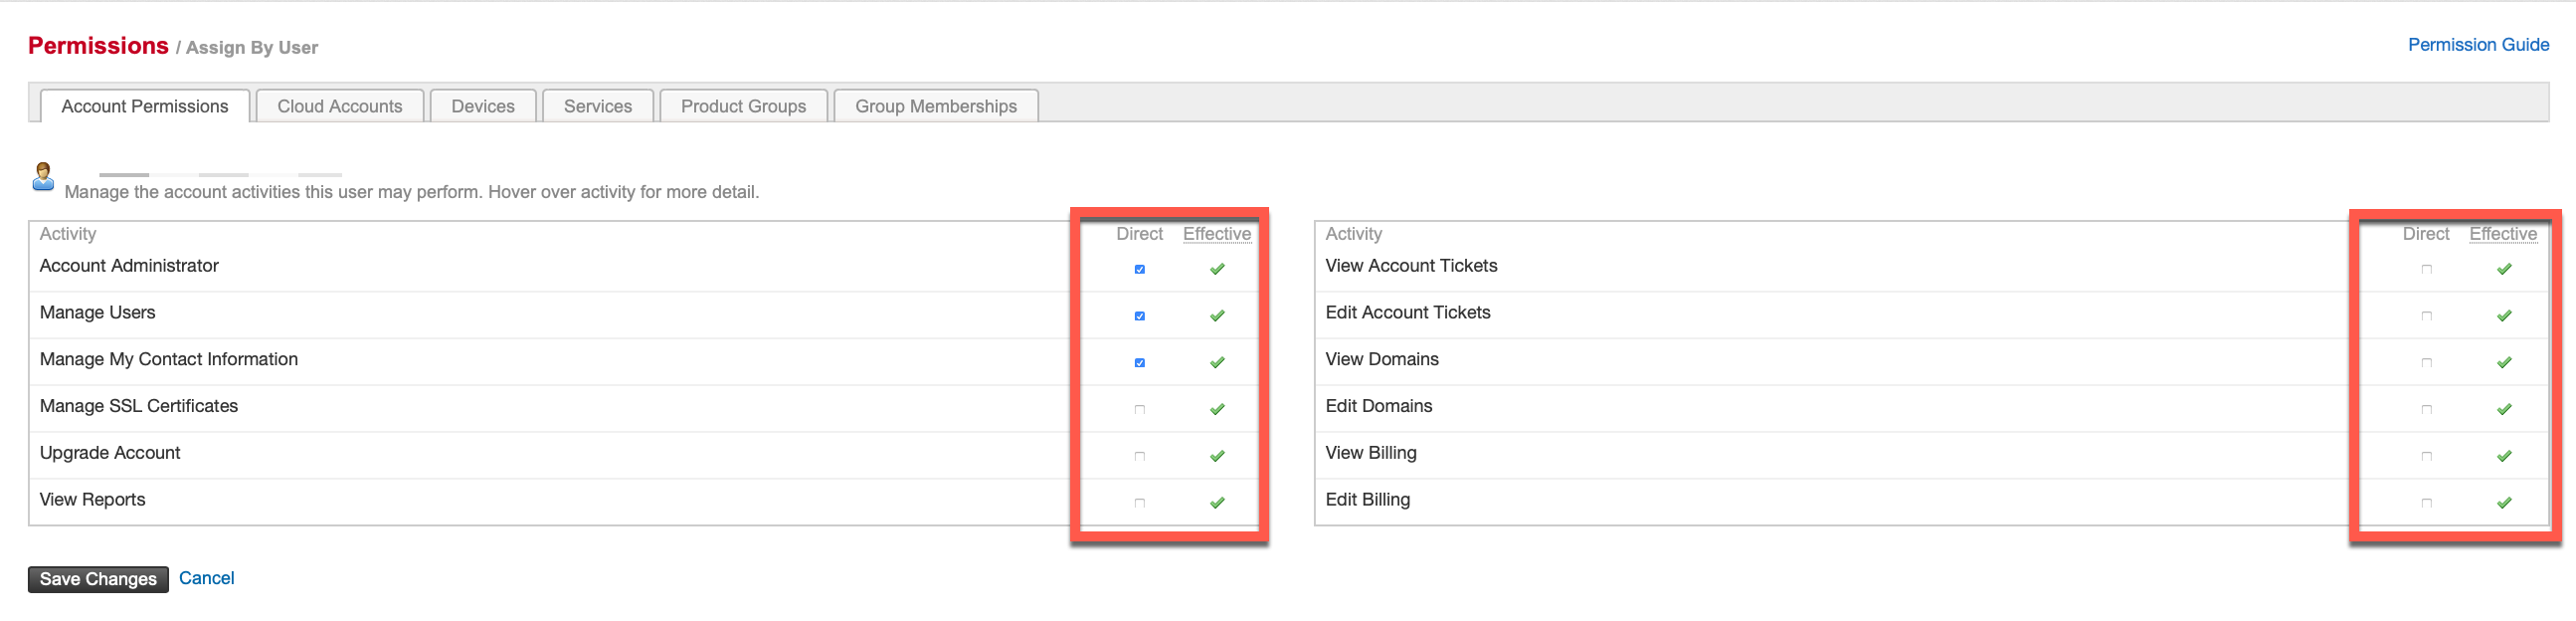
Direct permissions: These grant the user direct access to account permissions, linked cloud accounts, devices, or services.
-
Effective permissions: Users inherit these because of their memberships in user and product groups.
You can grant a user a combination of direct and effective permissions. MyRackspace uses the highest level of permission granted.
Methods for assigning permissions
To manage user permissions, log in to the MyRackspace portal and then select Account > Permissions.
You can use the four tabs on the next page to assign permissions in the following ways:
- Assign by user
- Assign by product
- Manage groups
- Global permissions
Assign by user
This method enables you to select an individual and grant them direct or effective permissions at the account level. You can also manage a user's access to associated cloud accounts, devices, services, product groups, and group membership by selecting the tabs on the Assign By User page.
To assign permissions by user, complete the following steps:
-
Select Account > Permissions.
-
Select Assign by User.
-
Select a user and select from one of the tabs to update the user permissions.
Assign by user group
This method enables you to select a group of users and grant them:
- Permissions at the account level.
- Access to linked cloud accounts, devices, services, or product groups. To assign permissions by user group, perform the following steps:
-
Select Account > Permissions.
-
Select Assign by User.
-
Select a group from the User Groups column.
-
Select the checkbox next to the permissions you want to assign to that group.
-
Click Save Changes.
This updates the permissions of all users in the selected group.
User permission types
The following table explains the different permission options.
Permission | Description |
|---|---|
| Account administrator | Grants effective permissions for the entire account, such as accounts, devices, and users. |
| Manage Users | View or edit users on the account. |
| Manage My Contact Information | View and edit personal information associated with your account. |
| Manage SSL Certificates | Manage SSL certificates. |
| Upgrade Account | Add or remove account products. |
| View Reports | View reports. |
| View Account Tickets | View the list of account tickets for Managed Mail, DNS, Billing, or Bandwidth related to any account with direct or effective permissions. |
| Edit Account Tickets | Create and edit account tickets for Managed Mail, DNS, Billing, or Bandwidth to any account with direct or effective permissions. |
| View Domains | View DNS information for domains. |
| Edit Domains | Edit DNS information for domains. |
| View Billing | View invoices and online payments. |
| Edit Billing | Make a payment or set up recurring payments. |
Creating product and user groups and using them to manage user permissions is more efficient than assigning permissions to individual users.
Assign by product
This method enables you to manage user access to an individual product or product group.
To assign permissions by product or product group, perform the following steps:
-
Select Account > Permissions.
-
Select Assign by Product.
-
Make a selection from the Product or Product Group column.
-
Update the user, user group, or Group membership permission.
-
Select Save Changes.
Manage groups
The Manage Groups tab enables you to create new User and Product groups and update members.
Create a user group
Use the following steps to create a user group:
- Select Account > Permissions.
- Select Manage Groups.
- At the top of the User Groups column, enter a name for the new group and select the green plus sign.
- Select the Group Members to add and select Save Changes.
Create a product group
Use the following steps to create a product group:
- Select Account > Permissions.
- Select Product Groups.
- At the top of the Product Groups column, enter a name for the new group and select the green plus sign.
- Select the Product to add and select Save Changes.
Grant access to a user group or product group
Use the following steps to grant access to a user group or product group:
- Select Account > Permissions.
- Select Manage Groups.
- Select an existing group from the User Groups or Product Groups column.
- Select the member to add.
- Select Save Changes.
Delete a user or product group
Use the following steps to delete a user or product group:
- Select Account > Permissions.
- Select Manage Groups.
- Select an existing group from the User Groups or Product Groups column.
- Select the Actions dropdown in the upper-right corner.
- Select Delete Group**.
Manage global permissions
The Global Permissions section lets you make changes across your entire account.
Ticketing Settings enable you to control the tickets that your users have permission to see when those tickets include one or more devices.
The following table shows the ticketing settings that you need for common actions or views:
| Ticketing setting | Functionality |
|---|---|
| Flexible Ticket Viewing (default setting) | Enables users to see tickets that include a device that they have permission to view. For example, if a user has access to device A, they see all of the tickets that include device A, even if the ticket has other devices. If device C is later added to the ticket, the user can still see the ticket, even if the user does not have access to device C. |
| Strict Ticket Viewing | Requires users to have access to all the devices on a ticket to see that ticket. For example, if a ticket includes device A and device B, the user must have permissions to both devices to see the ticket. If a ticket the user could see later includes device C, to which the user has no access, the user can no longer see the ticket. |
How permissions impact the user experience for tickets
The following table shows the permissions that a user needs to perform common tasks with tickets:
Permission required | Task |
|---|---|
View Tickets or Edit Tickets permission | View or include another user on an account ticket (a ticket that doesn't have a device or service associated with it). |
View, Edit, or Admin permission to that device | View or include another user on a ticket that has a device associated with it. |
View, Edit, or Admin permission to that service | View or include another user on a ticket that has a service associated with it (such as tickets for Managed Antivirus). |
Updated 2 months ago