Enable DKIM in the Cloud Office Control Panel
DomainKeys identified mail (DKIM) adds a secure signature to your domain to authenticate emails sent from users in your company. DKIM
is an industry best practice that increases the security of your email domains.
Prerequisites
- Applies to: Administrator
- Difficulty: Easy
- Time needed: Approximately 15 minutes to create a record, 24-48 hours for the record to propagate
- Tools required: DNS host administrator access
For more information on prerequisite terminology, see Cloud Office support terminology.
Before enabling DKIM, we recommend you create a robust email verification policy by completing the following steps:
- Create an SPF record policy.
- Create a DKIM record.
- Create a DMARC record policy.
For a video tutorial of the following steps, see Rackspace Email - DMARC / DKIM: What It Is & How to Setup.
Enable DKIM for a domain
-
Log in to the Cloud Office Control Panel
-
In the Domains section of the home page, click the Sender Authentication (DKIM) link.
-
On the Sender Authentication (DKIM) page, click the domain for which you want to enable DKIM.
-
Click Enable DKIM for.
-
If you manage your domain's DNS through your Cloud Office Control Panel, DKIM enabling is automatic.
-
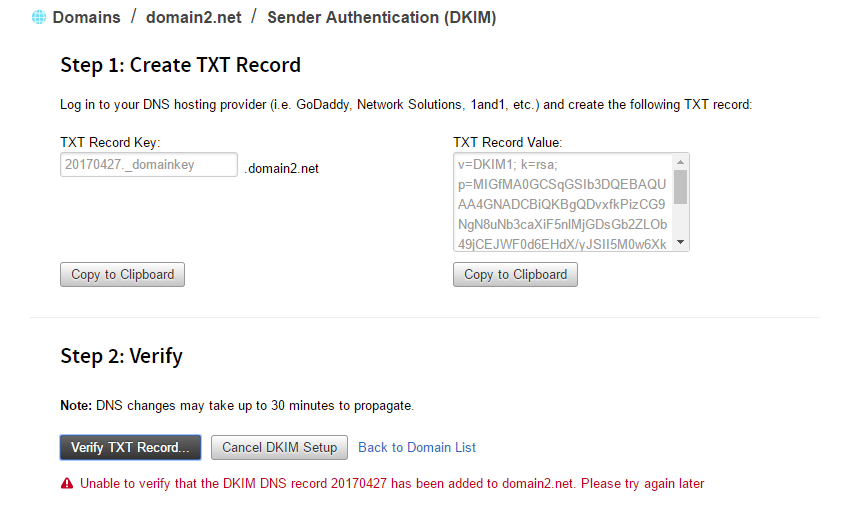
If you manage your domain's DNS through another service, that service provides the DNS key and value information to add a new
TXT record. See the documentation of your DNS hosting provider for instructions on adding a new TXT record for your domain.
If you do not know where your DNS is hosted, see Find your DNS host.
-
-
After adding the DKIM TXT record, click Verify TXT Record to ensure that the new DKIM record is publicly available
in DNS and is correct.If validation fails, then an appropriate error message displays to help you correct the problem.
After DKIM is enabled, all new outgoing email messages are signed using your new DKIM key. You can repeat the DKIM-enabling
process on other supported domains. Use the Feedback tab to make any comments or ask questions. You can also click Let's Talk to start the conversation.
Updated 2 months ago