Resize a Cloud Server
Previous section: Create a Cloud Server
This article describes how to resize your server in the Cloud Control Panel. The process changes the virtual processor (vCPU), random access memory (RAM), and might also change disk size.
Servers can resize up or down with the following exceptions:
- Standard flavor Linux servers that use the deprecated paravirtual (PV) virtualization mode can resize down, potentially losing data.
- OnMetal servers cannot be resized up or down.
- All other flavors can only resize up.
Resize a server via the Cloud Control Panel
Use the following steps to resize a server:
-
Log in to the Cloud Control Panel.
-
Click Products > Rackspace Cloud in the top navigation bar.
-
Select Servers > Cloud Servers to view your servers.
-
Click the gear icon next to the server you want to resize
A pop-up window that lists your server size options displays.
-
Click Resize Server to select a new server size.
Note: Each server size has a distinct uptime hourly cost, and the new cost starts when the resize process finishes. You might pay different rates for the same server within a single billing cycle.
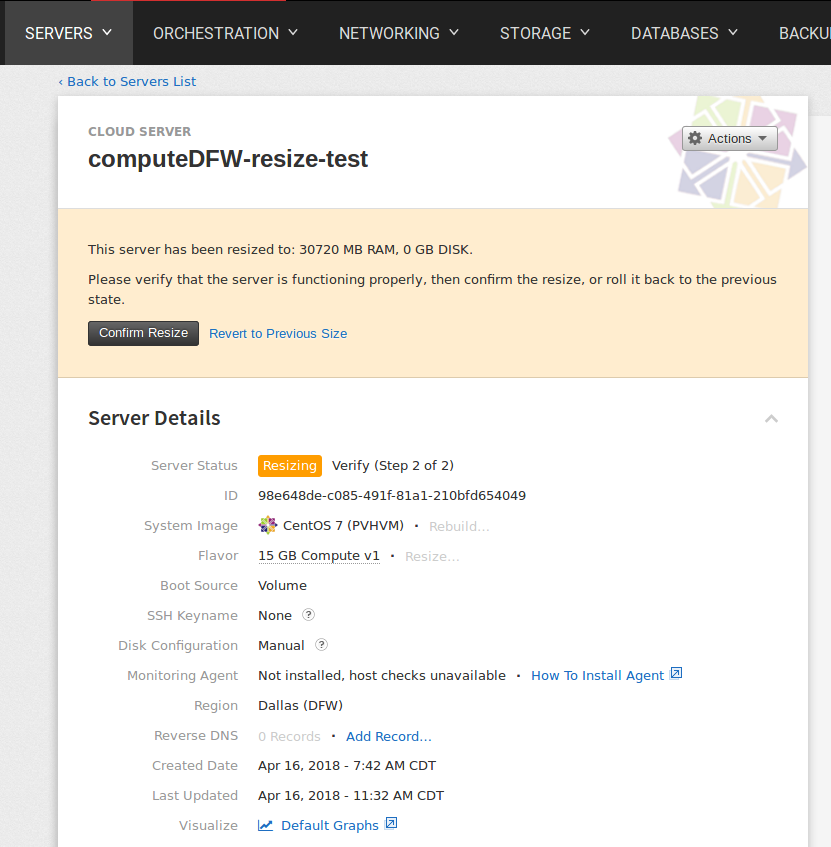
A notification displays prompting you to verify the changes that you made to your system resources and that there was no adverse impact to your server.
-
Verify server resize and system integrity by remotely logging in.
Warning: Verification is an important step because it is the last chance you have to revert to the original size and cancel any changes to your server. In this case, website availability isn't an indicator of success because some server processes might stop during verification.
With a Linux server, you can use Secure Shell (SSH) to connect to either the public or private IP address for the server and run the following commands to verify the changes:
-
nproc: Number of processors -
df -hP: Hard disk usage -
free -m: Available RAMNote: Servers booted from a Cloud Block Storage volume don't gain disk space after a resize.
With a Windows server, you must complete additional steps to use the additional space after a resize. For more information, see Adding Disk Space After Resizing a Windows Server 2012 Cloud Server.
If a Linux device does not show the correct disk space after a resize follow these instructions
- Click Confirm to verify the resize or Revert to go back to the original size.
Confirming the resize changes the server's status. The process is complete when the Status shows as Active, the Current Action is None, and the server restarts. You might need to restart web services that were running manually. After 24 hours, the system automatically confirms the resize and the changes.
Resize a server via Pitchfork
You can also use Pitchfork, an interactive web API application that enables you
to interact quickly with Rackspace Cloud products to resize up your server.
Use the following steps to resize up your server by using Pitchfork:
-
Navigate to Pitchfork and log in by using
your cloud account username and API key. -
Click the Cloud Servers icon to access the Cloud Servers page.
-
In the Region drop-down menu, select the region for the cloud server
that you want to resize. -
Scroll down to List Flavors and click Details. Enter
limit=100 for the Filter parameter, and then click Send API Call.
-
Find the server that you want to resize and take note of the server
UUID and flavor_id. You need these values for the Resize Server API call. -
Scroll down to Resize Server and click Details. Enter
the server_id (UUID) and flavor_id that you gathered in the previous
step, and then click Send API Call.
The server status in the Cloud Control Panel should change to Resizing.
After the operation is complete, you must verify the server resize by
navigating to the Server Details page for the server that you resized.
Additional resources
- Rebuild a Cloud Server
- Reset your server password
- Reboot your server
- Basic Cloud Server security
- Cloud Servers API reference: Resize specified server
- Pitchfork - the Rackspace Cloud API web application
Use the Feedback tab to make any comments or ask questions. You can also [start a conversation with us](https://www.rackspace.com/contact).
Updated 4 months ago