Migrate a .NET application from Amazon Web Services
Previous section: Provision cloud resources when migrating from Amazon Web Services
This article describes how to migrate a .NET web application from
Amazon Web Services® (AWS®) to the Rackspace Cloud. It takes approximately 30 minutes
to complete if you follow the instructions step by step.
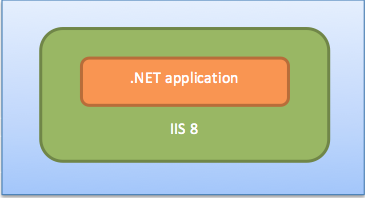
The following figure shows the topology of the application in this scenario:
Prerequisites
- Microsoft® Windows® Server on AWS running a .NET® web application on Internet
Information Services (IIS®) This article's examples used a Windows Server 2012 with IIS 8. - Valid and enabled account on the Rackspace Cloud.
Preparation
- Identify the resources to migrate, including application and
database resources. - If you have not already, create a Cloud Server instance
and any supporting Rackspace Cloud services.
Install software packages
-
Install the Rackspace Cloud Files client as follows:
-
Connect to the AWS instance by using Remote Desktop Connection.

-
Install an FTP client application for backing up data to
Rackspace Cloud Files. You can use any browser to download the client. -
Create a connection to Rackspace Cloud Files by using your Rackspace
account user name and API key. You will use this connection to back up
data during the migration steps.
-
-
Install IIS 8 by using the instructions located at https://www.iis.net/learn/get-started/whats-new-in-iis-8/installing-iis-8-on-windows-server-2012 .
Back up data from AWS to Rackspace Cloud Files
Using the FTP client that you installed in the preceding section, upload the
.NET project folder to the Rackspace Cloud Files container that you created in
the article Provision cloud resources when migrating from Amazon Web Services.
Restore data from Cloud Files to Cloud Servers
-
Connect to your Rackspace Cloud Servers instance by using Remote Desktop
Connection. -
Copy the .NET web application folder from the Cloud Files container to the
cloud server at the following location:C:\inetpub\wwwroot -
Open IIS Manager, click Add Website, and enter details: site name,
physical path, and hostname.
-
After creating the website, stop the Default Web Site pre-installed
application and start your web application.
Test your application
Click on Browse *:80 (http) to see the application in the browser.
Next step
Post-migration considerations when migrating from Amazon Web Services
For other migration scenarios, see the following articles:
Updated 4 months ago