Use NTP to Sync Time
You can easily keep your system's date and time accurate by using network
time protocol (NTP).
Having an accurate clock on your server ensures that timestamps in
emails sent from your machine are correct. An accurate clock is
especially helpful when you need to look at the logs from a particular
time of day.
If you don't occasionally set the system clock yourself, the time will
slowly drift away from a perfectly accurate setting. That's when
NTP is useful.
What is NTP?
NTP lets you automatically sync your system time with a remote server.
The NTP can be used to update the clock on a machine with a remote
server. This keeps your machine's time accurate by syncing with servers
that are known to have accurate times. NTP also keeps the clocks on
several machines in sync, thus making it easier to match log entries for
an event across multiple servers.
It's easy to set up an NTP server to adjust your machine's clock
regularly. It's also possible to make it a bit more complicated if you need
your clock accurate down to the millisecond instead of just to the
second.
Install
The first thing to do is to install the NTP server. Grab the package by
running:
Ubuntu operating systems / Debian:
sudo aptitude update
sudo aptitude install ntp
CentOS:
sudo yum install ntp
Ater you install NTP, you can ensure the service runs at boot time by
running the following command:
sudo /sbin/chkconfig ntpd on
Fedora / RHEL:
sudo yum install ntp
Ater you install NTP, you can ensure the service runs at boot time by
running the following command:
sudo chkconfig ntpd on
Start the service
To make sure the NTP service starts after installing it, run the following command:
Ubuntu operating systems / Debian / CentOS / RHEL:
sudo /etc/init.d/ntp start
Fedora:
sudo /etc/init.d/ntpd start
As is usual for Linux® services, you can stop or restart the NTP service
by running the preceding command with stop or restart as the argument
instead of start.
Quickstart
Most people just want to get NTP running and don't need to sync their
clock to pinpoint, millisecond-level accuracy. In this case, you don't
need to do anything else. When you installed NTP, it set you up with
default servers with which to sync, so NTP syncs your clock
automatically. Congratulations on a job well done!
The .ntpconf file
If you want to use NTP to sync several of your own machines, or if you
want to choose NTP servers other than the defaults, you can find the NTP
configuration file at /etc/ntp.conf.
A few settings can be changed, but the only settings of
interest to most users include server entries. Use the default
settings for your specific Linux distribution.
With more than one server entry, your NTP server queries all servers
and select a time on which most of the polled servers agree. Because NTP
uses three or more servers, your clock is more accurate than if it
uses only one.
Adding the iBurst option after the server address speeds up the NTP
time sync slightly. While this is helpful, it isn't essential.
The dynamic option tells NTP that it can try a configured server again
later if it's unavailable at some point. The dynamic option is useful
when NTP runs on a machine that doesn't always have access to the
Internet. It is not necessary on a machine with a dedicated connection.
NTP security
Protect yourself against NTP server attacks by adding disable monitor to
your /etc/ntp.conf file. Disabling monitoring prevents unwanted remote
queries that use commands from older versions of NTP, such as monlist.
Syncing multiple servers
If you have more than one machine to sync, it is best to designate one
as the master NTP server. Set up the master server to connect to an
outside NTP server, then have the other machines sync to the master.
This setup reduces the number of outgoing connections and guarantees
that all of your machines have their time set to the same value. This
configuration requires changes to the server settings in the ntp.conf
files on each machine.
Set up any external servers you want to use on the master machine. For
example, if you want to use the NTP pool servers, you can set the server values
in the master ntp.conf file to:
server 0.pool.ntp.org iburst
server 1.pool.ntp.org iburst
server 2.pool.ntp.org iburst
server 3.pool.ntp.org iburst
Point the ntp.conf to your master server on every other machine that needs
to sync the time. For example, if your master server is
main.example.com, you would alter the ntp.conf files on the secondary
machines so that the server entries are as follows:
server main.example.com iburst
After setting the server parameters and ensuring that the iptables entries don't
block connections to your main NTP server, restart the NTP services on
each machine to get them syncing.
Adjusting iptables
NTP uses UDP port 123 to conduct its business, either connecting to
another NTP server or accepting incoming connections. If you have
iptables filtering incoming traffic on the main NTP server in your
cluster, you need to open port 123 to UDP traffic to allow the
other servers to connect to it. You can open port 123 for UDP traffic
with the following iptables arguments:
-I INPUT -p udp --dport 123 -j ACCEPT
-I OUTPUT -p udp --sport 123 -j ACCEPT
Choosing an NTP server
When syncing one or more machines via NTP, you want at least one of
them to set their time from a reliable external server. Many
public servers out there are either synced directly from an atomic
clock (guaranteeing an absolutely accurate time) or synced from
another server that syncs to an atomic clock.
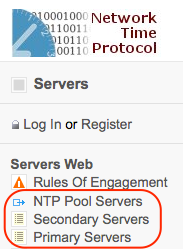
Public NTP server lists
The best source for lists of public NTP servers is the NTP Servers
WebHome at the main
NTP site. The site has a description of the servers available, and
the sidebar has links to three levels of NTP servers: Primary,
secondary, and pool.
Deciding what type of server to sync from depends on how accurate
you need your servers to be.
NTP pool servers
For most users, the pool servers are the best choice. Pool servers are
machines that have volunteered to make their NTP server available to the
public. They typically sync from a secondary NTP server, so their time is
accurate, but not necessarily accurate to the nearest millisecond.
Most users don't need their machine time accurate to the nearest
millisecond; they just want to know what time it is. Use the pool
servers unless you need pinpoint accuracy.
Using the NTP pool servers is as easy as setting the server entries in
your ntp.conf file to:
server 0.pool.ntp.org iburst
server 1.pool.ntp.org iburst
server 2.pool.ntp.org iburst
server 3.pool.ntp.org iburst
To ensure that you only connect to pool servers in your own country or
region, visit the pool servers
page for more
specific addresses. For most people, the above entries are more than
sufficient. Those addresses rotate among a huge list of volunteer NTP
servers worldwide, so the load on any one machine never gets too great.
If you want to contribute to the NTP pool after you've set up your NTP
server, get details on how to do so from the pool
website.
Primary and secondary servers
The other two tiers of NTP servers are primary and secondary servers. A
primary server gets its time directly from an atomic clock
(or from GPS satellites, which use atomic clocks). Atomic clocks are
expensive, so there aren't many primary servers. You don't have to use a
primary server unless you're looking for extreme scientific accuracy.
A secondary server usually gets its time from a primary server. If you
want accuracy down to the millisecond level, having three secondary
servers in your ntp.conf works well.
You can see what public servers are available in either tier by
selecting either list from the NTP Servers
WebHome. Before
selecting and using a server, check the details for that server as
follows:
- ISO: The ISO column lists the country of origin of that
particular server. - AccessPolicy: The AccessPolicy field tells you what the access
policy is for that server. Open Access means the server can be
used by the public, subject to any notification requirements the
server has. - Notify: The Notify field for secondary servers lists the
that server administrator's preferences regarding whether they
should be notified before you sync with their NTP server. Admins who
want to be notified are usually trying to manage the traffic to
their server, so be sure and respect their wishes
regarding notification. Note that primary servers are always
considered as requesting notification before use. - Service Area: If you've selected a primary or secondary server
you want to use, click its hostname in the list to view further
details for that server. Among the details listed is the
ServiceArea field that describes the geographic or demographic
group they intend to serve. If that field is Public, you do
not have to be in a particular region to use the server. If they
list a more specific service area, be sure to respect the server
administrator's wishes in that regard.
Testing with ntpdate
Before using an external NTP server to sync your time, you should make
sure you can actually connect to the server from your machine.
Fortunately, there's a tool for that included with the NTP server called
ntpdate.
The ntpdate command syncs your clock with an NTP server. It's
similar to what the NTP server does on a regular basis. The ntpd program
is a separate package on Ubuntu® operating systems and Debian®. The other
distributions install ntpdate at the time of ntpd installation. To
use ntpdate, Ubuntu operating system and Debian users must first install it.
sudo aptitude install ntpdate
Set your clock to sync at times you specify by using cron to run
ntpdate. Otherwise, run the NTP server because it uses less bandwidth and
keeps time more accurately by tracking your clock's drift over time and
adjusting accordingly. Use ntpdate for testing purposes only.
The ntpdate command does not run when the NTP server is running. If you
run ntpdate and get a response like "the NTP socket is in use," this
means your NTP server is running. Stop it with the appropriate command
for your distribution:
Ubuntu operating systems / Debian
sudo /etc/init.d/ntp stop
CentOS / Fedora / RHEL
sudo /etc/init.d/ntpd stop
You can now run ntpdate with the server you want to sync against as an
argument. For example, to tell ntpdate to try and sync with
"pool.ntp.org", run the following command:
sudo ntpdate pool.ntp.org
When you're finished testing, remember to restart NTP:
Ubuntu operating systems / Debian
sudo /etc/init.d/ntp start
CentOS / Fedora / RHEL
sudo /etc/init.d/ntpd start
Summary
Fortunately, NTP time syncing is pretty easy to do. After you set the
time servers and start the NTP service, it does its work quietly in
the background.
If NTP has any problems, it logs them to the system log, which you
should be checking regularly anyway.
For more details on setting up an NTP server and what options are
available, visit the NTP documentation
site. If you want to
know more about how NTP works, go to the main NTP web
site, and all will be revealed.
Updated 4 months ago