Configure your monitoring tool
This chapter describes how to configure the following monitoring tools:
- New Relic
- Datadog
- Prometheus Alertmanager
Before you configure your tool, be sure to reach out to your Rackspace Support team. For the AMR service to function properly, it is important to consult Rackspace and that appropriate documentation for handling events is created.
Configure New Relic
This section provides simplified steps to configure New Relic to integrate with Rackspace Watchman. For more detailed information, see the New Relic documentation.
-
Log in to New Relic by using your username and password.
-
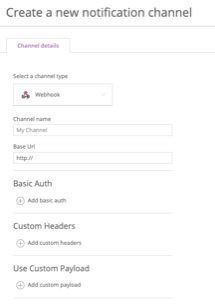
Create a notification channel for the severity level you want for the alert. Enter the following information:
- Select a channel type - Select “Webhook”
- Channel name - Enter a descriptive name for the channel
- Base URL - This should match the cloud account and desired severity. See Getting the webhooks for more information.
Basic auth, custom headers, and custom payload are optional.
Note :Be sure that you configure your tool for the right cloud account, using the right values for secret and severity. If you misconfigure your tool, alerts won’t be translated into Rackspace tickets and might result in downtime.
-
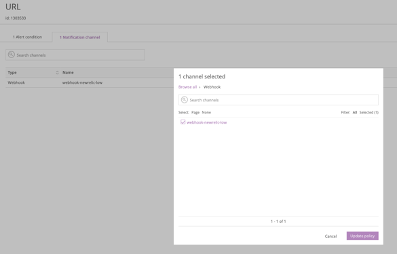
Configure alerts to use the notification channels. For example:

Each time you set up a new cloud account, you should contact Rackspace to test the end-to-end workflow. If you have any issues, see Troubleshooting.
Configure Datadog
This section provides simplified steps to configure Datadog to integrate with Rackspace Watchman. For more detailed information, see Datadog webhooks.
-
Log in to Datadog by using your username and password.
-
Navigate to Integrations and search for Webhook.
-
Install the Webhook integration.
-
Scroll down to the Webhooks section and click New.
-
Enter the following information:
- Select a channel type - Select “Webhook”
- Channel name - Enter a descriptive name for the channel
- Base URL - This should match the cloud account and desired severity. See Getting the webhooks for more information.
Payload, Custom Headers, and Encode as from are optional.
Note :Be sure that you configure your tool for the right cloud account, using the right values for secret and severity. If you misconfigure your tool, alerts won’t be translated into Rackspace tickets and might result in downtime.
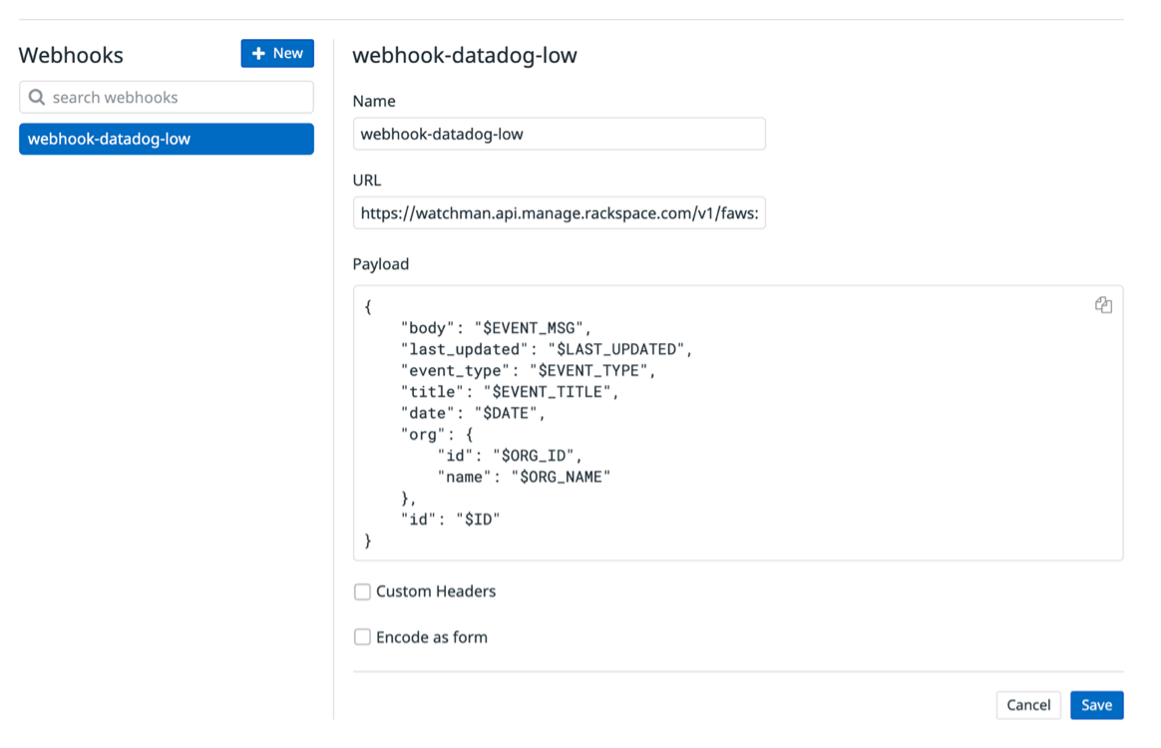
- Click Save to save the integration settings.
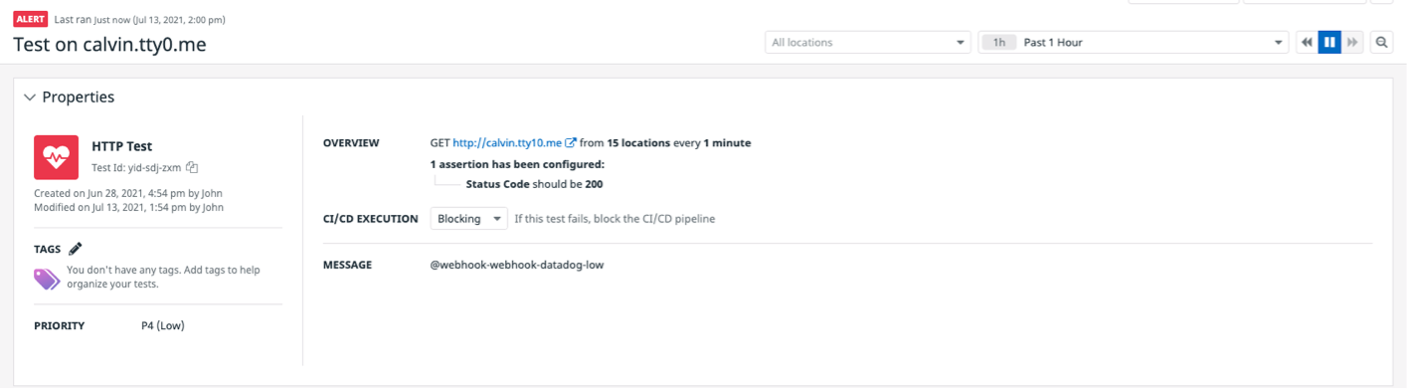
- Configure Datadog alerts to use the notification channels. For example:
Each time you set up a new cloud account, you should contact Rackspace to test the end-to-end workflow. If you have any issues, see Troubleshooting.
Configure Prometheus Alertmanager
Prometheus is popular with cluster-level monitoring in the Kubernetes ecosystem and includes an application called Alertmanager, which handles alerts sent by client applications such as the Prometheus server.
This section provides simplified steps to configure Prometheus Alertmanager to integrate with Rackspace Watchman. For more detailed information, see the Alertmanager documentation.
-
Create a Kubernetes cluster using a non-end-of-life version.
-
Set up a metrics server by using the official documentation.
-
Install Prometheus and ensure that the pods and services are running.
The actual steps might vary depending on your setup and deployment model. The following example assumes that you have kubetcl and helm installed.
kubectl create namespace Prometheus helm install prometheus-operator prometheus-community/prometheus-operator --namespace Prometheus -
Ensure that the setup completed successfully by using the following commands:
kubectl -n prometheus get pods
kubectl -n prometheus get services
The output should look similar to the following example
1. NAME READY STATUS RESTARTS AGE alertmanager-prometheus-operator-alertmanager-0 2/2 Running 0 61s prometheus-operator-grafana-6f8fbdcddc-78g4t 2/2 Running 0 66s prometheus-operator-kube-state-metrics-66b4c95cd9-2sn6g 1/1 Running 0 66s prometheus-operator-operator-67d8cb455-d66pr 2/2 Running 0 66s prometheus-operator-prometheus-node-exporter-58nbf 1/1 Running 0 66s prometheus-operator-prometheus-node-exporter-5rbmx 1/1 Running 0 66s prometheus-prometheus-operator-prometheus-0 3/3 Running 1 51s -
Update the Alertmanager configuration section to use the Watchman webhooks. The following example has two webhooks for low and high severities, but you can add all supported severities. The inline comments describe the purpose of each line of the configuration file. Be sure that the yaml formatting is consistent with your yaml configuration.
1. \## Alertmanager configuration directives \## ref: <https://prometheus.io/docs/alerting/configuration/#configuration-file> \## <https://prometheus.io/webtools/alerting/routing-tree-editor/> ## config: global: resolve_timeout: 5m route: \# How long to wait to buffer alerts of the same group before sending initially. group_wait: 10s \# How long to wait before sending an alert that has been added to a group which contains already fired alerts. group_interval: 5m \# How long to wait before re-sending a given alert that has already been sent. repeat_interval: 3h \# The default receiver. This should not be set to Rackspace webhooks unless it has been agreed as part of onboarding. receiver: 'null' \# In this case Alertmanager is configured to group alerts by \*groupLabels\*: \`region\`, \`cluster\`, \`alertname\` and \`severity\`. \# This results in a de-noising of alerts since all of the \*KubePodNotReady critical\* alerts are sent as a group. group_by: \[alertname, severity, cluster, region\] \# Alert routing rules. routes: - match: severity: normal receiver: 'null' - match: severity: rs-low receiver: 'webhook-k8s-alertmanager-low' - match: severity: rs-high receiver: 'webhook-k8s-alertmanager-high' 1. \# Rackspace Watchman webhooks will be configured in this section. This is in addition to any other receivers such as email addresses or other systems. receivers: - name: 'null' - name: webhook-k8s-alertmanager-low webhook_configs: - url:<replace with the Watchman URL> - name: webhook-k8s-alertmanager-high webhook_configs: - url:<replace with the Watchman URL> -
Add a section called externalLabels to the Prometheus specification section of the configuration file to support the above group_by labels. This is required for proper identificatino of the source cluster and can aid in troubleshooting.
1. prometheusSpec: \## If true, pass --storage.tsdb.max-block-duration=2h to prometheus. This is already done if using Thanos ## disableCompaction: false \## APIServerConfig \## ref: <https://github.com/coreos/prometheus-operator/blob/master/Documentation/api.md#apiserverconfig> ## apiserverConfig: {} \## Interval between consecutive scrapes. ## scrapeInterval: "" \## Interval between consecutive evaluations. ## evaluationInterval: "" \## ListenLocal makes the Prometheus server listen on loopback, so that it does not bind against the Pod IP. ## listenLocal: false \## EnableAdminAPI enables Prometheus the administrative HTTP API which includes functionality such as deleting time series. \## This is disabled by default. \## ref: <https://prometheus.io/docs/prometheus/latest/querying/api/#tsdb-admin-apis> ## enableAdminAPI: false \## Image of Prometheus. ## image: repository: quay.io/prometheus/prometheus tag: v2.18.2 sha: "" \## Tolerations for use with node taints \## ref: <https://kubernetes.io/docs/concepts/configuration/taint-and-toleration/> ## tolerations: \[\] \# - key: "key" \# operator: "Equal" \# value: "value" \# effect: "NoSchedule" \## Alertmanagers to which alerts will be sent \## ref: <https://github.com/coreos/prometheus-operator/blob/master/Documentation/api.md#alertmanagerendpoints> ## \## Default configuration will connect to the alertmanager deployed as part of this release ## alertingEndpoints: \[\] \# - name: "" \# namespace: "" \# port: http \# scheme: http \# pathPrefix: "" \# tlsConfig: {} \# bearerTokenFile: "" \# apiVersion: v2 \## External labels to add to any time series or alerts when communicating with external systems ## externalLabels: cluster: amr-test-cluster region: us-east-2 -
If you are installing Prometheus from scratch or want a complete values.yaml file, you can use this `sample file [<https://github.com/RSS-Engineering/amr-public/blob/main/prometheus-alertmanager-values.yaml](https://github.com/RSS-Engineering/amr-public/blob/main/prometheus-alertmanager-values.yaml)’_.
Note :If you use the provided file, ensure that the values in the previous steps are set correctly as per your account configuration.
-
After you update the values.yaml file, use the following command apply the configuration.
Note :The actual steps might vary depending on your setup and deployment model.
helm upgrade -f values.yaml prometheus-operator prometheus-community/prometheus-operator --namespace prometheus
To test the configuration, use the following steps:
-
Save the following as rs-alert-test-pod.yaml:
1. cat rs-alert-test-pod.yaml apiVersion: v1 kind: Pod metadata: name: memory-demo namespace: rs-alert-test spec: containers: - name: memory-demo-ctr image: polinux/stress resources: limits: memory: "200Mi" requests: memory: "100Mi" command: \["stress"\] args: \["--vm", "1", "--vm-bytes", "120M", "--vm-hang", "1"\] EOF -
Save the following as rs-alert-test-rules.yaml:
1. cat rs-alert-test-rules.yaml apiVersion: monitoring.coreos.com/v1 kind: PrometheusRule metadata: annotations: meta.helm.sh/release-name: prometheus-operator meta.helm.sh/release-namespace: prometheus prometheus-operator-validated: "true" labels: app: prometheus-operator chart: prometheus-operator-9.3.2 name: prometheus-operator-general.rules spec: groups: \- name: general.rules rules: \- alert: TargetDown annotations: message: '{{ printf "%.4g" $value }}% of the {{ $labels.job }}/{{ $labels.service }} targets in {{ $labels.namespace }} namespace are down.' expr: 100 \* (count(up == 0) BY (job, namespace, service) / count(up) BY (job, namespace, service)) > 10 for: 10m labels: severity: warning \- alert: Watchdog annotations: message: | This is an alert meant to ensure that the entire alerting pipeline is functional. This alert is always firing, therefore it should always be firing in Alertmanager and always fire against a receiver. There are integrations with various notification mechanisms that send a notification when this alert is not firing. For example the "DeadMansSnitch" integration in PagerDuty. expr: vector(1) labels: severity: none \- name: rs.rules rules: \- alert: example-memory-alert annotations: message: Pod memory alert description: High memory on test pod runbook_url: <http://example.rackspace.com/runbook/value> expr: sum(container\_memory\_usage_bytes{namespace="rs-alert-test",pod="memory-demo",container="memory-demo-ctr"}) > 150000000 for: 1m labels: severity: rs-low EOF 2. -
Use the following commands to deploy the pods and resources:
1. kubectl create namespace rs-alert-test kubectl -n rs-alert-test create -f rs-alert-test-pod.yaml kubectl -n prometheus create -f rs-alert-test-rules.yaml kubectl -n prometheus get prometheusrules kubectl -n rs-alert-test get pods -
Open three terminal windows and run the following commands:
1. \# Window 1 - This is going to increase the memory usage by 30M on the pod
   kubectl exec -ti -n rs-alert-test memory-demo -- stress --vm 1 --vm-bytes 30M --vm-hang 1 -t 500

   \# Window 2 - If the pod is using more than 150Mi, the alert should be firing as per the rules.
   kubectl top pods -n rs-alert-test

   \# Window 3 - You can also check the current alerts firing
   kubectl exec -ti $(kubectl get pods -l app=alertmanager -n prometheus
      -o jsonpath='{.items\[0\].metadata.name}') -n prometheus
      -c alertmanager -- amtool alert query --alertmanager.url=<http://127.0.0.1:9093>
The output should be similar to the following example:
Depending on the severity set, the corresponding webhook is triggered and a Rackspace alert ticket is generated.
-
Finally, clean up the test artifacts by using the following commands:
kubectl -n prometheus delete -f rs-alert-test-rules.yaml
kubectl -n rs-alert-test delete -f rs-alert-test-pod.yaml
If you have any issues, see Troubleshooting.
Updated 5 months ago