Rackspace Data Protection for VMware Cloud
The Rackspace Data Protection service is available to all customers using Rackspace SDDC Flex. It provides image-based (snapshot) backups of the VMs provisioned in Rackspace SDDC Flex environments.
This chapter contains the following section:
How to Access Rackspace Data Protection
Complete the following steps to log in to the Rackspace SDDC Flex portal:
- After you receive a username and password, go to https://rsvc.rackspace.com/tenant/.
- Enter username and password and click Sign In.
- Click More dropdown and select Data Protection from top navigation bar.

Creating a Protection Group
-
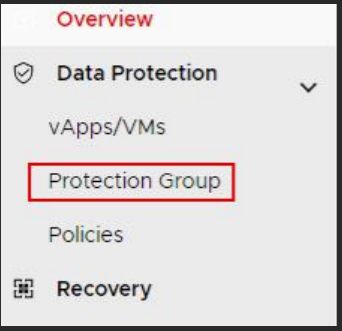
Click navigation menu on the left side of your screen. Click Data protection dropdown and select Protection group.
-
Click New at the top of your screen.
-
The window opens for New Protection group.
-
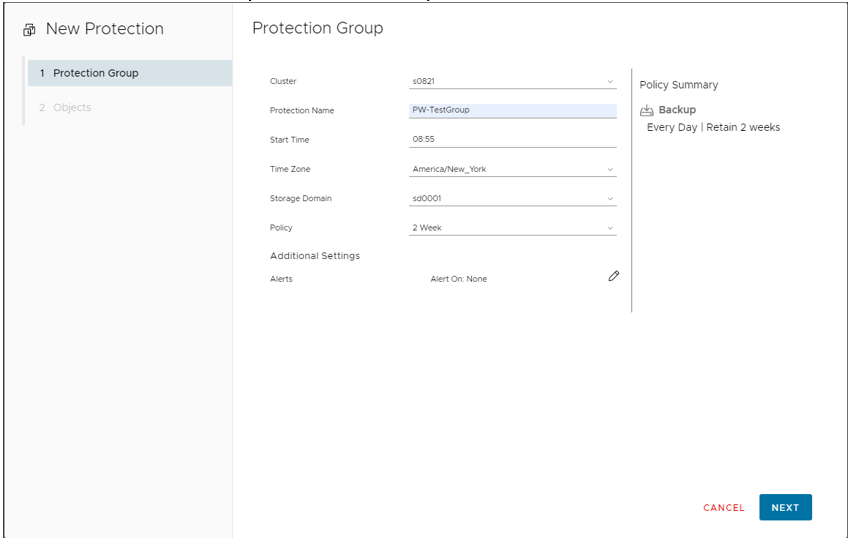
All fields are auto populated except for Protection Name.
- Cluster: Leave default setting
- Protection Name: Name of your protection group
- Start Time: For daily backups, the time at which jobs will start (using 24-hour clock)
- Time Zone: Start time is based on the time zone selected in this field
- Storage Domain: Leave default setting (sd0001)
- Policy: Define the backup retention policy used by this job. The 2 week and 4 week policies are available by default to use by your organization. If any additional custom policies need to be created, open a ticket with support.
- Additional settings: Email alerts can be configured here. Jobs can be configured to alert on success and/or failure.
-
Click Next at bottom right of the window after all fields are modified to the appropriate settings.
-
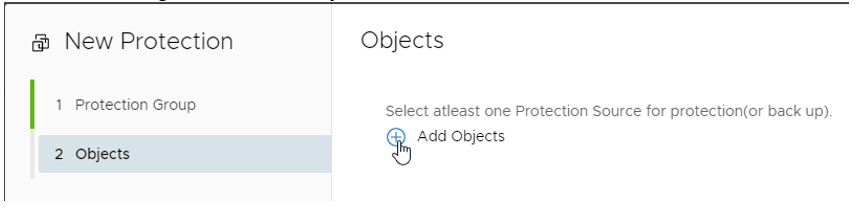
Click Plus sign next to Add Objects.
-
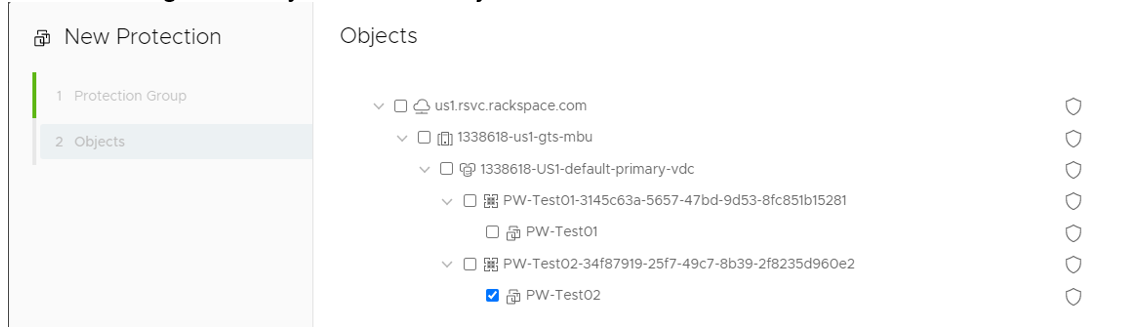
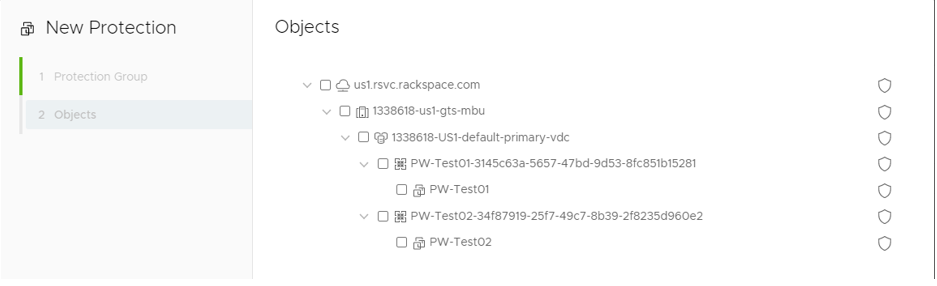
In the Objects selection screen, you can define what objects are included in this protection group and how they are selected.
-
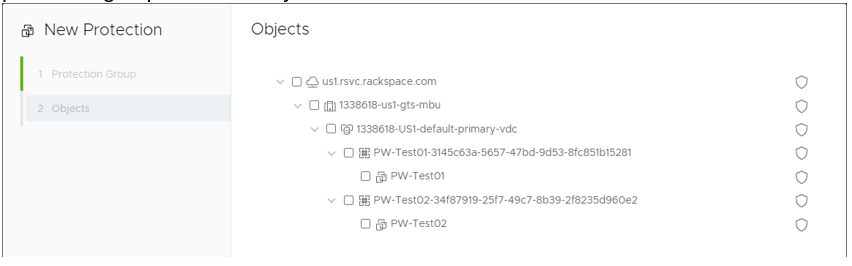
Objects can be manually defined by checking the individual boxes to the left of objects.
-
Automatic protection can be added at the Organization, Virtual Data Center, or Virtual App level, indicated by the blue shield to the right of objects. If Autoprotect is defined, all objects at that level and below in the hierarchy will be automatically protected. This includes any objects created at those protected levels in the future. Individual objects can be excluded from Auto Protect to refine selection granularity.
-
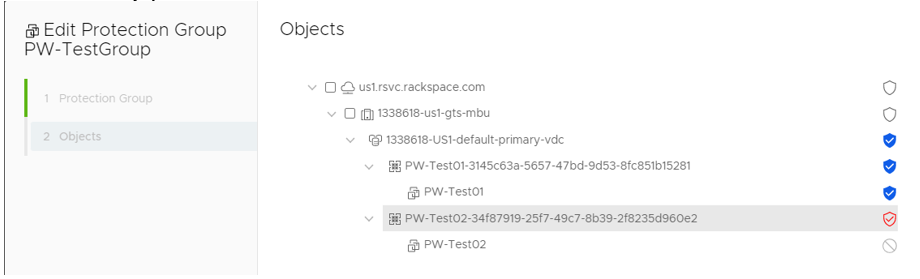
Example 1: Everything in our Virtual Data Center should be automatically protected, but we want to exclude the PW-Test02 server from this protection group. We would like servers created in the future to be automatically protected without the need for manual intervention.

-
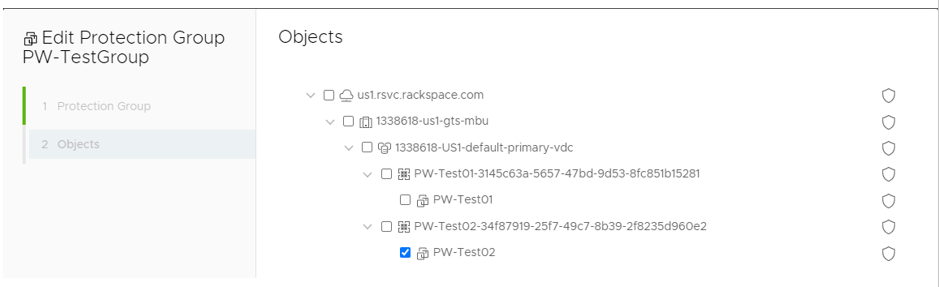
Example 2: We would like to back up only the PW-Test02 server as part of this protection group. Newly created servers should not be included without being manually added to the job.
-
-
After you’ve finished choosing your objects, click the Save Selection button in the window’s lower right corner.
-
Click the Finish button at the bottom right of the window to finalize protection job creation.
Editing a Protection Group
-
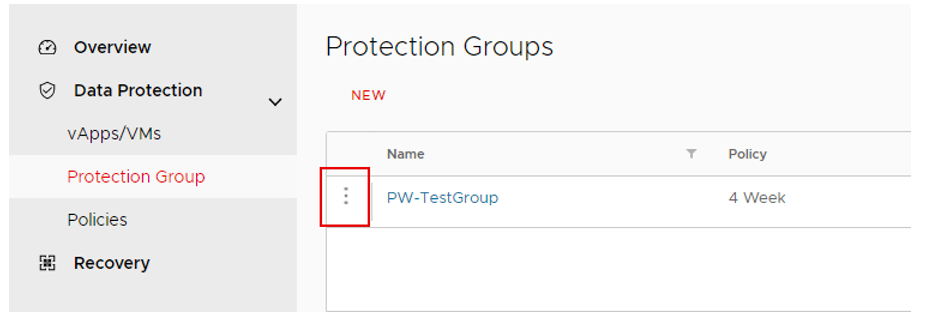
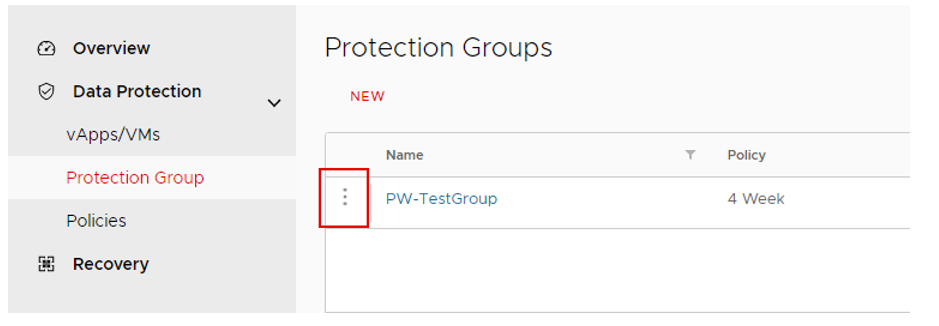
Click navigation menu on the left side of your screen. Click Data protection dropdown and select Protection group.
-
Click three vertical dots to the left of the Protection Job you wish to edit.
-
Select Edit option.
-
The window opens for New Protection group.
-
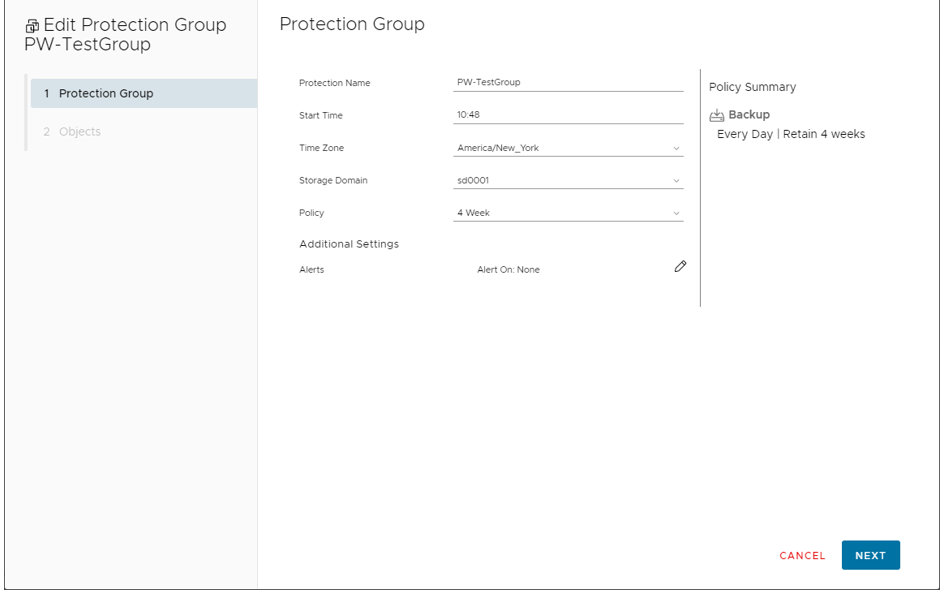
You can modify Protection Group settings as listed below:
- Protection Name: Name of your protection group
- Start Time: For daily backups, the time at which jobs will start (using 24-hour clock)
- Time Zone: Start time is based on the time zone selected in this field
- Storage Domain: Leave default setting (sd0001)
- Policy: Define the backup retention policy used by this job. The 2 week and 4 week policies are available by default to use by your organization. If any additional custom policies need to be created, please open a ticket with support.
- Additional settings: Email alerts can be configured or modified here. Jobs can be configured to alert on success/failure.
-
Click Next at the bottom right of the window after all fields are modified to the appropriate settings.
-
Click Edit pencil at the top right of the window to update object selection, else click Finish button.
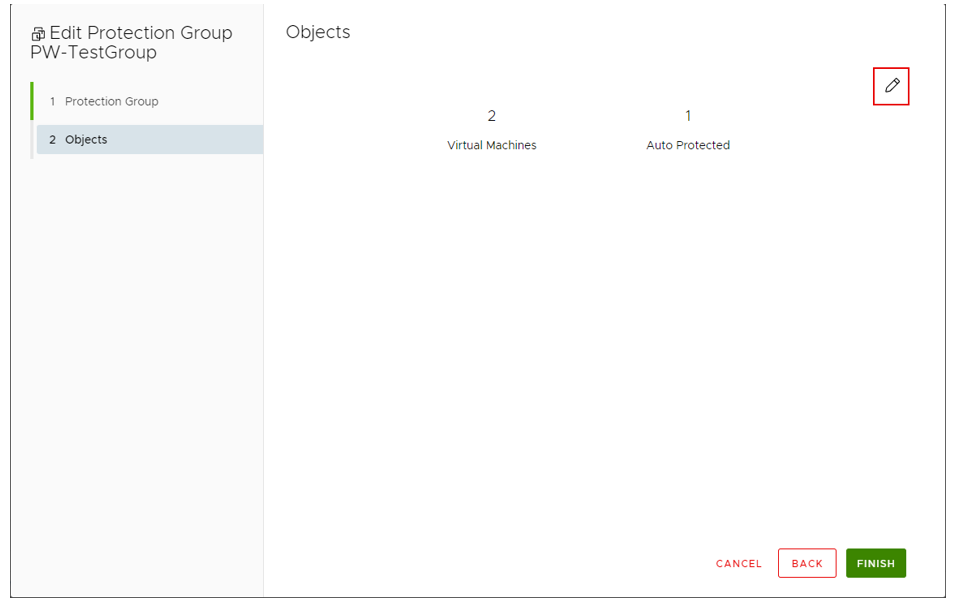
- In the Objects selection screen, you can define what objects are included in this protection group and how they are selected.
- Objects can be manually defined by checking the individual boxes to the left of objects.
- Automatic protection can be added at the Organization, Virtual Data Center, or VirtualApp level indicated by the blue shield to the right of objects. If auto protect is defined, all objects at that level and below in the hierarchy will be automatically protected. This includes every object created at those levels in the future. Individual objects can be excluded from Auto Protect to refine selection granularity.
- Example 1: Everything in our Virtual Data Center should be automatically protected, but we want to exclude the PW-Test02 server from this protection group. We would like servers created in the future to be automatically protected without the need for manual intervention.
- Example 2: We would like to back up only the PW-Test02 server as part of this protection group. Newly created servers should not be included without being manually added to the job.
-
After you’ve finished choosing your objects, click the Save Selection button in the window’s lower right corner.
-
Click Finish button at the bottom right of the window to finalize changes to the protection job.
Manually Starting an Off Schedule Backup
-
Click navigation menu on the left side of your screen. Click Data protection dropdown and select Protection group.
-
Click three vertical dots to the left of the protection job you wish to run.
-
Select Run Now option.
-
Progress can be monitored from the Protection Groups screen.
Restore a VM
-
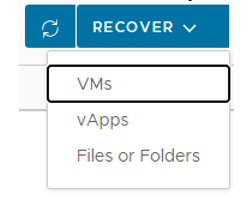
Click navigation menu to the left of your screen, select Recovery.
-
Select VMs from the drop-down Recover menu on the Recovery screen.
- Type the name of the VM you wish to restore into the search bar and click enter. Partial names and Wildcards are supported.
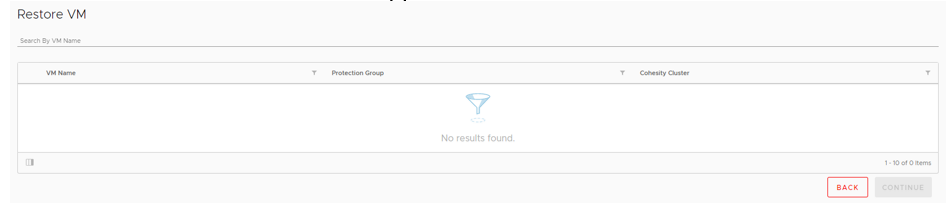
- Select a device you wish to restore and click Continue.

- You can configure parameters for Recovery using Restore VM screen.
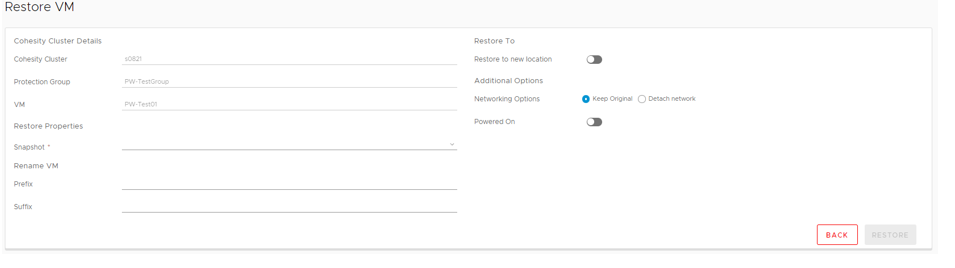
- Use the Snapshot menu to select a recovery point from any jobs that are within their retention period.
- A prefix or suffix must be added to the VM name if you are restoring back to the original location, or the restore will fail. This is to prevent accidentally overwriting a VM.
- Toggle Restore to new location to allow selecting an alternate Virtual Data Center as the recovery target.
- Under Additional Options, detaching the restore from the network can be toggled, as can the VM power state.
- Click Restore button to initiate the recovery after all restore parameters were set.
- You can monitor Restore progress from the Recovery screen.
Restore Files/Folders
-
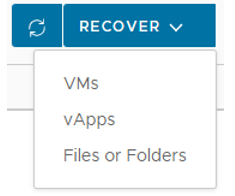
Click navigation menu to the left of your screen, select Recovery.
-
Select Files or Folders from the drop-down Recover menu on the Recovery screen.
-
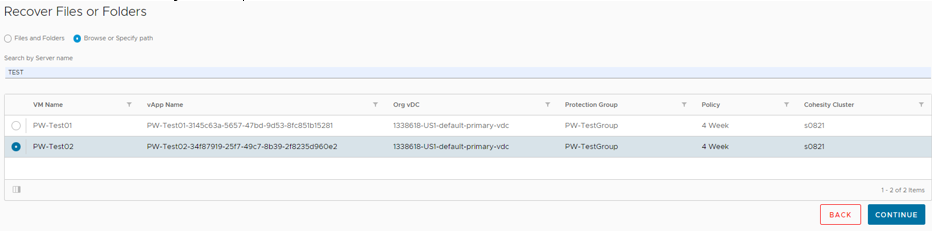
There are two search options available on the Recover Files or Folders screen.
-
Searching for a filename or path across all backups is possible by choosing the Files and Folders radio button. Wildcards can be used.

-
You can browse by server by using the radio button for Browse or Specify path. Wildcards can be used. Select a server, then press Continue to browse the file system.
-
-
Recoverable files can be obtained through the vCloud Director site or directly restored to a server.
-
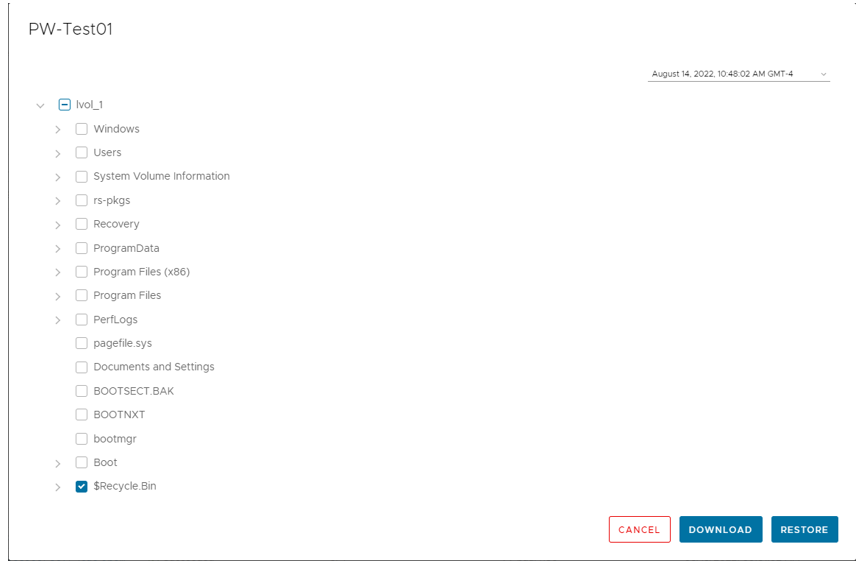
To download the files:
- Select the desired file(s) to be restored using either browsing method from step 4.
- Click Download button.
- Return to Recovery page and click link for your file download task.

- Click Download Files button to locally download a zip archive of the requested files.
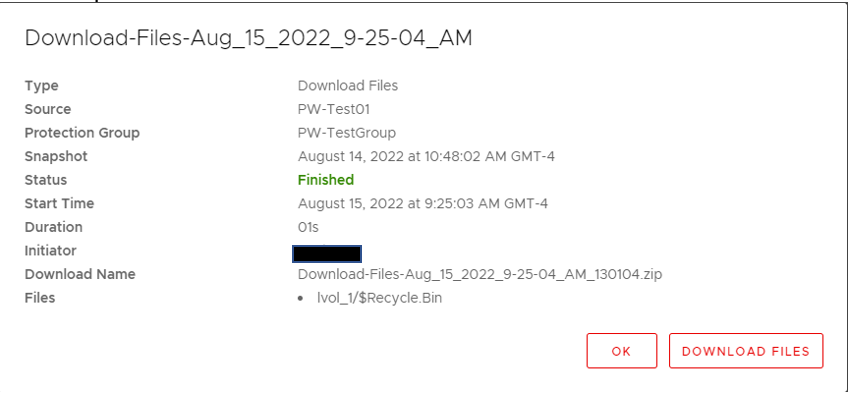
- The Downloads menu of your local browser allows you to keep track of progress.
-
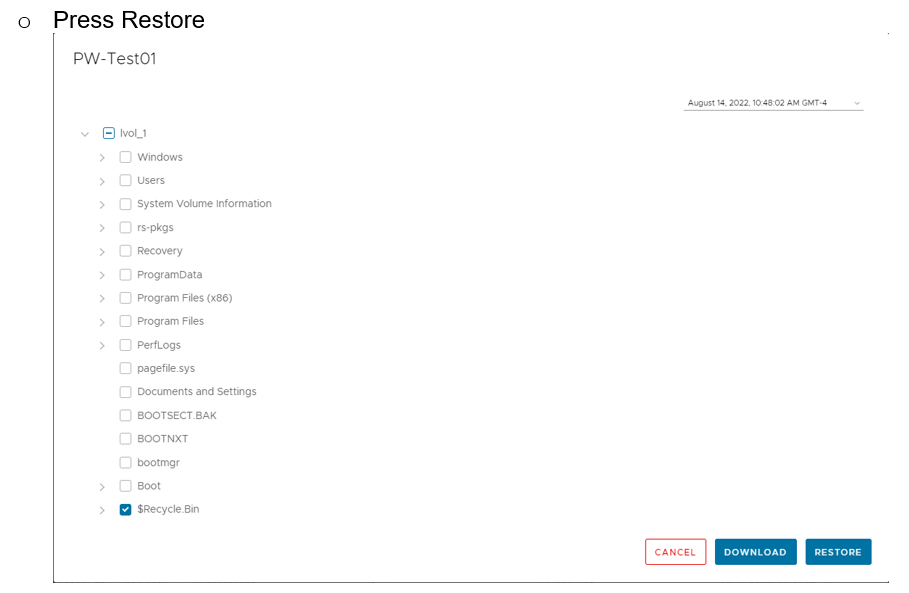
To recover files directly to a server:
- Select the desired file(s) to be restored using either browsing method from step 4.
- Click Restore.
- From the presented Recover Files or Folders screen, restore parameters are defined.
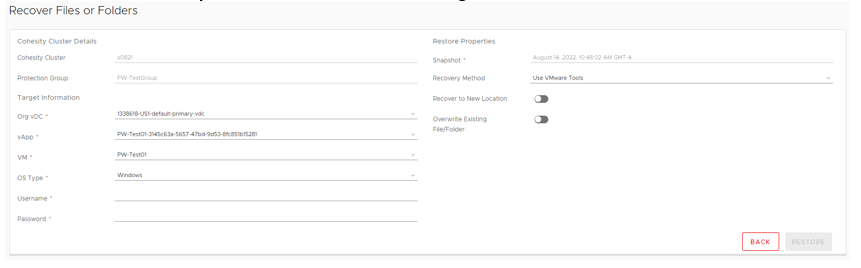
- The fields under Target Information will prefill with the original VM info. If this is an out of place restore, you can select a different Virtual Data Center/vApp/VM.
- Username and password fields are required as this recovery process will need to authenticate to the Guest OS of the VM.
- Recovery Method should remain set to Use VMware Tools.
- Recover to New Location can be toggled to provide an alternate destination path for the file recovery.
- Overwrite Existing File/Folder can be toggled to allow an overwrite if the original file is still present, or if a file of the same name is in the specified directory. This is off by default to prevent any accidental file/folder overwrites.
- To initiate the recovery after setting the restore parameters, click Restore in the bottom right corner.
- You can monitor the progress from the recovery screen.
-
Rackspace Data Protection and Patching
In order to ensure the best quality of service, periodic patching of the Rackspace Data Protection infrastructure is required. Thankfully, patching does not require downtime and should be non-disruptive to normal backup and restore opportunities. During updates, nodes are taken down one at a time, with all operations failing over to other active nodes. Rackspace will notify users of maintenance windows due to the elevated risk for unanticipated impact, however updates are expected to be non-impacting.
Updated 5 months ago