Multi-factor Authentication (MFA) - Cloud Users
Rackspace customers are required to have multi-factor authentication on all user accounts. MFA adds an extra layer of identity verification to the login process by requiring a user to submit a time-sensitive code that the Identity service that is stored in the authentication app of choice or sent via SMS.
-
Mobile Passcode (recommended): A client application installed on your phone, notebook, or other digital device creates and uses the mobile passcode. You can use this with smartphones apps like:
- Authy
- Duo
- Google Authenticator
-
SMS: Users without smartphones or other digital devices with linked phone numbers capable of receiving SMS text messages can use an SMS text messaging service. Please note, that SMS is not as reliable and can be delayed at times and this is outside the control of Rackspace.
You can modify MFA by updating your account settings in the Rackspace Cloud Control Panel. After you pair a device with your account, authentication becomes a two-step process:
-
Each time you log in, the Rackspace authentication service generates a code and sends it to the associated device.
-
After the service sends the code, the system prompts you to type the code and submit it to the Identity service to complete the authentication process.
Standard text message rates and data fees apply based on your contract with your mobile device provider.
Additionally, Rackspace Cloud account administrators can configure account-wide settings to specify an MFA policy for all account users. Administrators can update the account-wide settings to require MFA for all users. When this setting is enabled, users cannot access their account until they configure MFA. The system logs current users out as soon as it applies the account-wide requirement. The next time they log in, users get a notification of the increased security and a prompt to complete the setup process.
As of March 2024, all Rackspace accounts are required to have multi-factor authentication. These settings will only be available for accounts that have followed the exception process. If you have questions, please reach out to your support team.
Considerations
-
MyRackspace also implements MFA. For information, see Multifactor authentication from the MyRackspace portal.
-
Once MFA is enabled, a Rackspace portal user needs to authenticate using username + password + MFA. For API authentication, users can still authenticate using API Key or doing token authentication. SAML Federation is also not affected.
- If the user supplies the client with a valid username and API key credentials, the client receives then authentication token immediately. This behavior allows automated processes or agents to run operations by using the username and API key credentials.
-
If you use a username and password to log in to an OpenStack or Rackspace CLI tool. You cannot authenticate if you add MFA to your account since the CLI tools do not support MFA. Try one of the following solutions to solve this issue:
- If you are using the nova-client, configure the client to authenticate with an API key.
- If you are using a client that supports token authentication, use URL to get the authentication token. Export the token value to the token environment variable for the client--for example, OS_TOKEN or OS_AUTH_TOKEN. Then, use the CLI to submit API requests to the Rackspace Cloud.
-
You can also manage MFA from the Identity API 2.0 Guide.
Configure your account to authenticate by using a Mobile App
To configure your account to use a Mobile App for MFA, you must install one of the following OTP client applications on your device:
To register and verify a mobile code device, use the following steps:
-
Log in to the Rackspace Cloud Control Panel.
-
In the upper-right corner of the Cloud Control Panel, click the user menu and select My Profile & Settings.

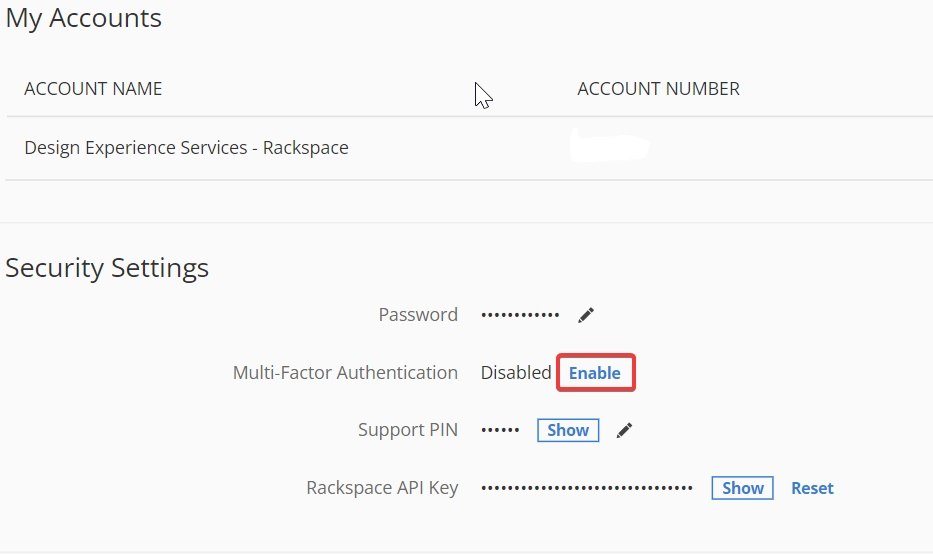
- In the Security Settings section, select Enable for Multi-factor authentication.

-
Select Use a Mobile App and click Next.
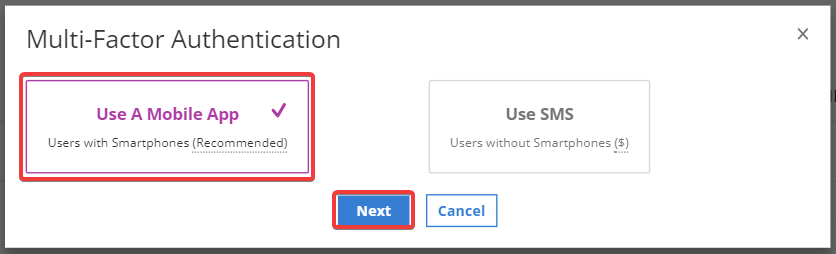
Supported applications: Authy, Duo, Google Authenticator.
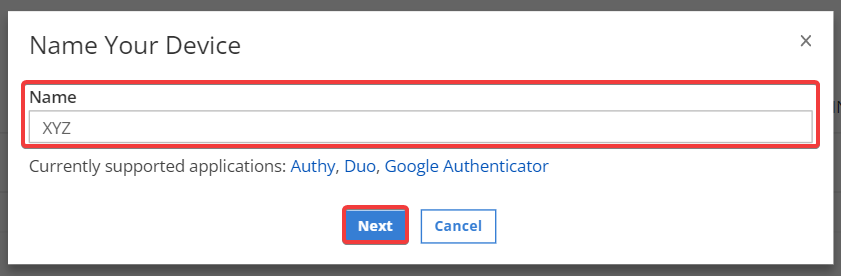
- Type a Device nickname for the Mobile App. Then, click Next.
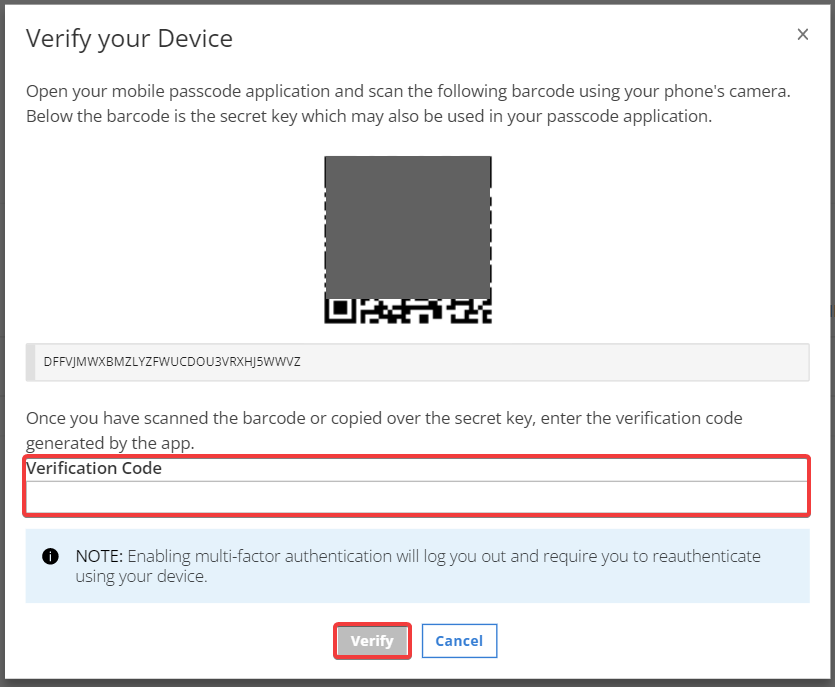
- The Identity service generates a QR code. Use the application on your device to scan the barcode and click Verify. After you scan the barcode, the application on your device generates an OTP/code.
- To verify the new device, enter the code on the Verify Code form. Then, click Verify.
After you submit the verification code, the system automatically logs you out.
By default, the new Mobile App is the default method for authentication. If you do not want it to be the default or if you do not want to be logged out of your account, remove the selection from make this my default authentication method.
You can update the default authentication method on the My Profile & Settings page.
Configure your account to authenticate by using an SMS
To configure your account to use an SMS for MFA, you need the phone number associated with your digital device. You must have a device capable of receiving SMS text messages.
To register and verify an SMS, use the following steps:
-
Log in to the Rackspace Cloud Control Panel.
-
In the upper-right corner of the Cloud Control Panel, click the user menu and select My Profile & Settings.
- In the Security Settings section, select Enable for Multi-factor authentication.

-
Select User SMS and click Next.

-
Select the country code for the device, type the device phone number, and click Next
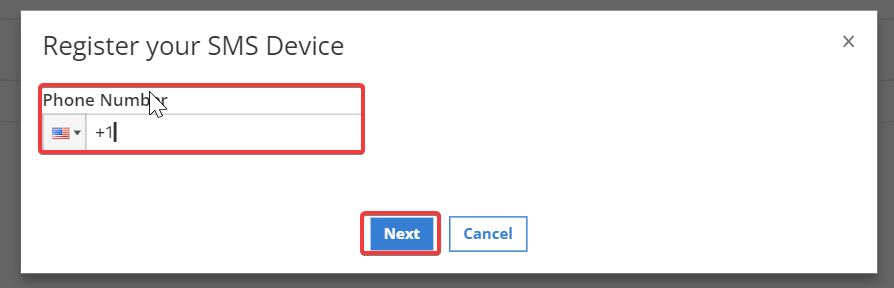
The Identity service sends an SMS text message with a four-digit PIN to the specified mobile device.
- Enter the PIN code sent to your mobile device in the verification code field then, click Verify.

After you submit the verification code, you need to re-authenticate by using the MFA process.
Change default MFA method from Mobile App to SMS
If you configured your account with both SMS and Mobile App, you could select the default MFA method from the My Profile & Settings page.
-
Log in to the Rackspace Cloud Control Panel.
-
In the upper-right corner of the Cloud Control Panel, click the user menu and select My Profile & Settings.

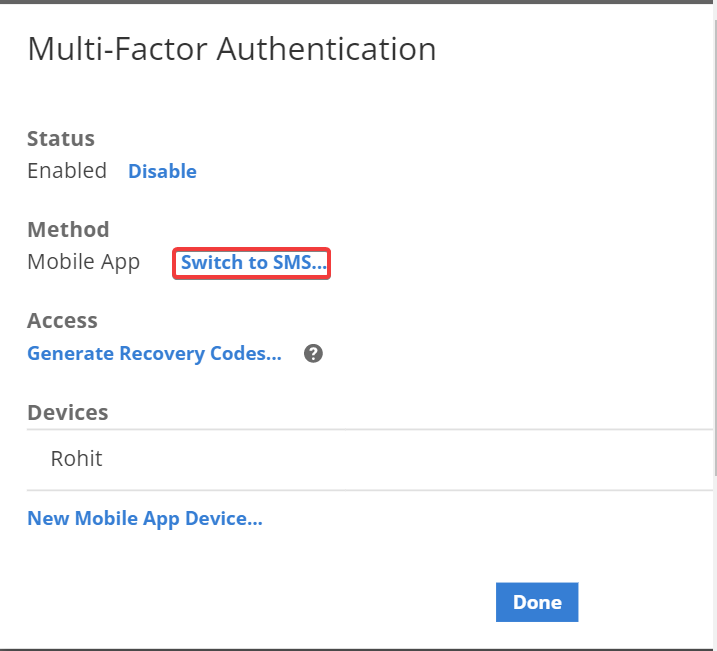
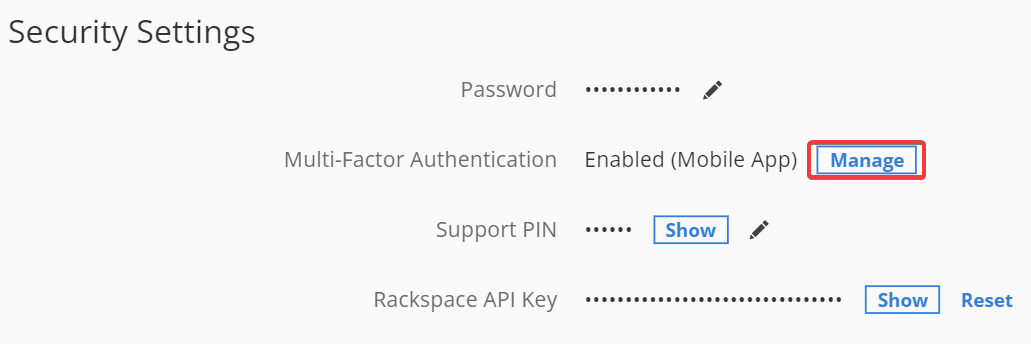
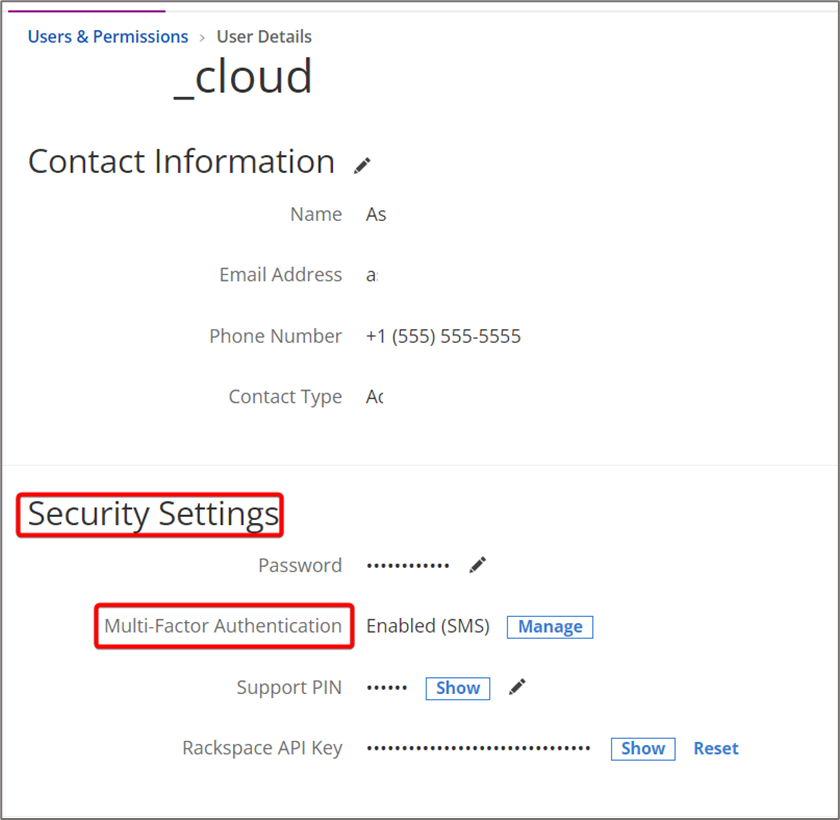
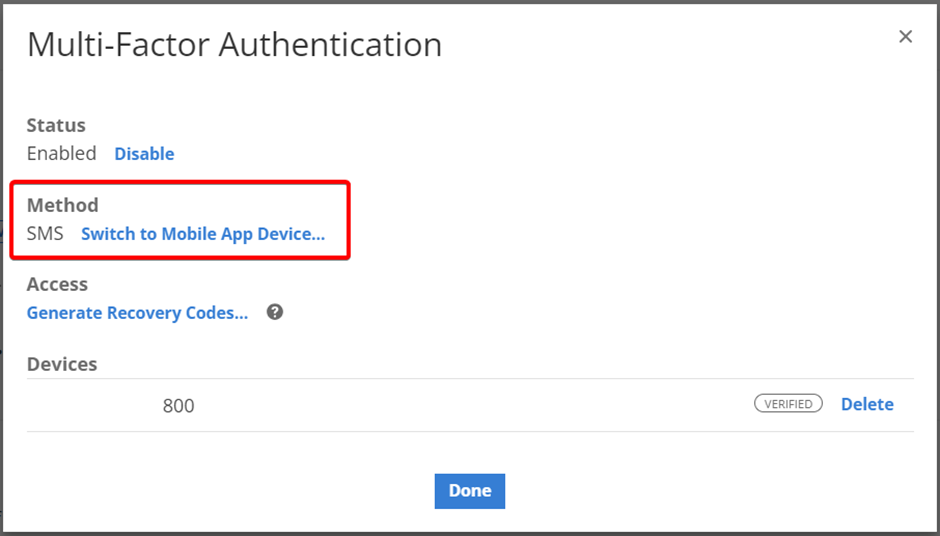
- In the Security Settings section, under Multi-Factor Authentication, select Manage.

- In the Security Settings section, select Enable for Multi-factor authentication.
- Under Method, select Switch to SMS (if you set up a mobile app) or Switch to Mobile App (if you set up SMS).
Change Default MFA method from SMS to Mobile App
-
Log in to the Rackspace Cloud Control Panel.
-
In the upper-right corner of the Cloud Control Panel, click the user menu and select My Profile & Settings.
- In the Security Settings section, under Multi-Factor Authentication, select Manage.
- In the Security Settings section, select Enable for Multi-factor authentication.
- Under Method, select Switch to Mobile App (if you set up SMS).
Configure account-wide MFA settings from an Administrator account
As of March 2024, all Rackspace accounts are required to have multi-factor authentication. These settings will only be available for accounts that have followed the exception process. If you have questions, please reach out to your support team.
Account administrators can update Rackspace Cloud account-wide settings to require all users to authenticate by using MFA. When the setting is enabled, users cannot access their accounts until they add and verify a device on their account.
-
Log in to the Rackspace Cloud Control Panel.
-
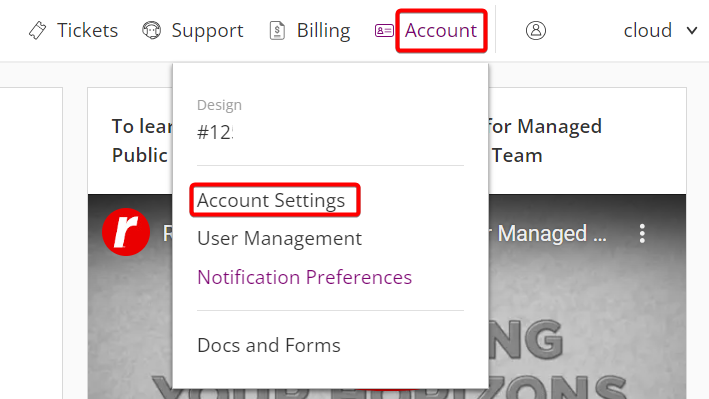
In the upper-right, click Account > Account Settings**.
- Under Rackspace Account Settings, click Change next to Multi-Factor Authentication.

- In the Pop-up window, click Require Multi-factor Account-Wide.
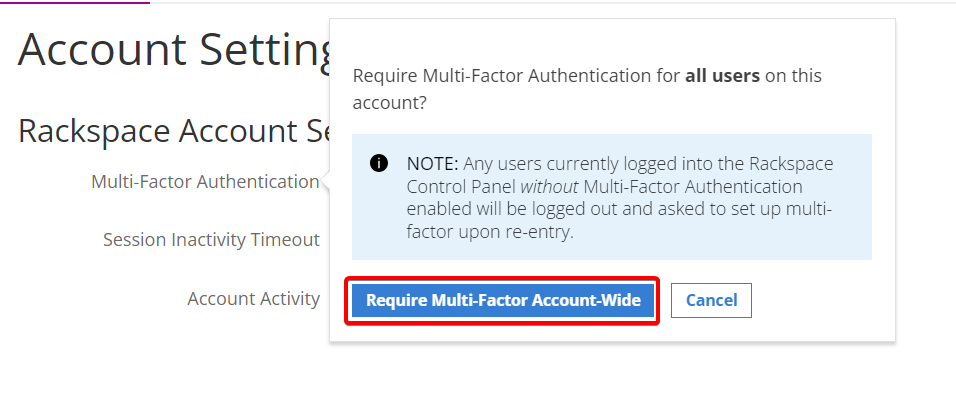
If you update the setting to require Multi-Factor Account-Wide, any users currently logged into the Rackspace Control Panel without Multi-Factor Authentication enabled will be logged out and asked to set up multi-factor upon re-entry.
When these users log back in, the system guides them through the MFA setup.
Configure MFA during account log in
If you did not configure your account for MFA when required, the system notifies you about the increase in security requirements and prompts you to set up authentication.
To access your account, click Set Up Multi-Factor Authentication. Then, follow the steps to register and verify a device and authenticate by using the code sent to the device.
Remove MFA
You can turn off MFA and remove all devices associated with your account.
- In the upper-right corner of the Cloud Control Panel, click the User menu and select My Profile & Settings.

- In the Security Settings section, click Manage for multi-factor authentication.

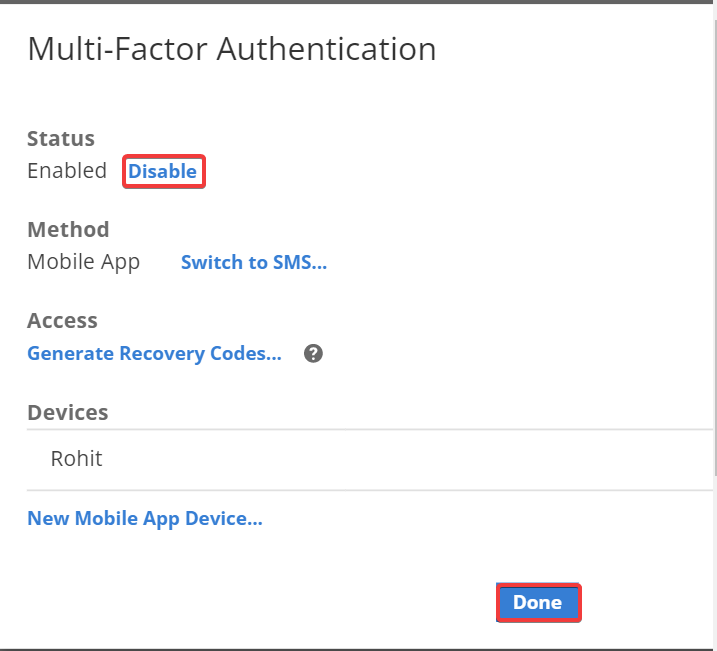
- Select Disable and click Done.
Change the Mobile Phone Number
To change the mobile phone number paired with your account, use the Remove option to remove the existing phone number by following the instructions in the preceding task. Then, update the account settings with the new phone number and verify the device.
Troubleshooting
Use the following information to resolve common issues that can occur when configuring and using MFA.
Updated 26 days ago