How to set up O365 via your Cloud Office Control Panel
Get quick answers to common questions about setting up Rackspace Office 365.
Prerequisites
- Applies to: Cloud Office Administrator
- Difficulty: Moderate
- Time Needed: 30-60 minutes
- Tools required: Cloud Office Control Panel & Office 365 Administrator access
The purpose of this document is to provide instruction on how to setup a brand new Office 365 environment through Rackspace.
For more information about prerequisite terminology, see
Cloud Office support terminology.
Create a Microsoft 365 tenant
The Microsoft 365 tenant that you create is permanent. If you already have an existing tenant for your Office 365 account, open a Rackspace support ticket so we can transfer it for you.
- Log in to the Cloud Office Control Panel using your Rackspace Cloud Office admin ID and password.

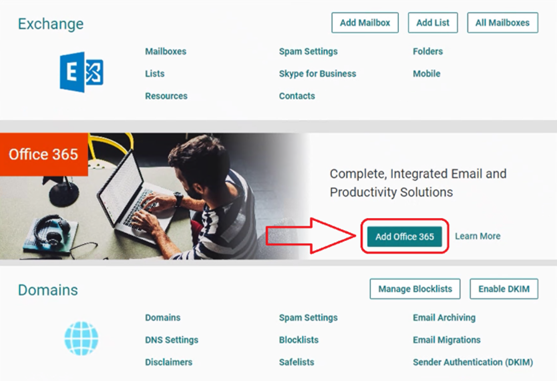
- In the Microsoft Office 365 section, select Add Office 365.

-
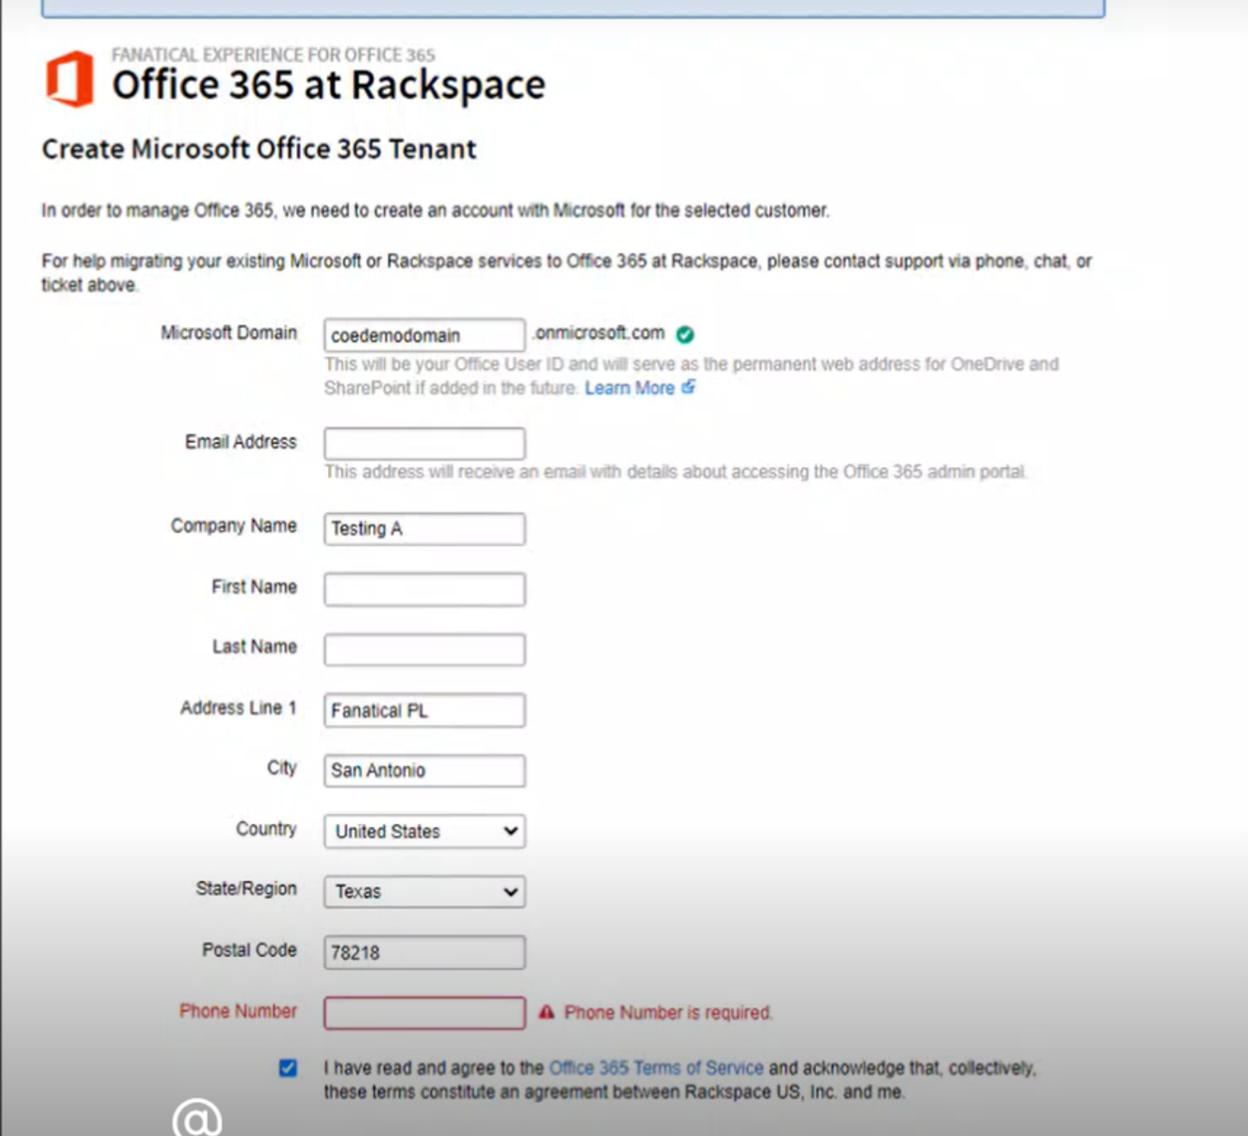
Enter a tenant name using only letters and numbers.
A tenant is a unique name for your organization within the Office 365 portal. Your tenant name is your account ID on Microsoft’s systems.
If the tenant ID that you enter is valid and available, a green check box appears next to the name. -
Fill in the requested information. All fields are required.

- Click Save/Create Tenant.
Log in to the Office 365 portal
- Log in to the Manage Office 365 at Rackspace Control Panel with the Global Administrator of your tenant.
- This portal will take you to your Rackspace Office 365 Management Page.
Add an Office 365 License
- Click on Product Catalog > Select Microsoft365 on the left sidebar.

- Scroll down and Select one of the following Exchange Online plans based on your mailbox size requirements:
- If your mailbox is under 48GB choose Plan 1.
- If your mailbox is over 48GB choose Plan 2.
- Enter the number of licenses to match mailbox quantity required and select “Monthly” commitment option.
- Click Add Product.
Note: It may take a moment for provisioning to complete. - Go back to Manage Office 365 at Rackspace Control Panel. This portal will take you to your Rackspace Office 365 Management Page.
- Click on Office 365 Admin Center on the left sidebar to be logged in to the Office 365 Admin Center automatically.

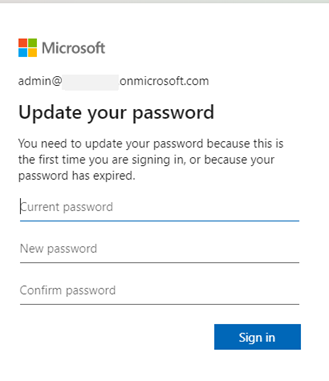
- When you first log in, the Office 365 portal requires you to enter and confirm a new password. After you confirm the password, the only user who can log in to your Office 365 account is admin@{tenantName}.onmicrosoft.com, until new users are created.

Add Users and assigning a license
After you have verified your domain in the tenant, you can add users and assign licensing as follows:
Add an Office 365 User
- Log in to your Office 365 Control Panel.
- From the left menu, select My Users.
- Select Add User & complete new user form
- Now assign a license to the newly added user (steps below)
Assign a license to a user
- Log in to your Office 365 Control Panel.
- From the left menu, select My Users.
- Find the user you want to assign the license to and select Manage.
- Select the license you’d like to apply to the user.
- Click Save at the bottom of the page to finish the process.
Connect to your New Exchange Online Mailbox
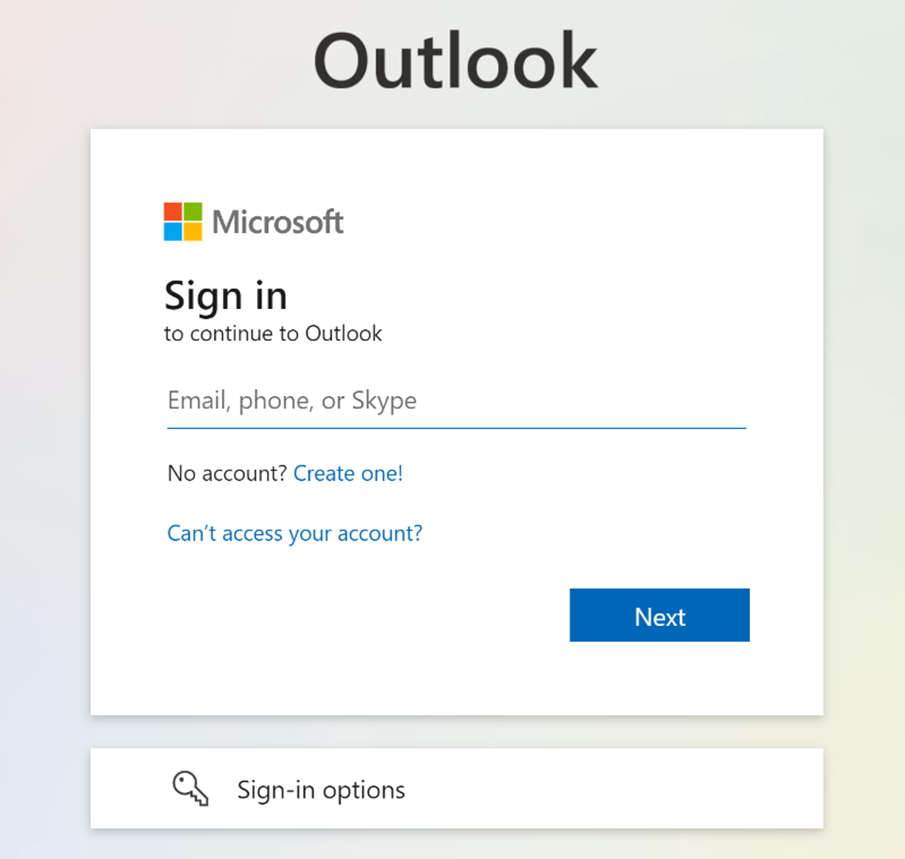
- To access your new Microsoft Exchange Online Mailbox:
1.1 Go to https://outlook.office.com in a browser - Login with your email address:
2.1 Example:
Username: [email protected]
Password: (password created during user creation)

FAQ
Does Rackspace update the customer’s DNS records?
No. Admins are responsible for updating their domain’s DNS records. Rackspace does not have access to your externally hosted DNS and cannot accept access to external DNS hosting accounts.
Appendix
Add a domain in Office 365
The default domain in Office 365® is {tenantName}.onmicrosoft.com. Until you add your own domain to Office 365, any new users that you create contain the default domain name. To add a domain follow the steps below.
- Log in to your Office 365 Control Panel.
- From the left menu, select a drop-down menu labeled “More”.
- Select Manage In Microsoft 365 Admin Center.
- From the left menu, select Show All -> Settings, and then select Domains.
- In the Domains section, click Add Domain.
- Enter the domain name when prompted, and then click Use this domain.
- You will be taken to a page titled “Verify that you own the domain.”
Verify that you own the domain
This step requires you to log in to your domain’s DNS host portal. If you do not know what your DNS host is, see Find your DNS host.
- Select the Add a TXT record to the domains DNS record option, and then select Continue.
- Copy the TXT record information provided on the Verify domain page.
- Log in to your domain’s DNS host portal.
- Add the TXT record by using the information provided on the Verify domain page.
- Save this change at your DNS host & allow 15-30 mins for your record to propagate.
- After the TXT record fully propagates, select Verify in the Microsoft Admin Center.
After Office 365 verifies your domain and you are ready to use your services, you need to finalize your setup by configuring the remaining DNS entries for your Office 365 services.
Configuring DNS records for your Office 365 services
Use the following steps to configure the DNS records for your Office 365 services:
- Log in to your Office 365 Control Panel.
- From the left menu, select a drop-down menu labeled “More”.
- Select Manage In Microsoft 365 Admin Center.
- From the left menu, select Show All -> Settings, and then select Domains.
- In the Domain section select the Domain you want to configure services for.
- From the Domain setup wizard, select Continue Setup from the top menu.
- On the Set up your online services screen, select I’ll manage my own DNS records and click Next.
- When prompted, select the online services you want to configure. The selection is based on the current licenses that are assigned to your users.
- After selecting your online services, click Next.
This step requires you to log in to your domain’s DNS host portal. - Log in to your DNS host and copy the records from the table provided into your DNS host. Save this change at your DNS host & allow 15-30 mins for your record to propagate.
- Once your new DNS records have propagated, go back to your Microsoft Admin Center & select Verify.
Note: In rare cases it can take up to 24-48 hours for the DNS records to fully propagate from your DNS host and for Office 365 to verify them.
Updated 25 days ago
