Add and Manage Domains in Rackspace CDN
You can add an additional domain to your service, and you must always create a CNAME for your service. The following sections provide information for these steps.
Add a domain
To add an additional domain to your service, following these steps:
-
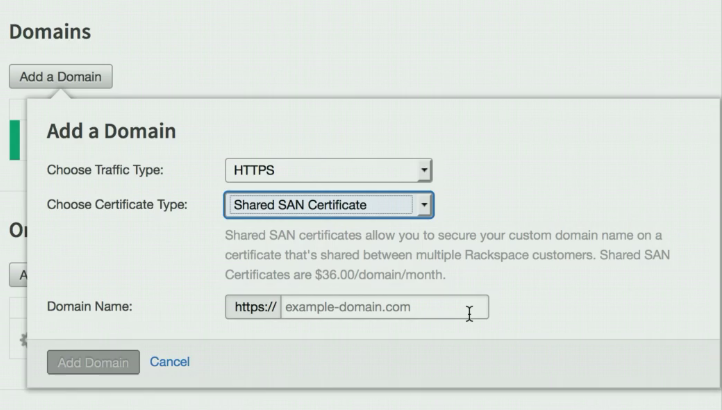
On the CDN Service page in the Domains section, click Add a Domain.
-
Select HTTP or HTTPS from Choose Traffic Type.
-
For HTTP traffic, enter the Domain Name.
-
For HTTPS traffic, select Shared SAN Certificate or Shared Rackspace Domain Certificate from Choose Certificate Type. Then enter the Domain Name of the domain that you want to add. For secure domains, the name must be a single word and cannot contain periods (.), but can contain hyphens (-).

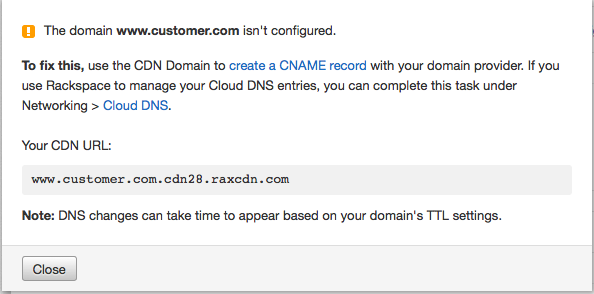
- Click Add Domain. In the Domains section, you can see the Domain Name, along with the Certificate Type, and the Status of the domain. Status will not show as Active until the SSL certificate has been provisioned and you have set the CNAME record for the domain. If the Status is Domain Not Configured, click on that text to get instructions and to see the Rackspace CDN URL that you need for the CNAME record creation.
The instructions that see see when you click on Domain Not Configured are similar to those in the following figure:

It might take some time for your DNS change to propagate across the internet. After this has happened (based on the TTL you have set with your DNS provider), you will be able to access your website via the CDN edge.
For more information, see Change DNS to enable Rackspace CDN.
Updated over 1 year ago
