Creating a cloud server in a region
When you plan to build a cloud server, consider the geographical region of its physical host. Choosing the right region can optimize network delivery speed for local users. For example, if you expect most of the server’s workload to originate in Australia, you might want it to be hosted in our SYD (Sydney) region rather than in our DFW (Dallas-Fort Worth) region.
For more information on regions, begin with the How-To article, About regions.
Beyond a general preference for a region, working in the cloud means that you need not be concerned with selecting among the hundreds or thousands of physical servers available in that region.
When you request the creation of a new cloud server, your request describes the initial resources that you want to make available to that server. We use that description to choose an appropriate physical host for your server.
If you use the Cloud Control Panel to create your new server, you describe your requirements by choosing a region, an image, and a flavor class, and then moving the slider up toward the maximum or down toward the minimum resource levels for that class.
If you use an SDK, you begin describing your new server by authenticating at an API endpoint (which identifies a region), and then choosing an image and a flavor, as shown at Quickstart for Cloud Servers.
No matter how you submit your request to create a server, the resources described in the request determine the placement of your server on a physical host capable of providing those resources. For example, the three figures below demonstrate using the Cloud Control Panel to describe the resources needed for a 1 GB standard instance of a cloud server in the Standard flavor class, running the Ubuntu operating system in the DFW region.
Step 1: Server Details
Choose a region that is near many of your users, reducing their network transfer time.
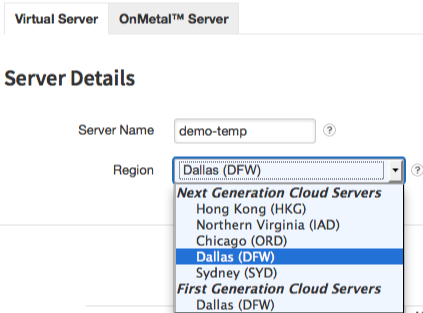
Choose a region. Your choice can affect network delivery speed.
Step 2: Image
Choose an image that supports the applications you intend to run.
Choose an operating system. Your choice can affect your cost.
Step 3: Flavor
Choose a flavor that offers adequate capacity and the price you want to pay. Moving the blue slider up and down changes initial resource sizes, and hovering over the green circle displays an explanation of pricing.
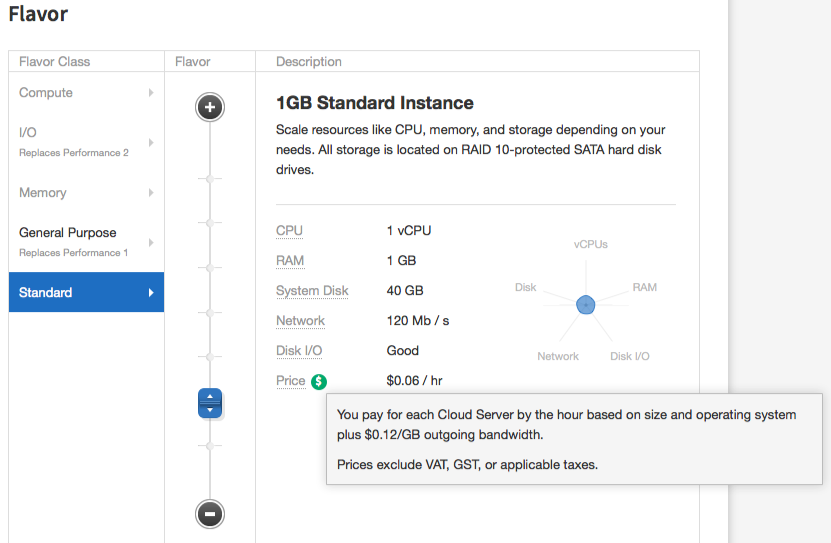
Choose resource sizes. Your choice can affect your cost.
After you submit your request, nova-scheduler, the component responsible for appropriately assigning a new server to a physical host, compares two sources of information:
Your detailed server-creation request
Details describing the current capacity of physical hosts available in the region you selected
Nova-scheduler then places your server on a physical host capable of providing the resources that you described.
By default, nova-scheduler does not place multiple cloud servers belonging to the same account on the same physical host. However, it is possible to override this default in some circumstances. Every server has a Host ID that identifies its physical host; by examining the host ID for each server, you can determine whether any of your servers have been placed on the same physical host.
See also
Understanding Cloud Servers introduces key ideas. To learn how to put these ideas to work, start at Actions for Cloud Servers.