Access a database instance#
After you’ve set up your database instance and databases, you need to use a Cloud Server to connect to the databases hosted on your database instance. You can use an existing Cloud Server or create a new one. You can also configure client applications or tools to connect to your database.
In the following sections, you’ll learn how to complete the following
Create a Cloud Server to access your database instance.
Configure an application to connect to your database.
Configure myPHPAdmin GUI client to manage your database instance
Note
These examples use the $API_ENDPOINT, and $AUTH_TOKEN environment
variables to specify the endpoint URI and authentication token values for
accessing the Rackspace Cloud Databases API. Make sure you
configure these variables before
running the code samples.
Creating a Cloud Server#
Create a Cloud Server (or use an existing Cloud Server) to access your database.
Note
If you are using an existing Cloud Server on your account, skip this step and go directly to Configure an application to use your database.
Create a Cloud Server using the Cloud Servers section of the Cloud Control Panel (login here: Cloud Control Panel ).
Create a Cloud Server by using the Cloud Control Panel#
Click Servers to view the Cloud Servers page.
Click Create Server, then select the Region, and specify the Server Name.
Select an image from a list of different operating systems, including Linux distributions and Windows images.
Specify the Flavor for your Cloud Server, then click Create Server.
Note
You can also create a Cloud Server using the Cloud Servers API. For details, see Cloud Servers API documentation.
Configuring an application to connect to a database#
If you are configuring an application to use your database on a Cloud Server, you need to configure the application with the hostname for the database instance and user name and password for the database.
The hostname value is returned in the response from a create database request. The username and password are the values specified for the database created on the database instance. For response examples with these values, see Create a database instance.
Note
For more detailed information about connecting to a Cloud database instance, read the Connect to a Cloud Database instance article in the Rackspace .
Administering your database using a GUI client#
If you want to access your database using the command line MySQL client, then you have now completed the Getting Started Guide.
Otherwise, you can use a GUI tool such as phpMyAdmin to interact with your database instance. Common operations include managing databases, tables, fields, relations, indexes, users, and permissions. Included below is a procedure to set up phpMyAdmin on an Ubuntu 11.04 Cloud Server.
For more detailed installation configuration instructions see the phpMyAdmin documentation at: http://www.phpmyadmin.net/documentation/.
Note
Rackspace does not provide phpMyAdmin support, and the user is responsible for any security related configuration.
Install and configure phpMyAdmin on an Ubuntu 11.04 Cloud Server#
Install phpMyAdmin:
sudo apt-get install phpmyadmin
Set up a symbolic link to the phpmyadmin config file:
sudo ln -s /etc/phpmyadmin/apache.conf/etc/apache2/conf.d/phpmyadmin.conf
Edit the
/etc/phpmyadmin/config-db.phpconfig file to point to your database instance:$dbserver='<cloud database hostname>';
Restart apache:
sudo apachectl restart
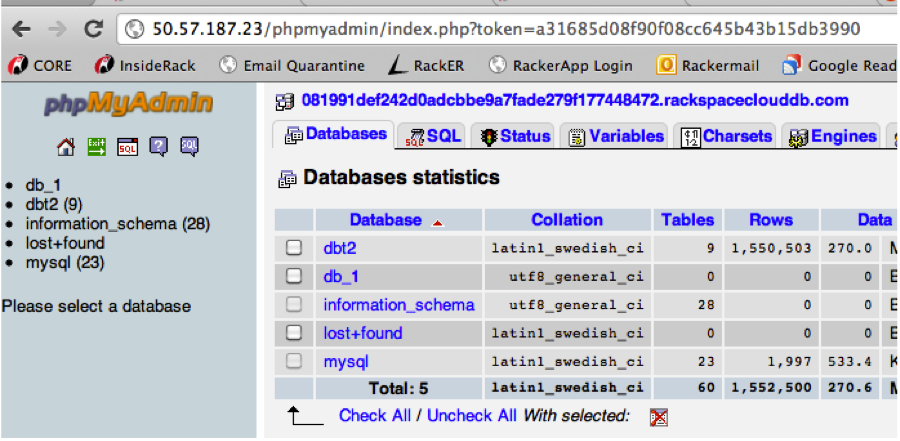
Access phpMyAdmin at
http://<your_ipaddress>/phpMyAdmin: